
WiFi Pairing The Canon 5D Mark IV
Pairing Canon EOS 5D Mark IV WiFi
One of the new features of the Canon 5D Mark IV is it’s built in WiFi features. This allows you to remote control or transfer photos from the Camera to a computer using EOS Utilities or an iOS device using (iOS software name). This stub will take you step by step in pairing the Canon EOS 5D Mark IV with these devices.
Pairing Canon EOS 5D Mark IV with Camera Connect on iOS
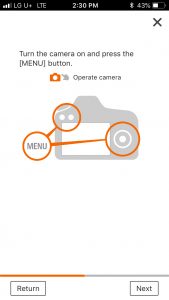
STEP – 1 Power on camera and press the MENU botton.
Using the LCD Touch Screen or the M-Fn dial select the Wrench Icon.
Using the LCD Touch Screen or the large scroll wheel on the back select Communication settings and press the SET button.
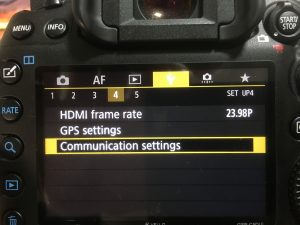
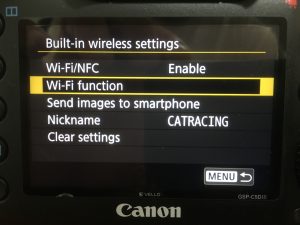
Using The LCD Touch Screen or using the large scroll wheel on the back select Built-in wireless settings, and press the SET button.
 STEP-2 Enable Wi-Fi/NFC
Using the LCD Touch Screen or the large scroll wheel on the back select Wi-Fi/NFC DISABLE, and press the SET button.
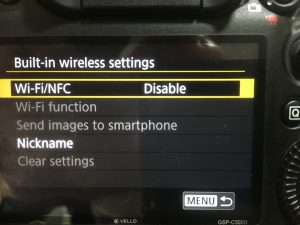
Using the LCD Touch Screen or the large scroll wheel on the back select Enable and press the SET button.
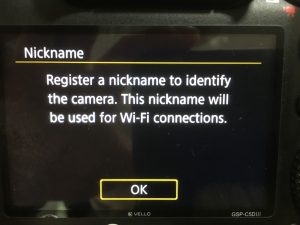
STEP – 3 Register a Nickname
Select OK when the below message is displayed.
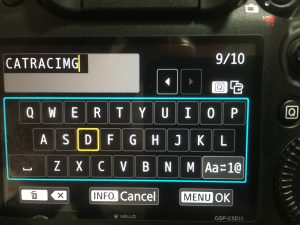
Using the LCD Touch Screen or using the large scroll wheel and SET button on the back to enter your desired WiFi nickname. Press or select the Trash Icon to delete a character, the INFO/Cancel button to discard changed and exit. or the Menu/OK button to save changes and exit.
STEP – 4
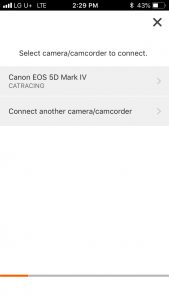
On your iOS device (I am using an iPhone 6), launch your CameraConnect app then select ‘Easy Connection Guide’. Select the camera by the model and nickname we just setup in step 3.
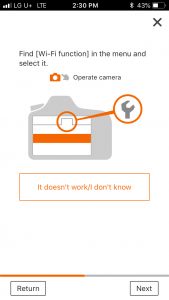
Follow the instructions on your iOS device.
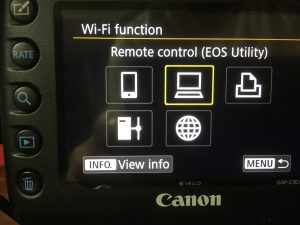
On your camera, press the Menu Button, and navigate to the wrench icon, and screen number 4 and select Communications settings, then built in wireless settings. Select the Wi-Fi function menu.
Select “Connect to smartphone” on the LCD touch screen, or press the SET button.

Select ‘ Easy Connection’, and press OK on the LCD touch screen, or select OK, and press the SET button.
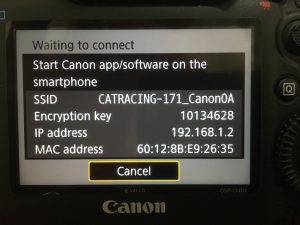
When the following is displayed on the back of the camera, proceed to the next step.
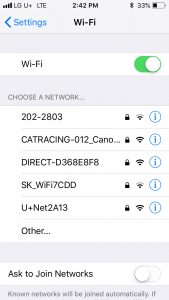
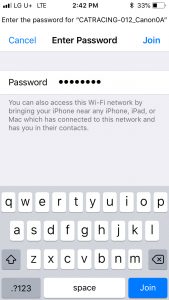
On your iOS device go to Settings > Wifi and find your cameras Nickname in the Wifi list. Select it and enter the 8 digit code displayed on the back of the camera.
If the password is correct you will be connected to the cameras Wifi, and you will see the following on the back of the camera. On your iOS device, launch the CameraConnect app. 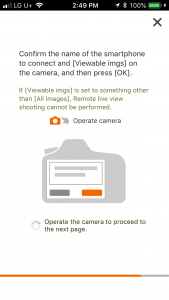
Once you see this screen on the CameraConnect app look at the LCD screen on your camera.
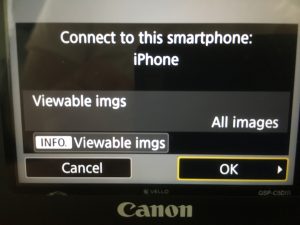
press OK on the LCD touch screen, or select OK, and press the SET button.
\Your camera is now connected to your iOS device.
Pairing Canon EOS 5D MARK IV with a MacOS X computer.
We will now cover pairing the Canon 5D MARK IV with a MacOS X computer, for this demonstration I will be using my 2015 MacBook Pro, as this is what I use on the road.
Step 1 – Turn on camera, and set WiFi nickname
Turn on your 5D Mark IV, and press the MENU button on the back. Navigate to the 4thWrench screen, and select ‘Communication Settings’ then ‘Built in wireless settings’.
If you have already setup a WiFi nickname in the first section you can skip to step 3. Otherwise perform step 3 from the Pairing Canon EOS 5D Mark IV with Camera Connect on iOS instructions above.
Step 2 – Paring EOS Utitlity with 5D Mark IV
Select the Computer Icon ‘Remote control (EOS Utility)’ icon using the touchscreen LCD.
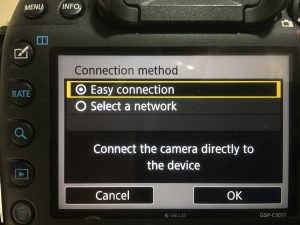
On the ‘Connection method screen’ select Easy connection, and select OK using the touchscreen LCD.
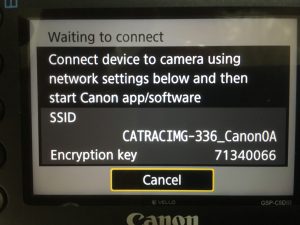
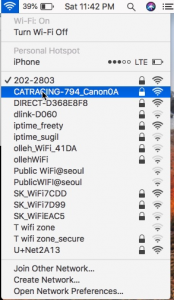
On your MacOS X computer go to your WiFi settings and select your camera nickname as defined previously, and enter the Encryption key as displayed on the back of the camera as the WiFi password. Click Join.
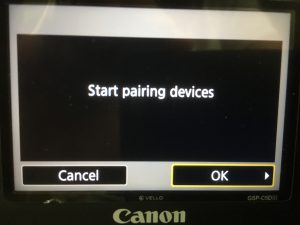
Using the touchscreen LCD select OK when asked to ‘Start pairing devices’.
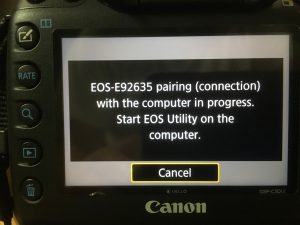
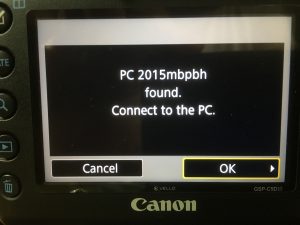
When you see this message on the back of the camera, Launch the EOS Utility on your computer.
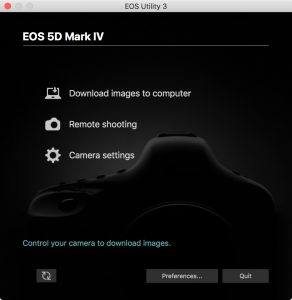
Step 3 – Launch EOS Utility
The Canon EOS Utility Launcher will open and display the following window
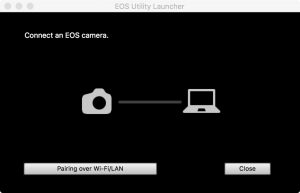
Click Pairing over Wi-Fi/LAN
The ‘EOS Pairing Software’ window will open.
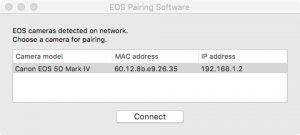
Select your Canon EOS 5D Mark IV and click the Connect button.
You will see the following message on the back of your camera. On the touchscreen LCD select OK.
Once connected EOS Utility 3 will automatically launch. If you receive an error message, you may need to download the latest version of EOS Utility 3, by clicking here.
Your camera is now connected to your Mac.
Please be sure to return next week for part two of this blog! I thought your packed it! Forgetting important gear and how to work around it. Don’t miss another blog! register today and receive automatic email notification when a new blog is posted. To register click here!
Camera 1300d not sopport?
Good afternoon Ali, and thank you for your comment. I do not have any experience with the Canon 1300d (though reviewing Wikipedia I see that it does have WiFi and NFC capability). So it may be a similar process. Though never having used the camera I can not say definitively.
Thank you, this was a very helpful step-by-step demonstration for setting up my camera to my laptop. Thank you again.
Thank you very much for your positive feedback.