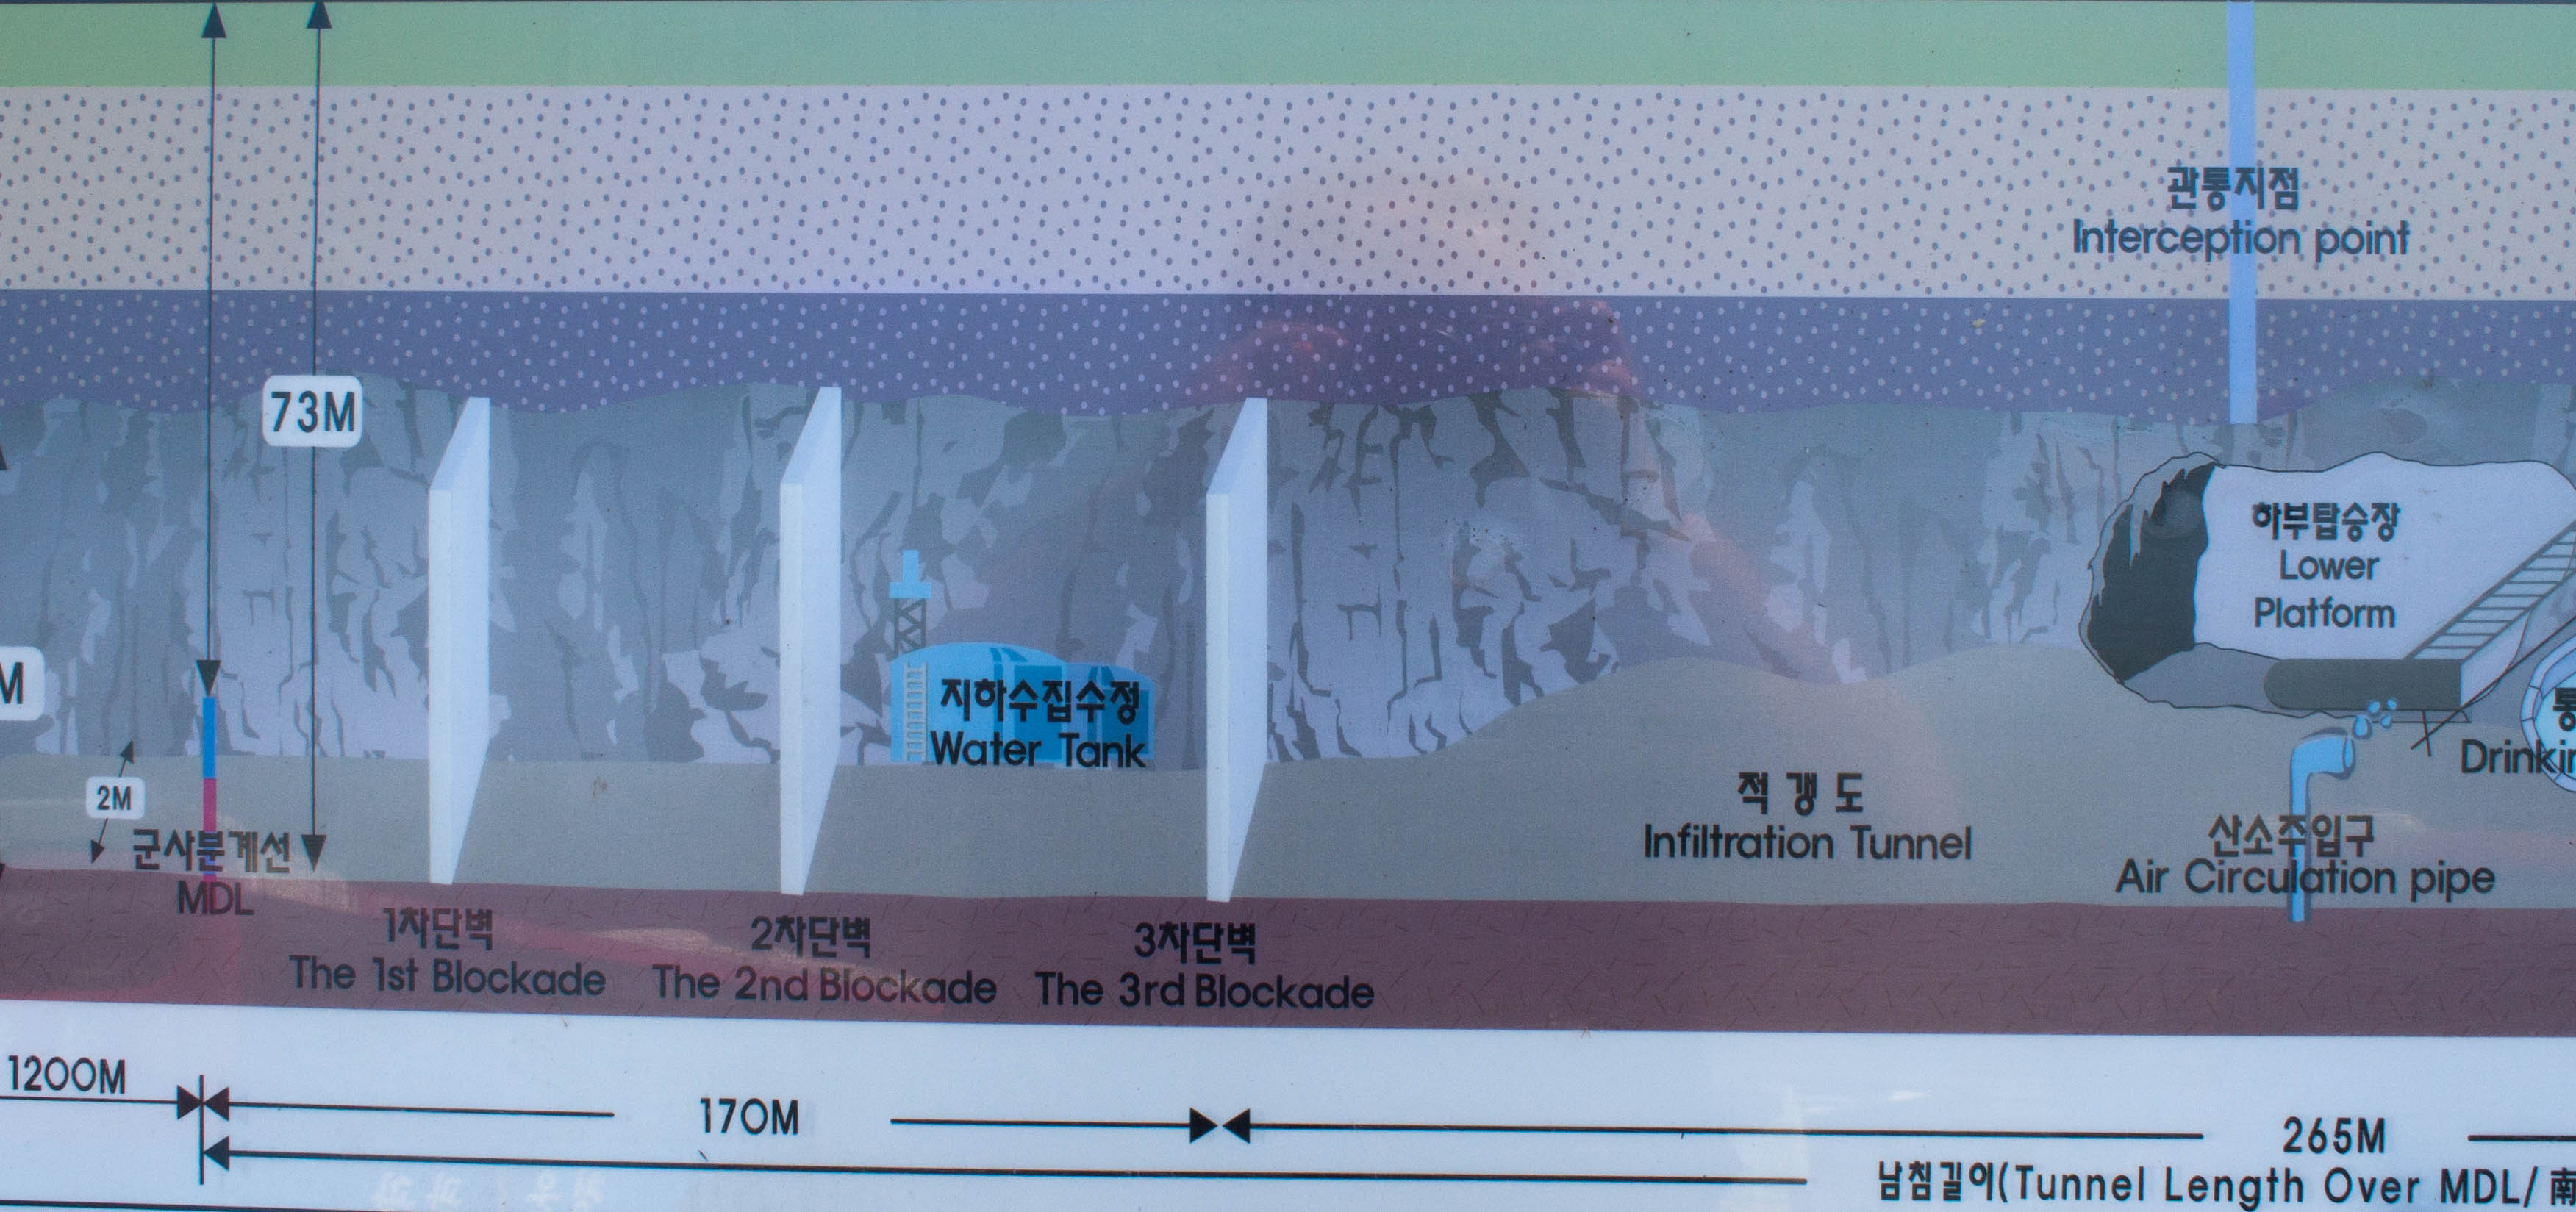
Tunnel #3 diagram 2 (1 of 1) Published January 10, 2016 at 3504 × 1649 in Tunnel #3 diagram 2 (1 of 1)

