
This Old Radio – Replacing Memory Battery on the HTX – 202 & HTX – 404
This Old Radio
Replacing memory battery in the RadioShack HTX-202 and HTX-404 Transceivers.
One of my goals when coming back to the United States was to finally upgrade my Amateur “Ham” Radio License to Amateur Extra class. I have been wanting to upgrade my license from a General Class license since the late 1990s. I just could not get the advanced math in the radio theory down.
With the help of Gary Wise’s (W4EEY) Amateur Extra License YouTube classes I was able to get the theory down enough to go take and pass the exam in February 2024!
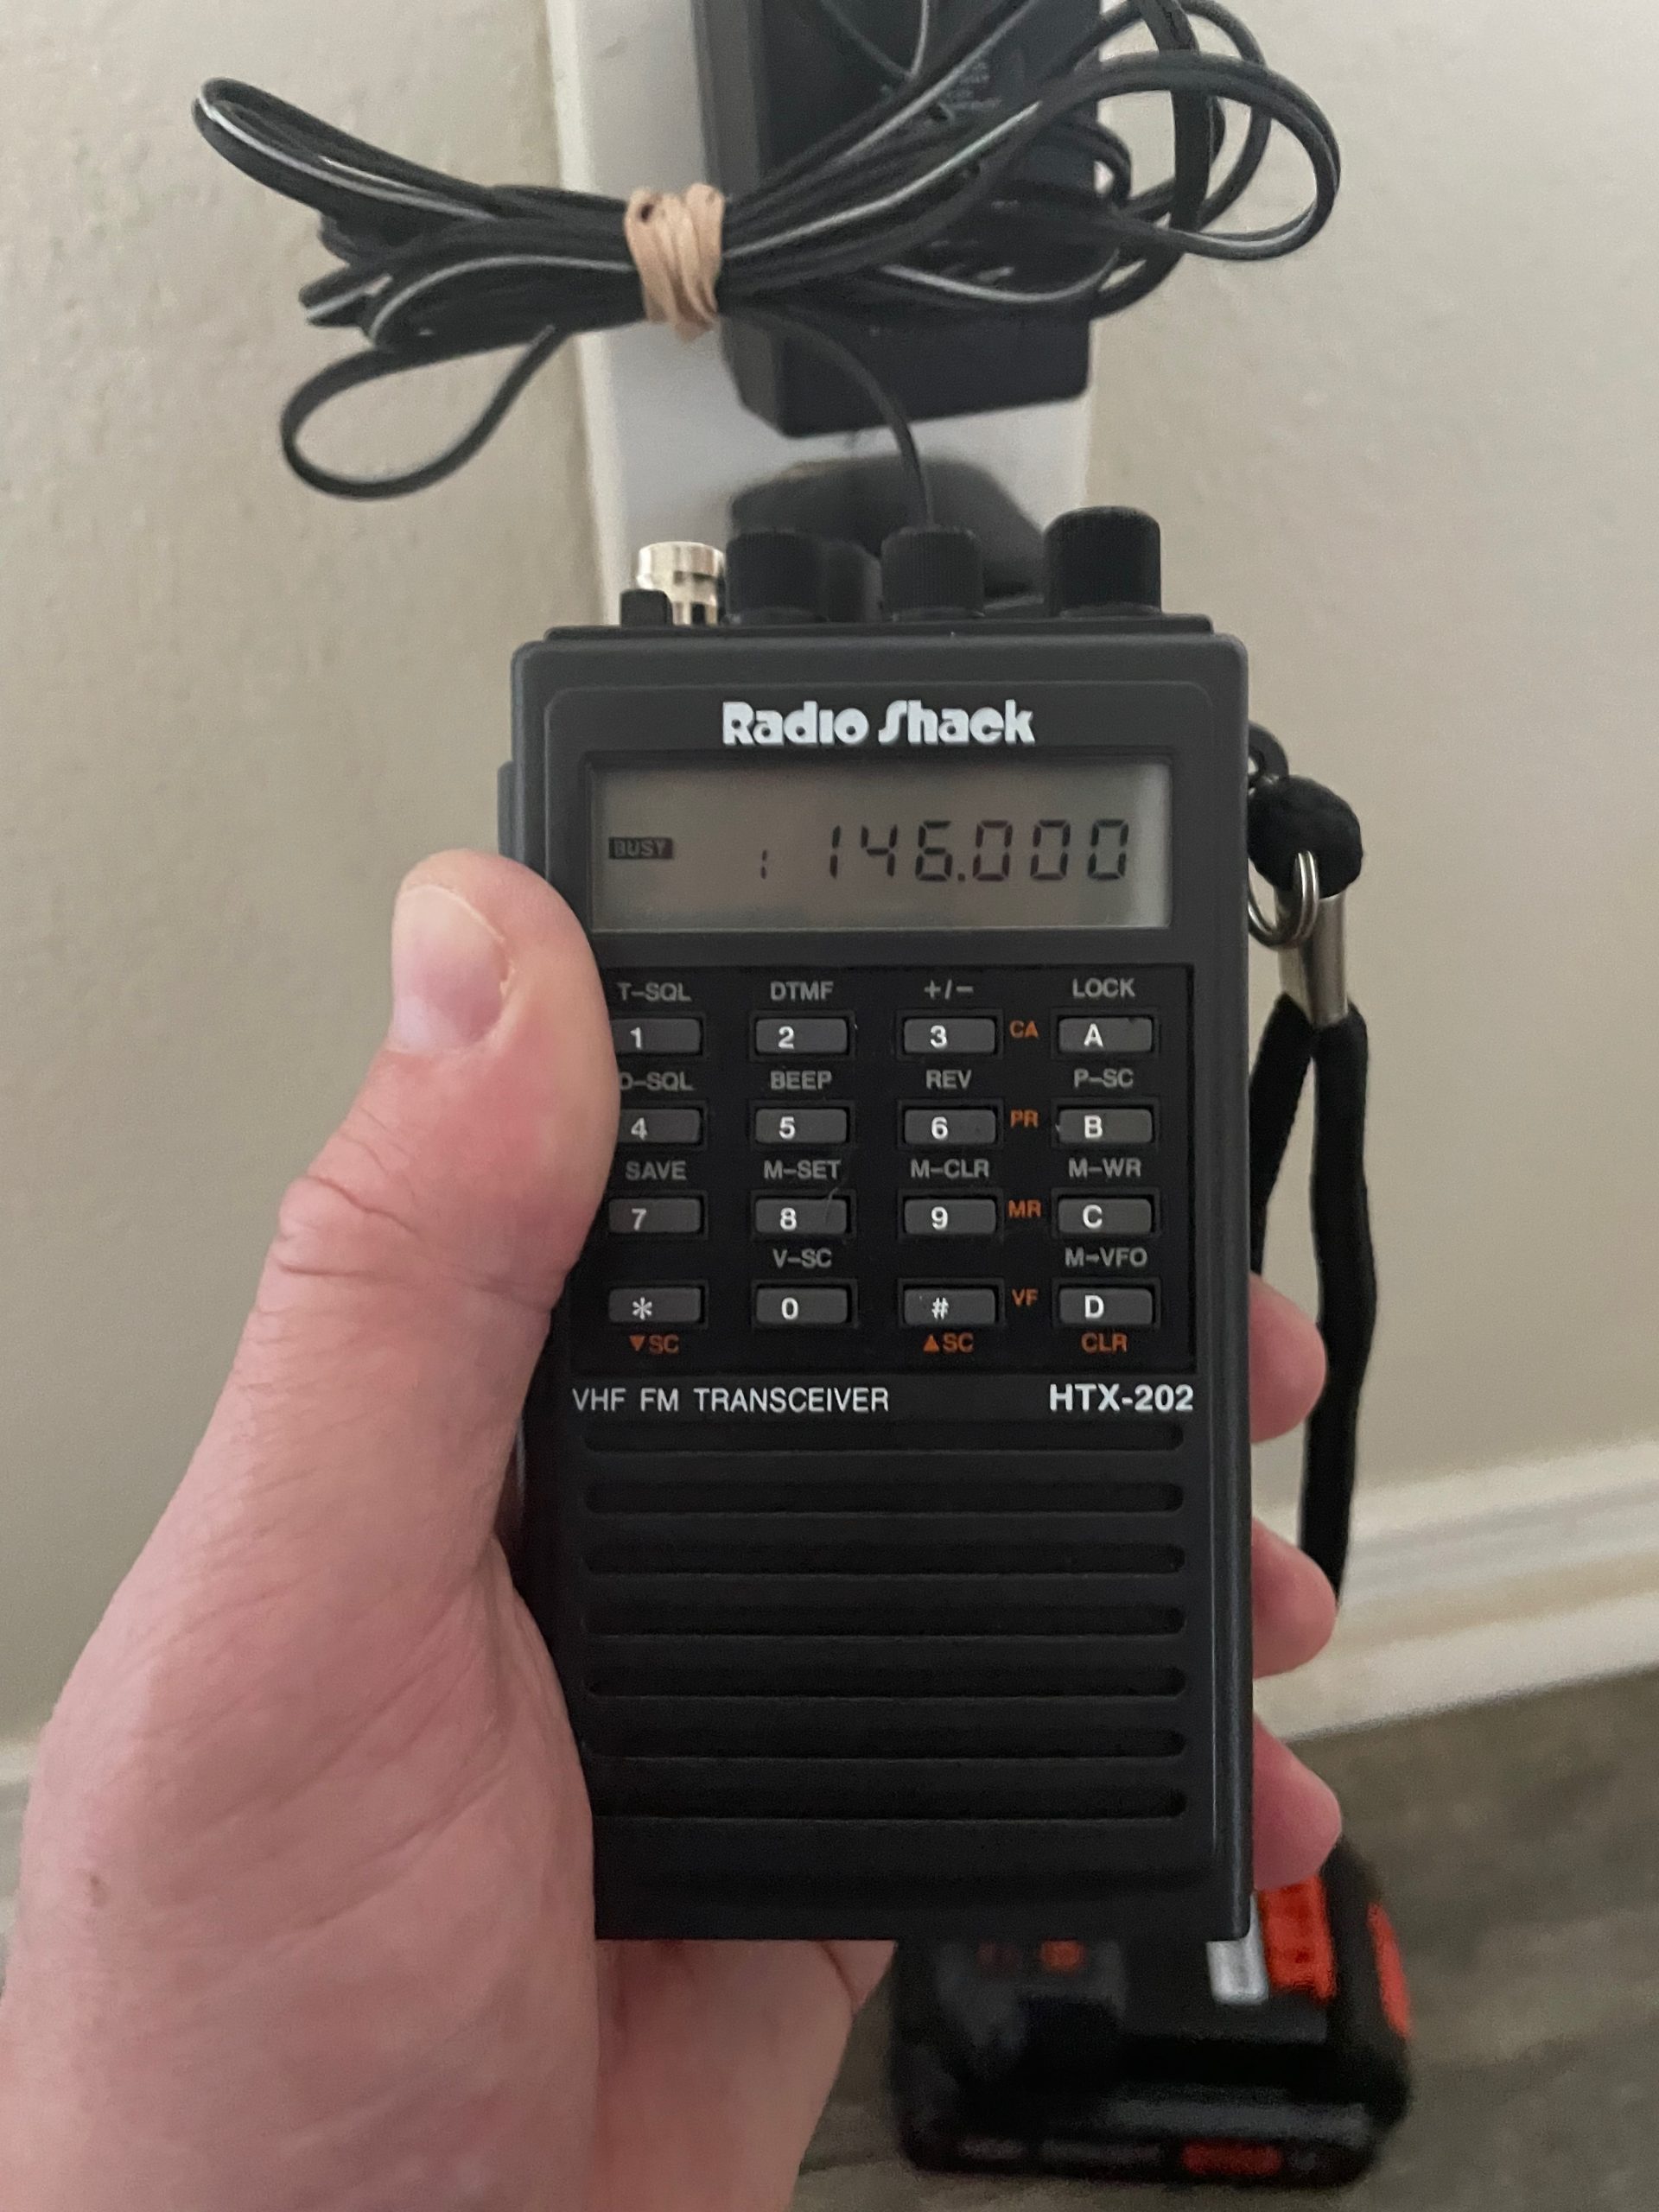
Now that I was a certified Extra Class Ham Radio operator, I figured it was time to actually do some Extra Class activities, such as fixing some older radio equipment. I have 2 old Radio Shack 2 meter, and 70cm (440MHz handheld transceivers.). I like these radios because they actually look like radios, and are almost indestructible! However, being so old, their mercury button type batteries that hold memory settings have long gone the way of the dodo, and produced an Er1 1 message on power-up.
Using the instructions on Craig LaBarge’s (WB3GCK) blog, I ordered the parts and a new soldering station on Amazon and set aside the time to replace the batteries in my radios.
Soldering Station
Button Battery Holder
4 pack of CR2032 3 Volt Button type batteries
CRAFTSMAN Precision Screwdriver Set
- Support Brent’s World. If you purchase from Amazon using these links, proceeds will be used to support the blog and new content!
So, let’s get down to business!
First I remove the Belt Clip from the back of the radio using the no.1 (2.5′) Phillips head screwdriver from the CRAFTSMAN precision screwdriver set.(2 of my radios did not have these attached, as I used them in a radio holder on a utility belt.).
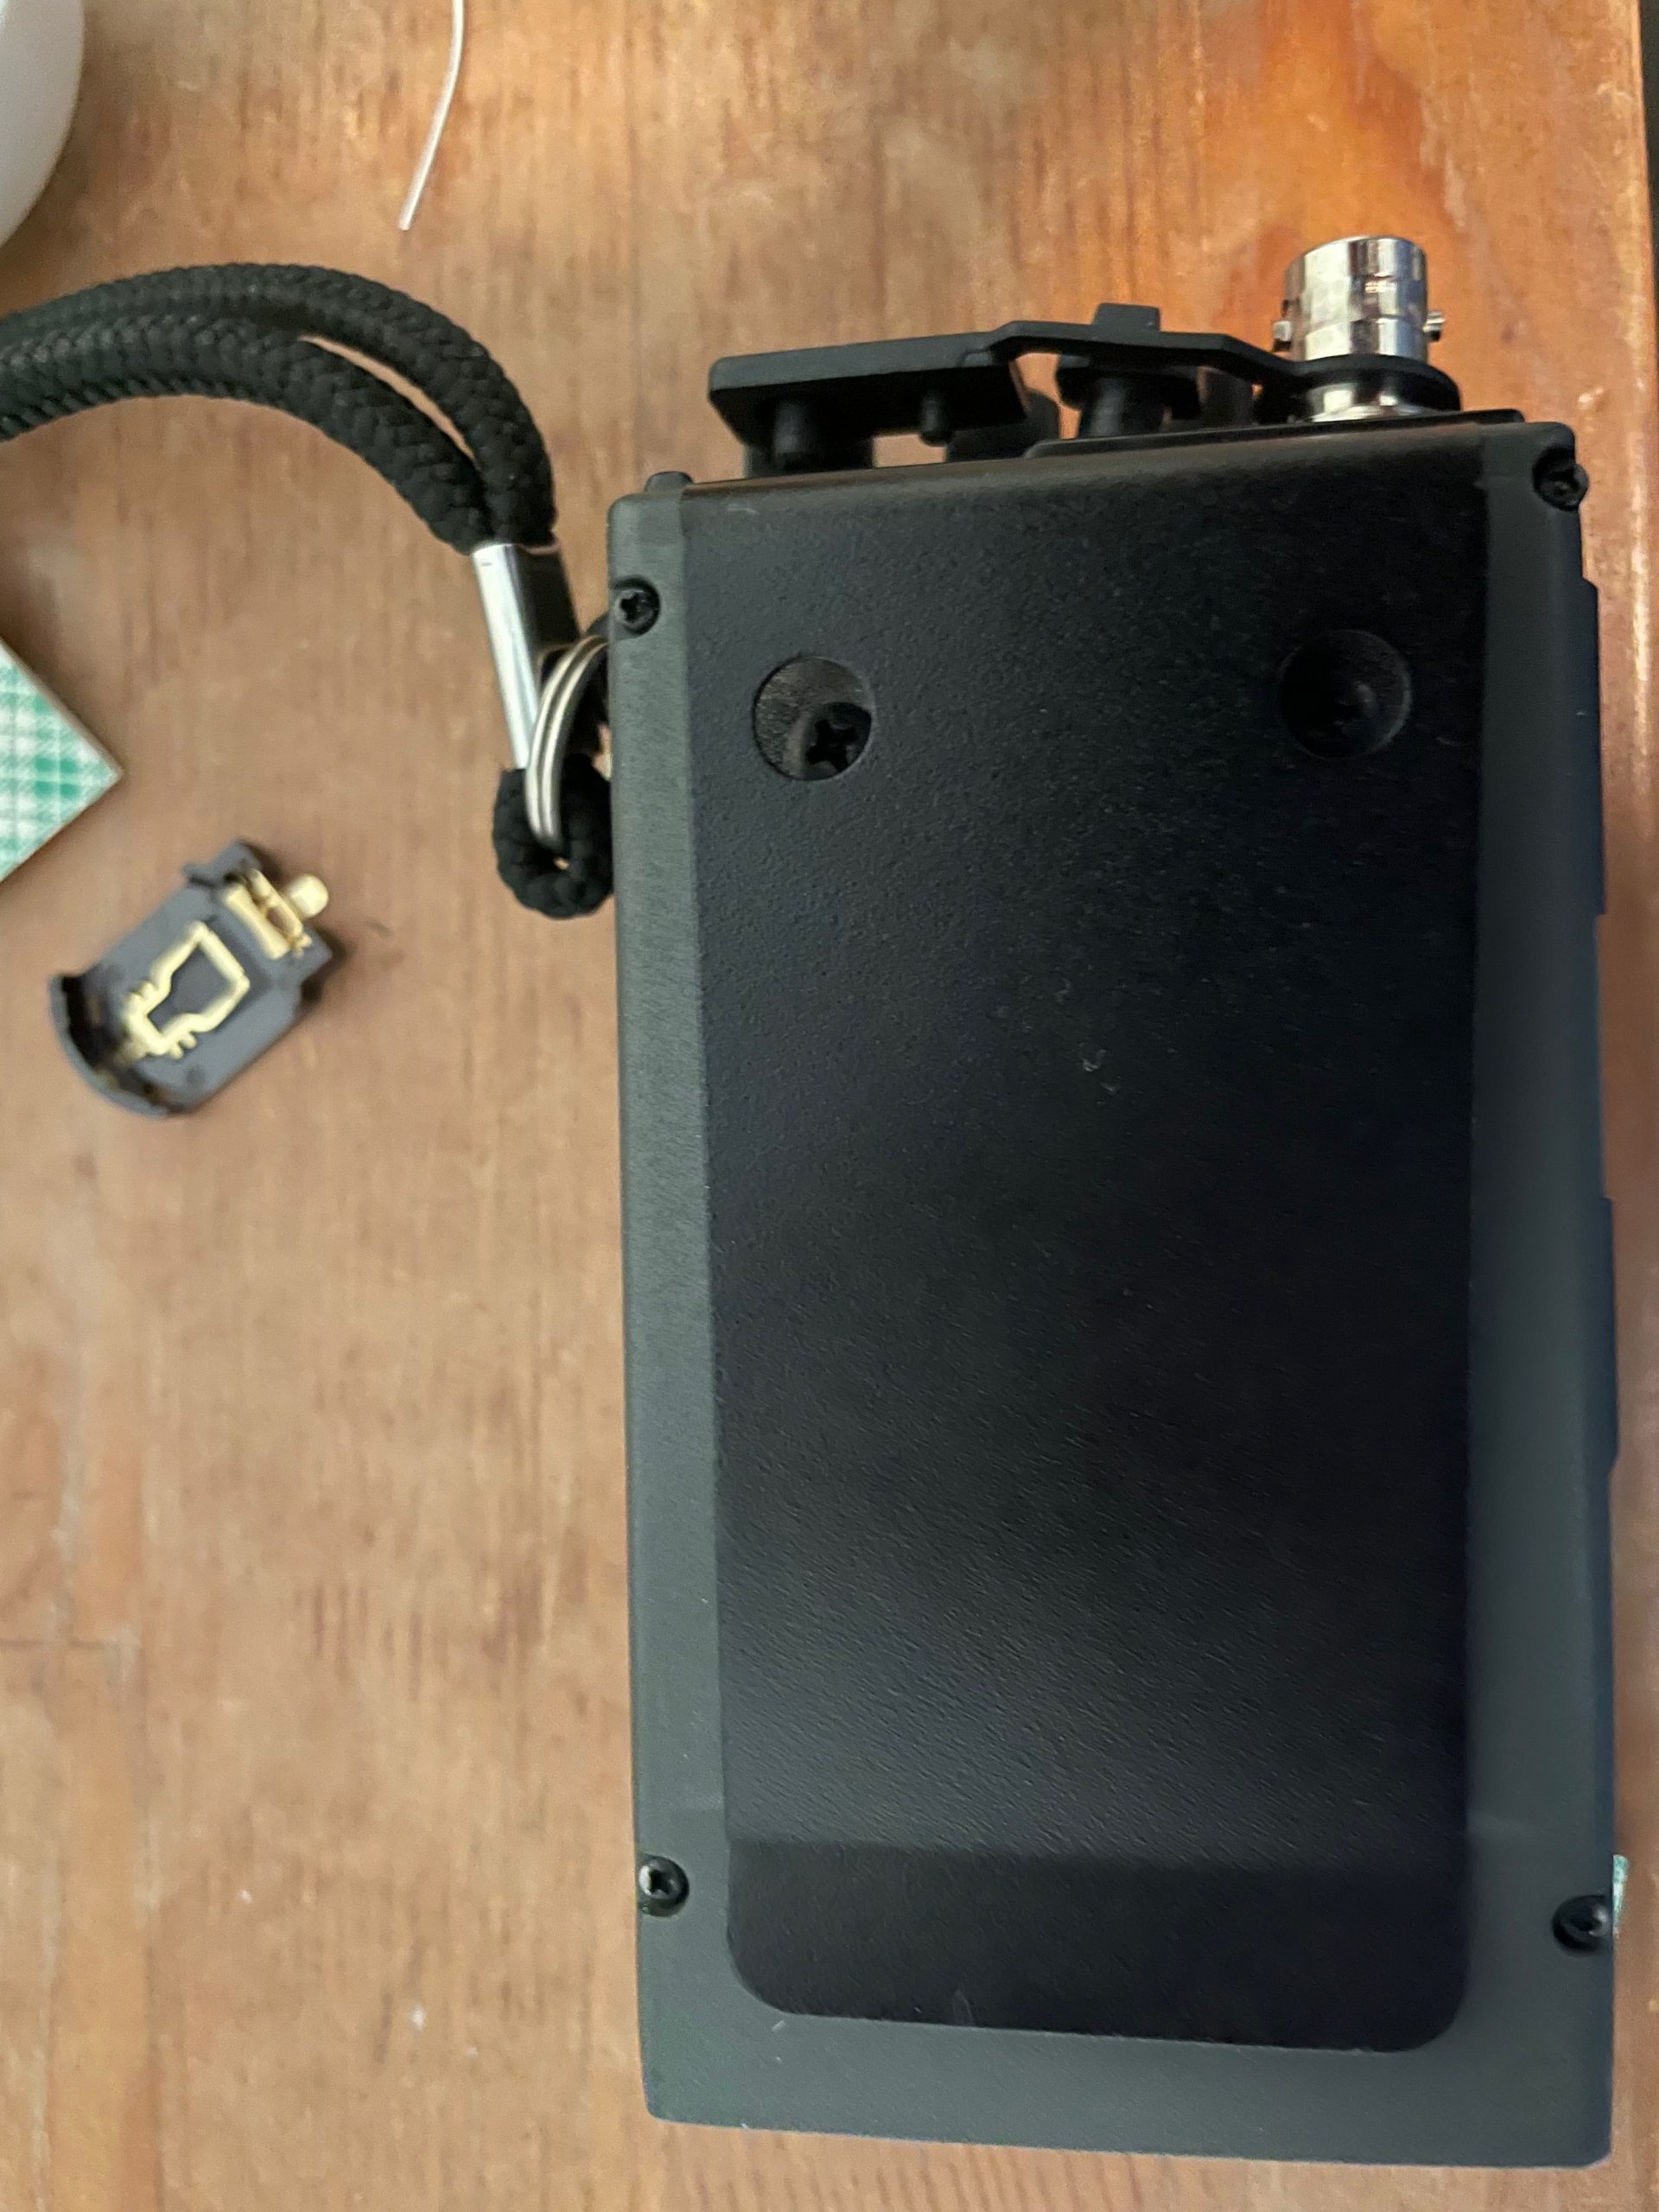
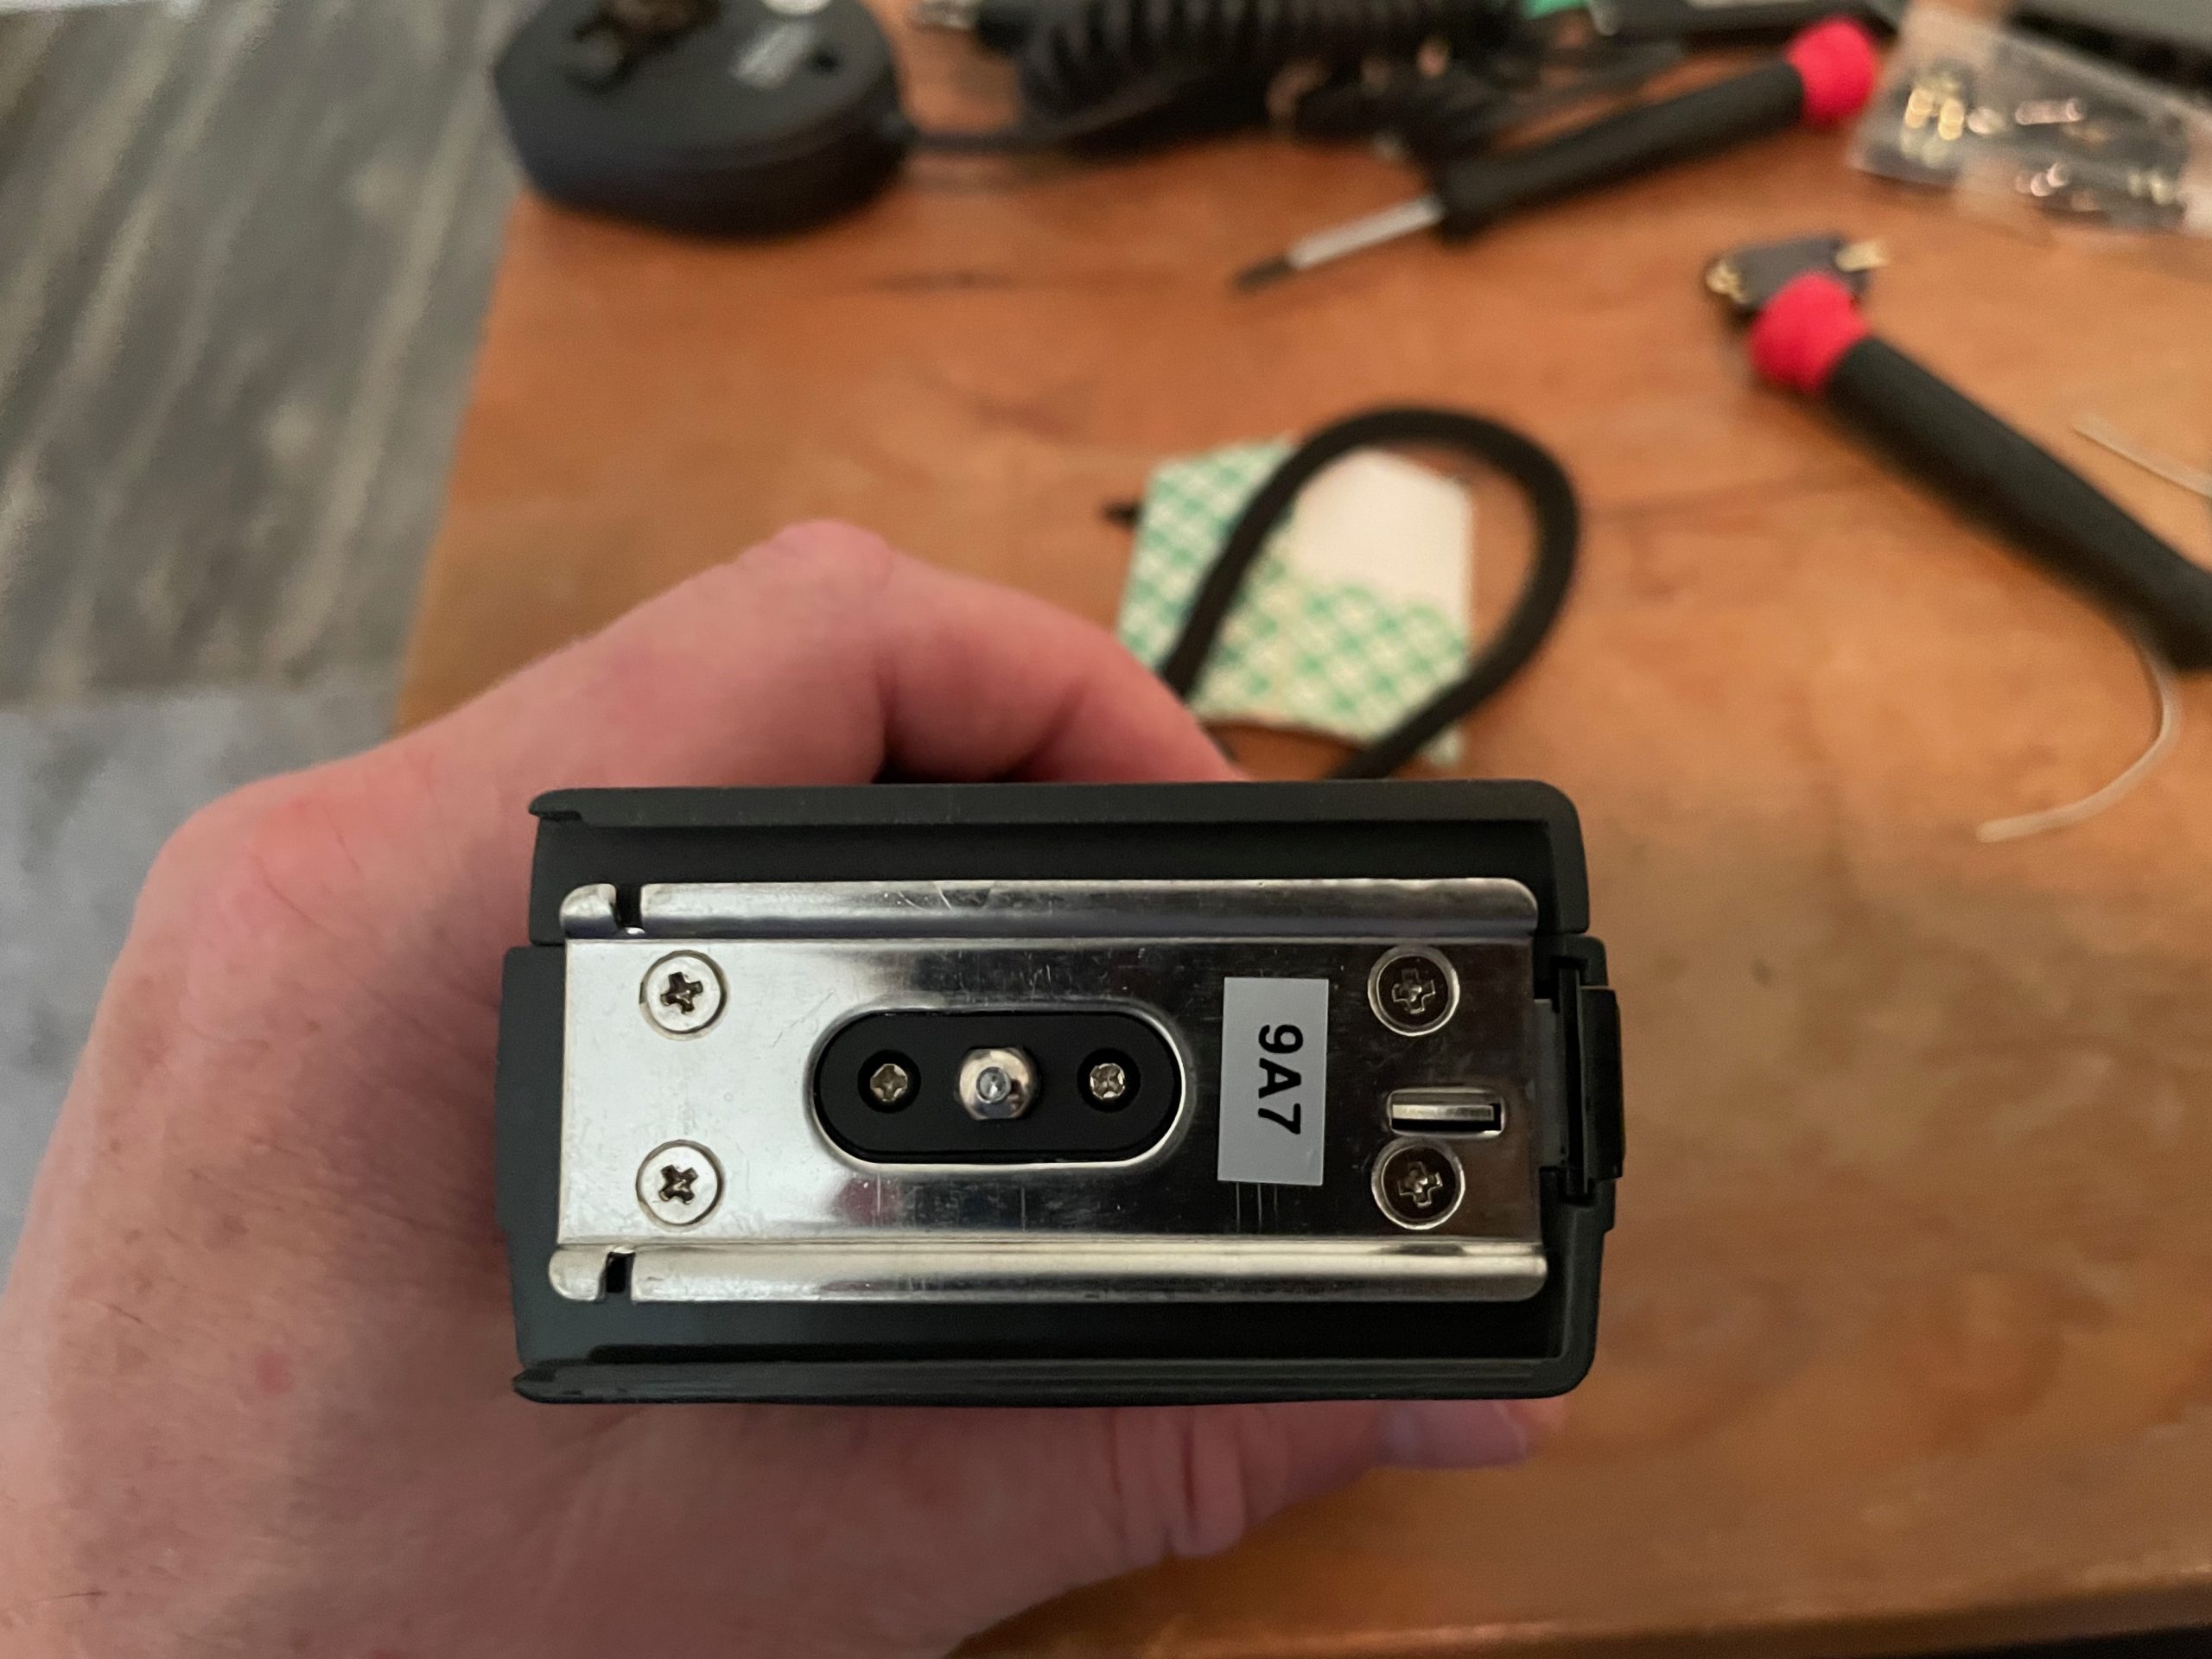
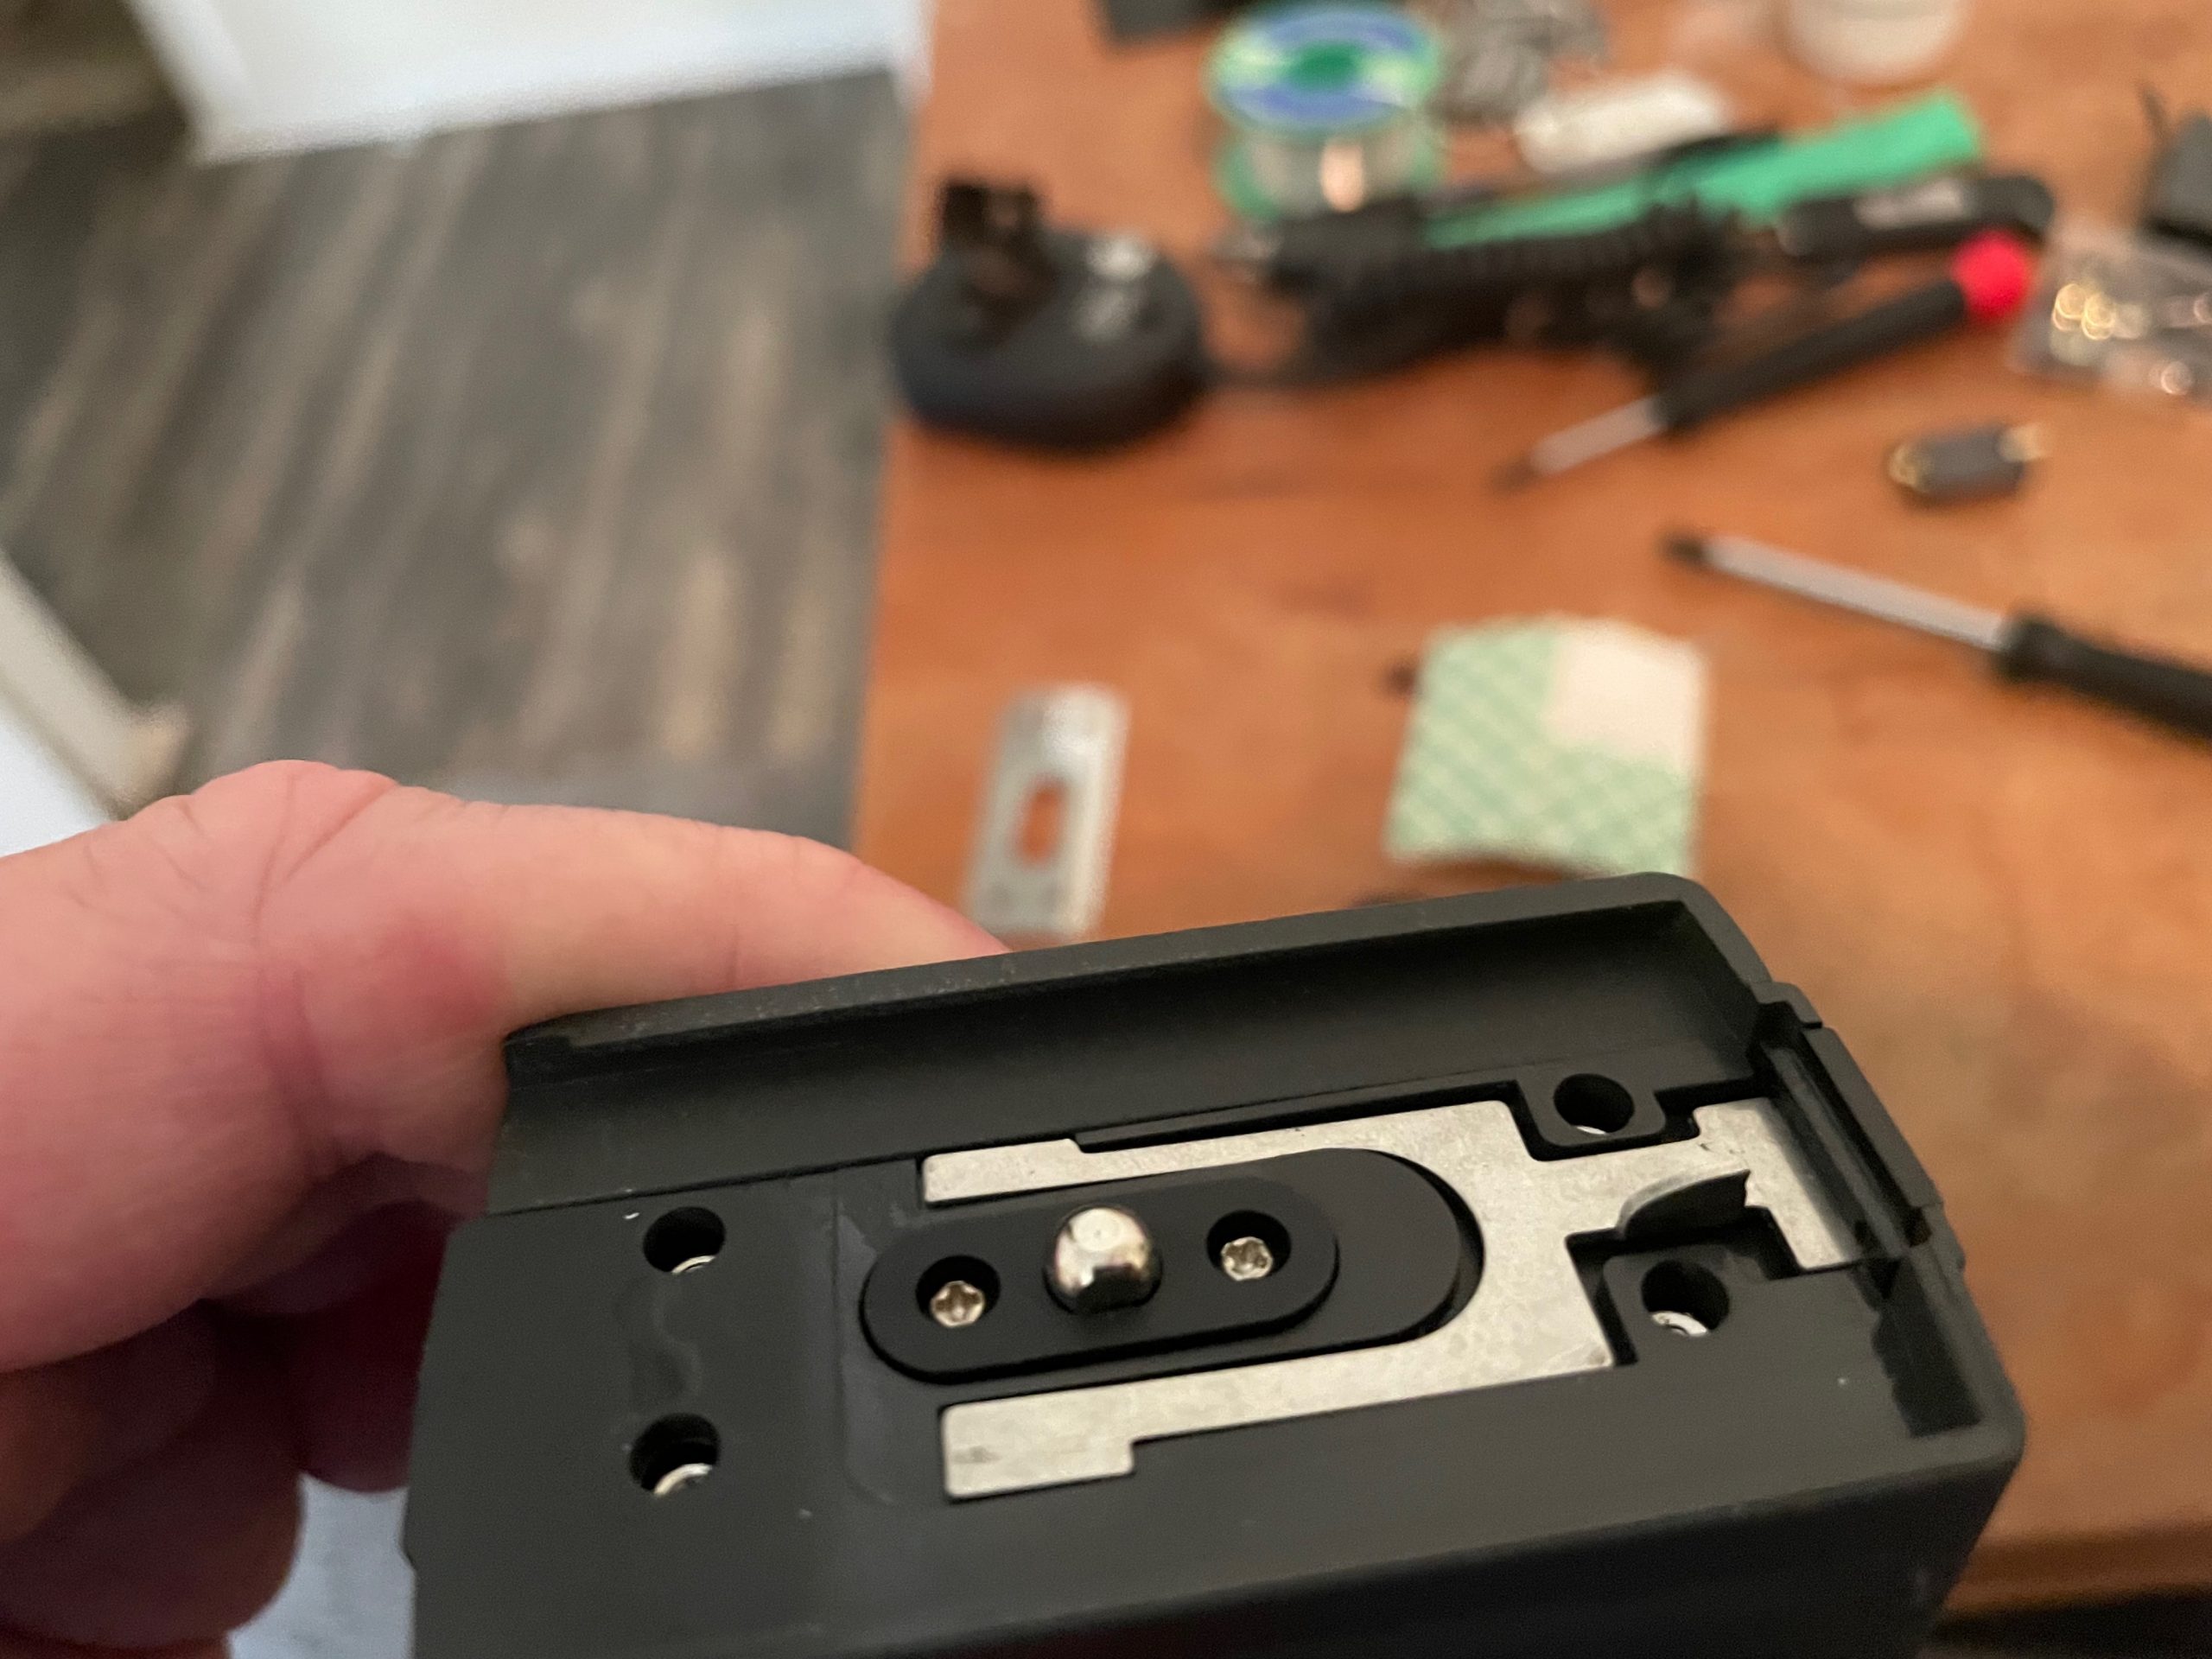
Next I remove the 4 screws, latch and battery rail from the bottom of the radio Also using the 1 (2.5′) Phillips head screwdriver, Pay close attention to how the plastic latch assembly sits on the radio.
Once this is done, it is time to remove the 5 screws holding the back of the radio on, use the No.0 (1.5″) Phillips head screwdriver, and carefully remove the screws. If the smaller #0 driver feels too loose in the heads of the 4 corner screws you can use the larger #1, but not on the center screw which is smaller. (The screws are very soft, and you might not be able to find replacements!). Once the screws have been removed, lift the back off the radio.
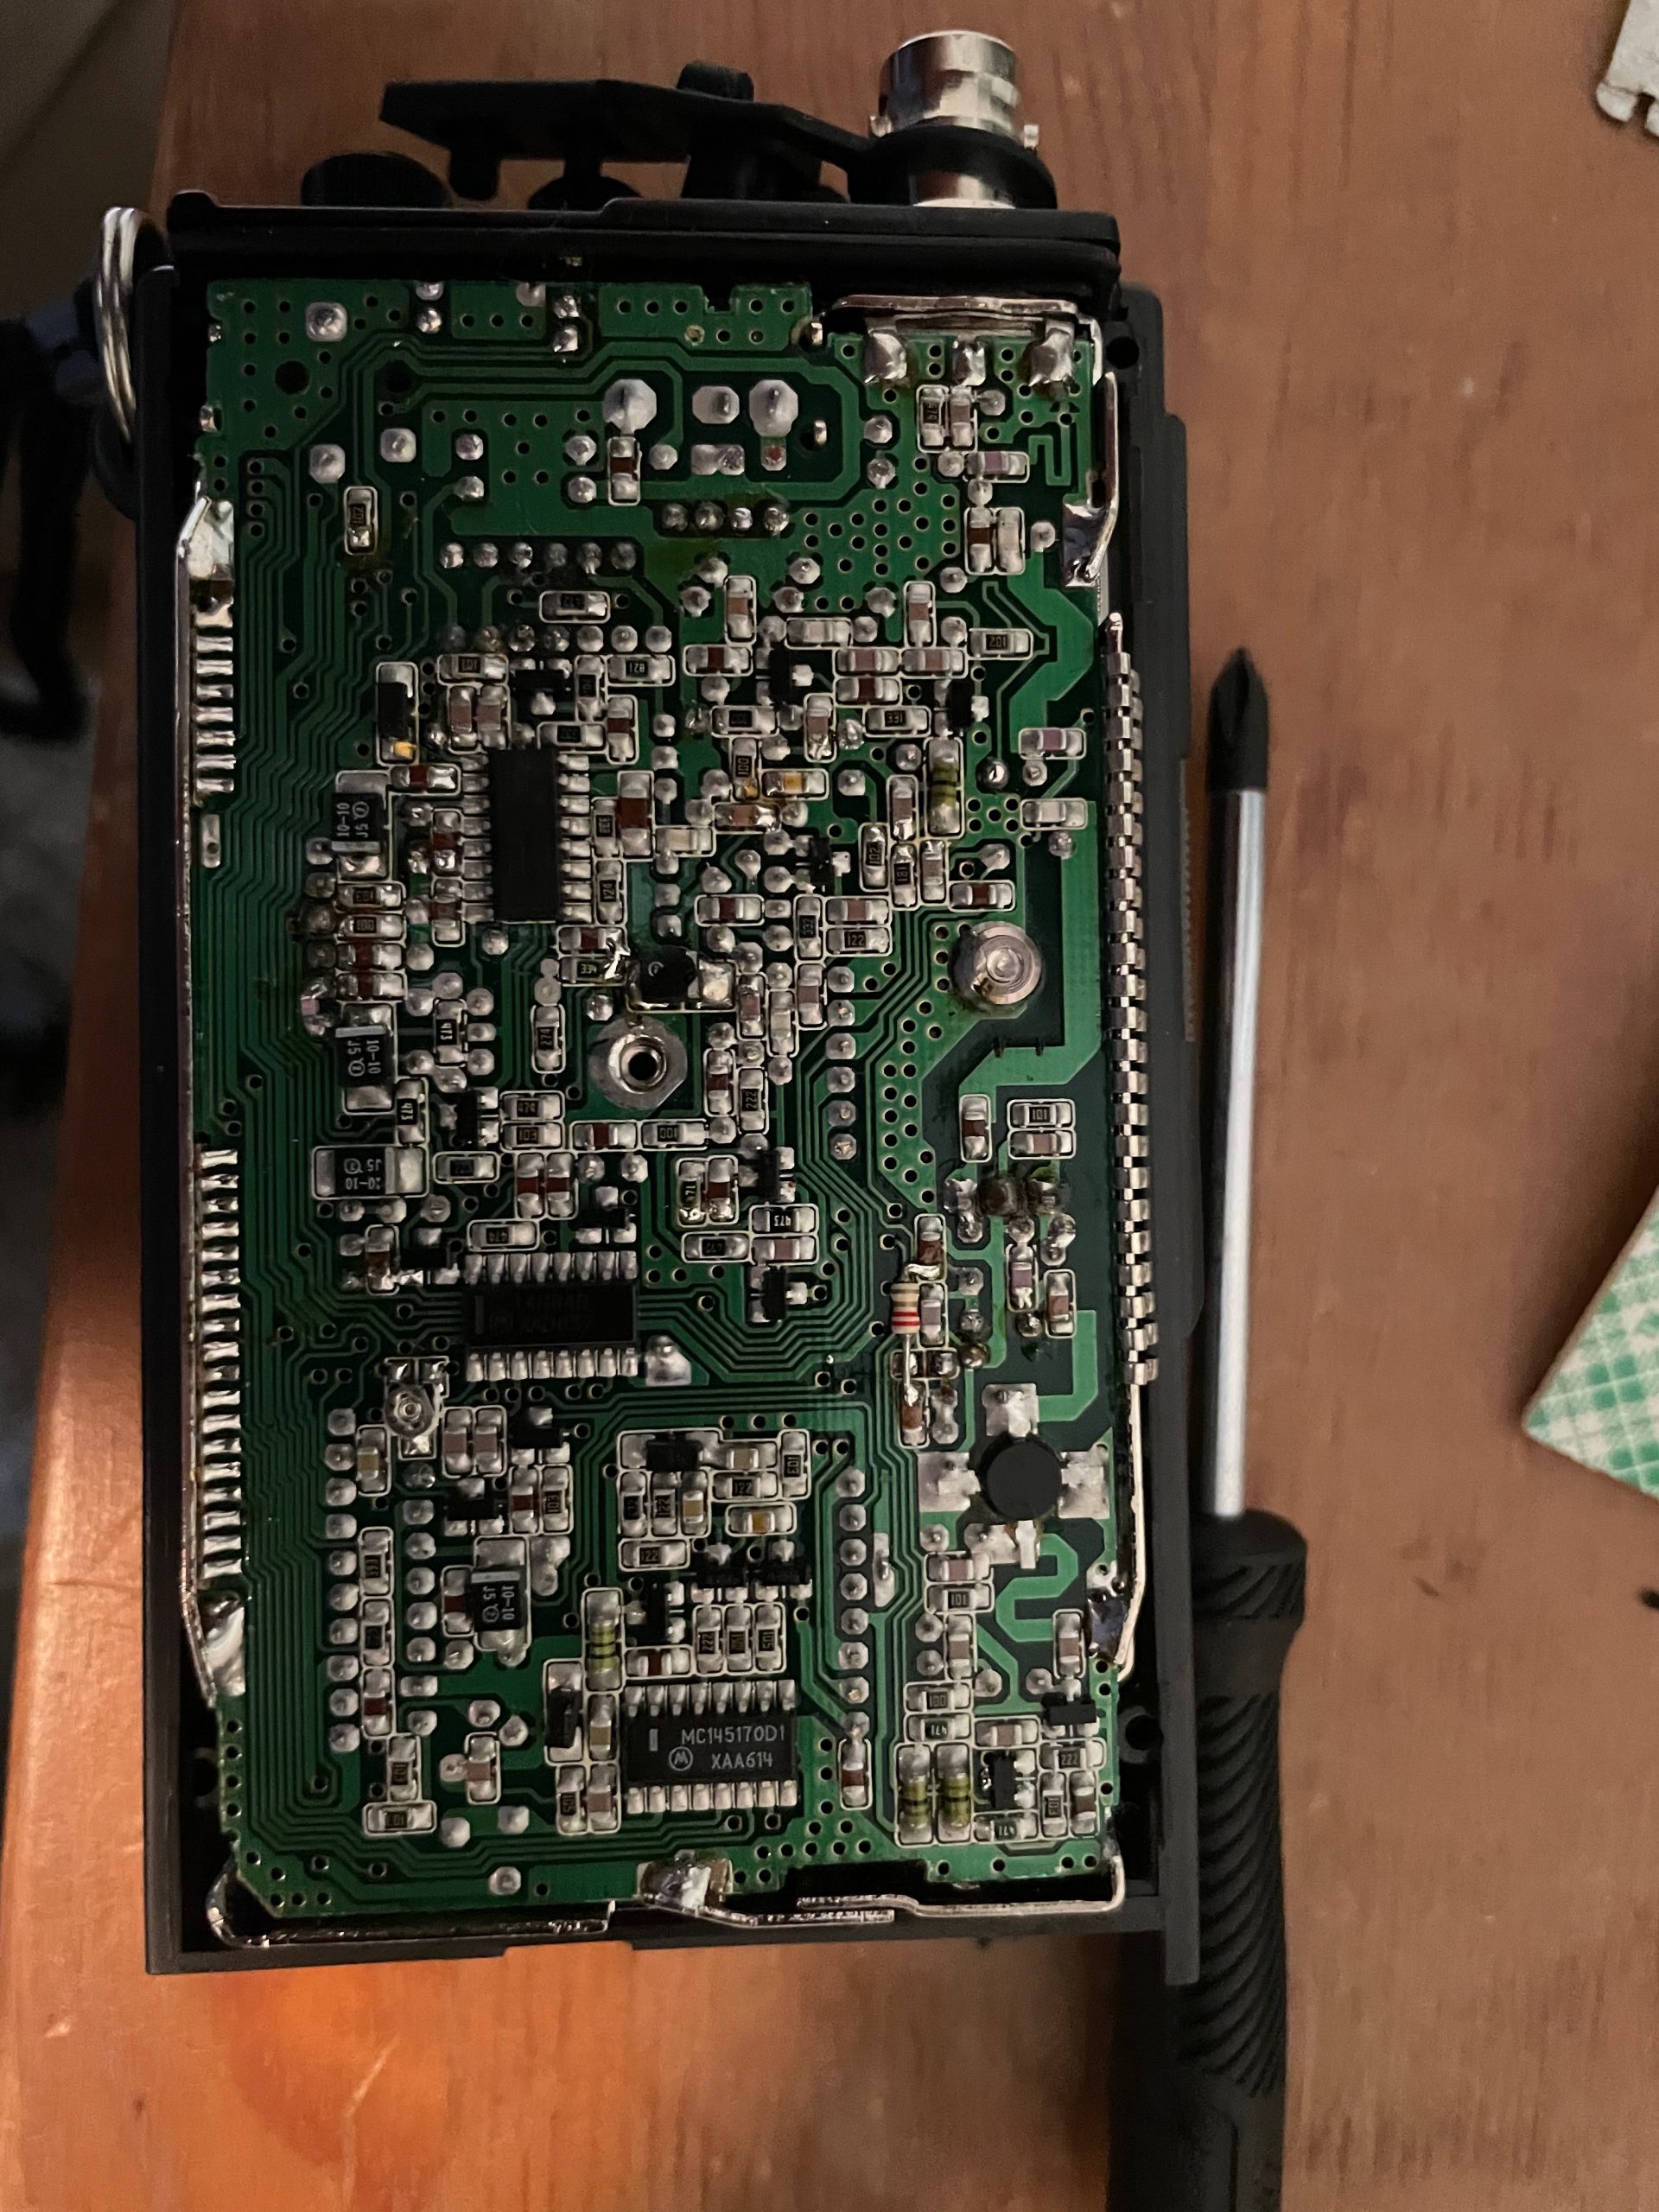
Carefully life the top circuit board out of the lower casing, and set it beside the radio. Be careful as it is still attached by a ribbon cable.
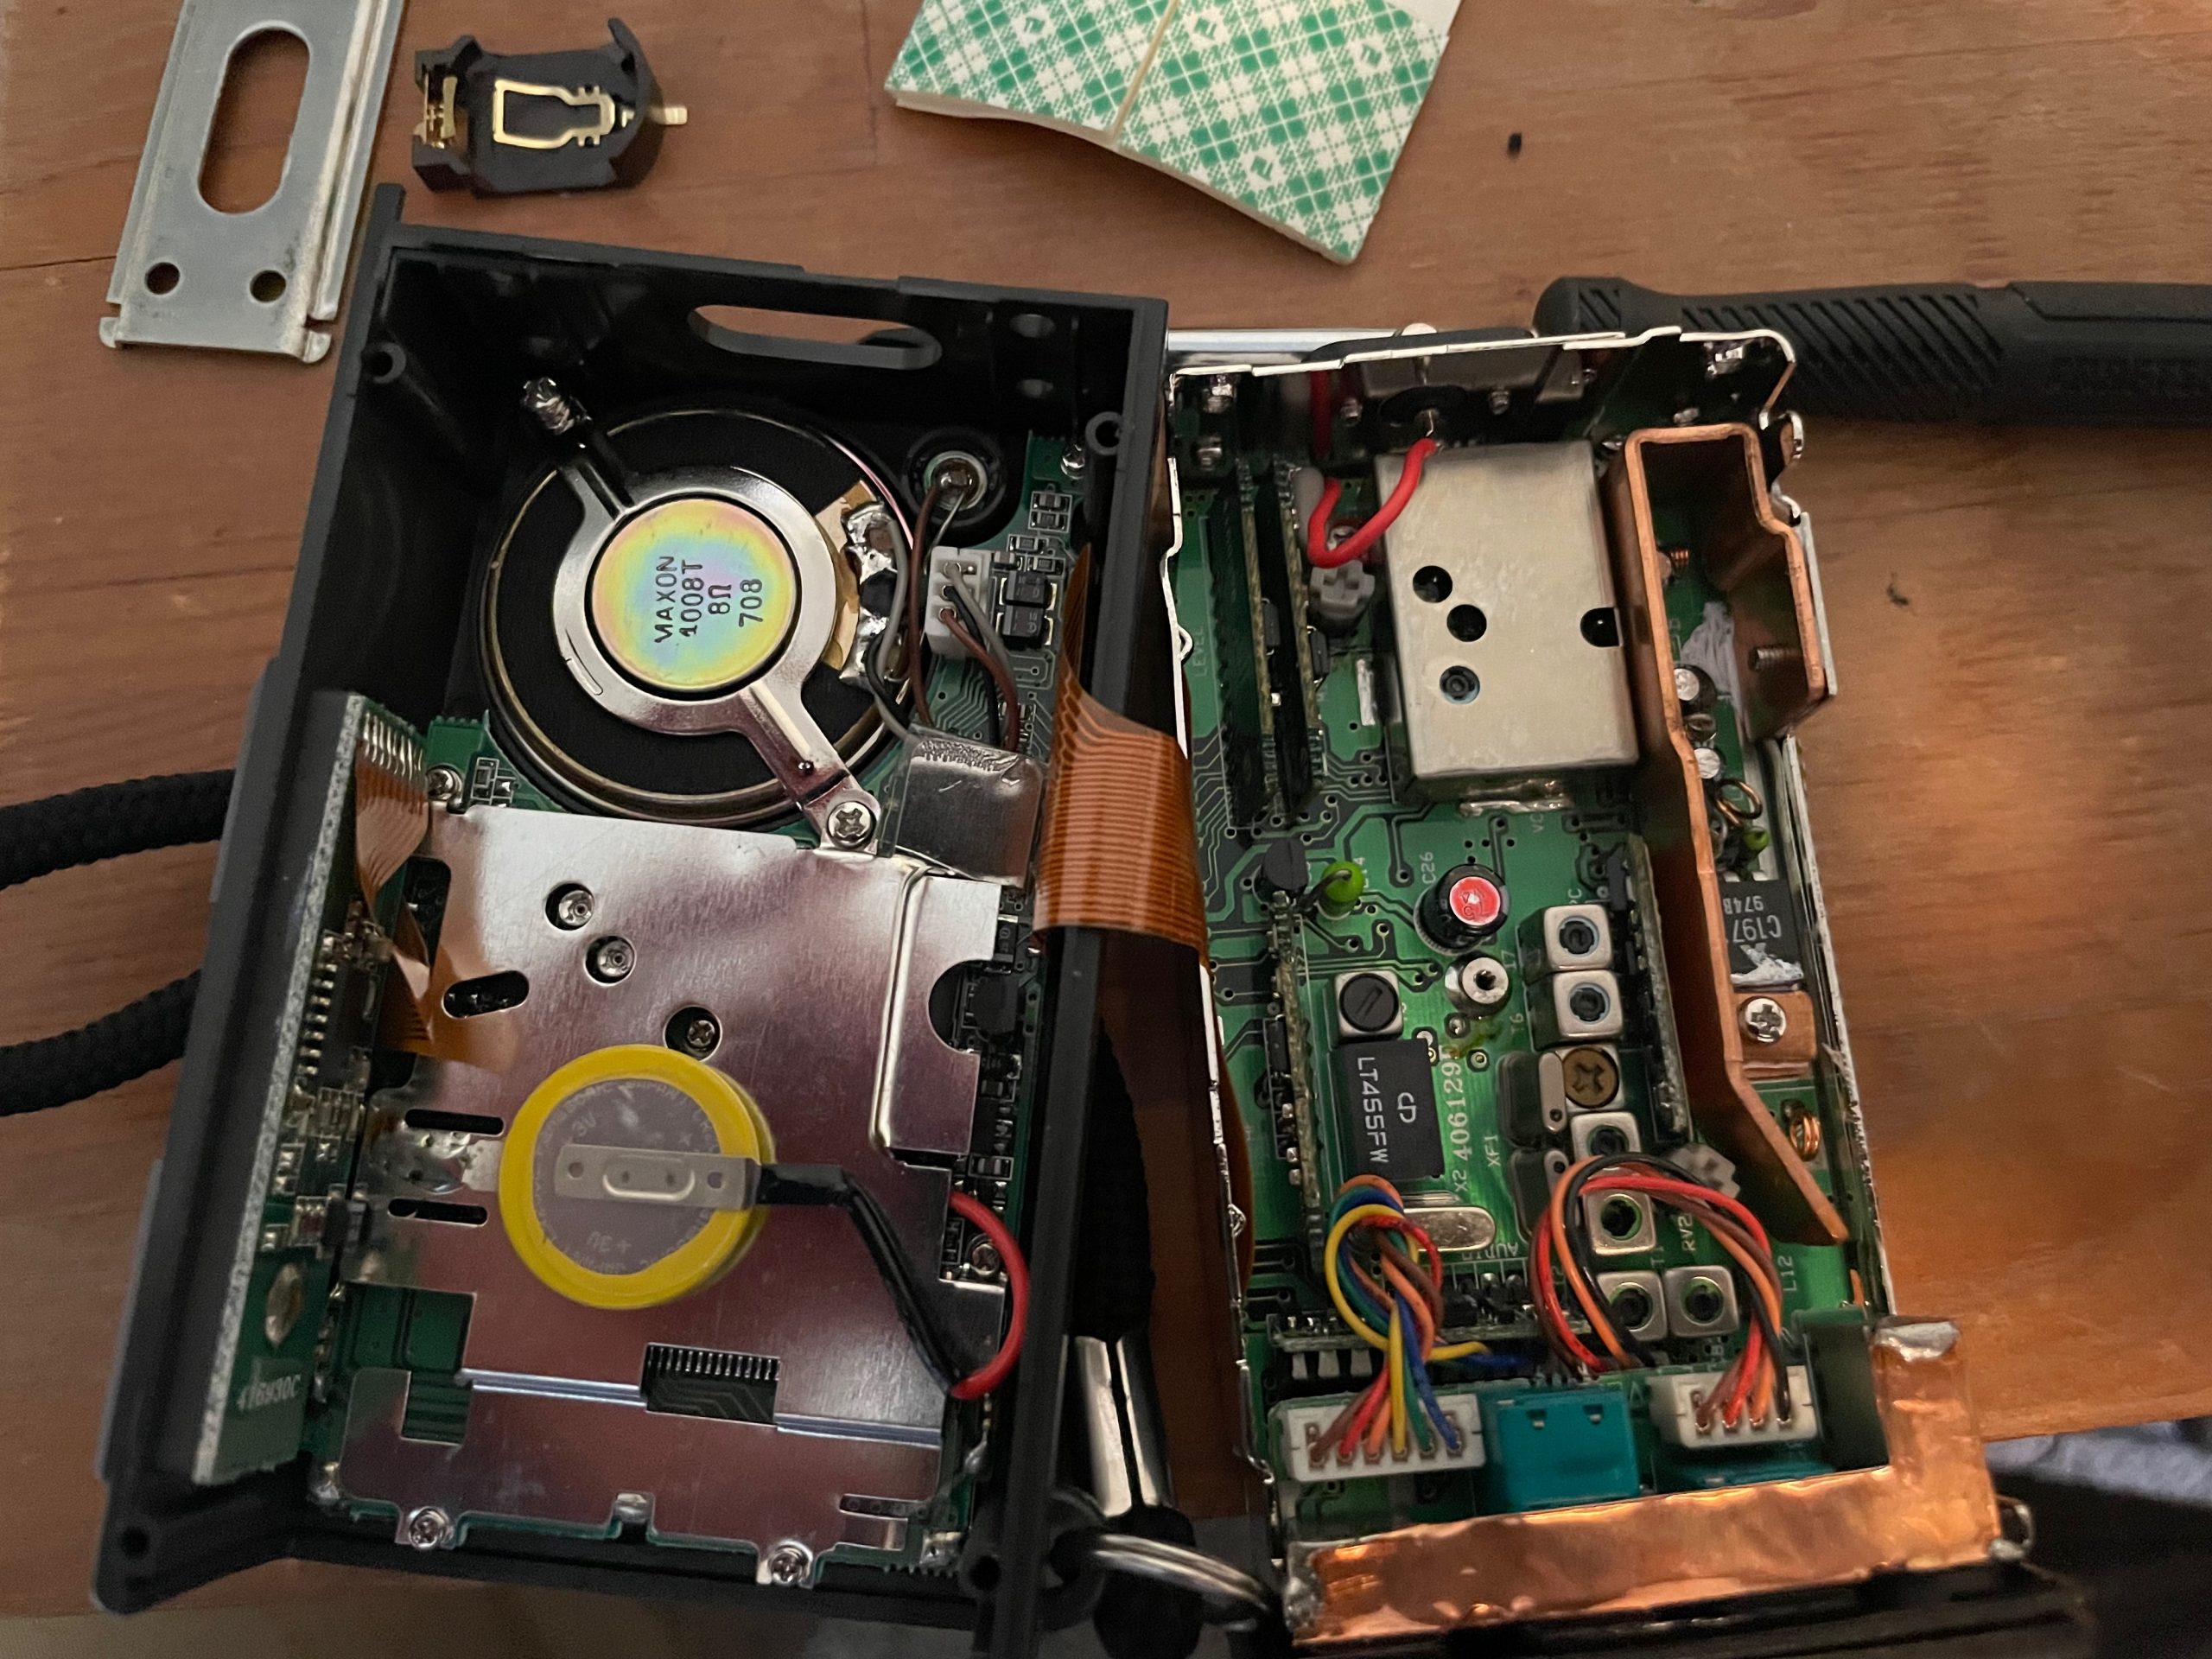
You can see the mercury battery used to store the memory settings.
We will now heat up our soldering iron (I set the temperature to 670F), You need to be careful not to get things too hot!
When the tip is hot enough to melt the solder, desolder the negative lead on the left side of the battery. (It is just soldered to the aluminum shielding seen in the picture.).
Next cut the positive RED wire as close as you can to the metal lead and remove the battery (It is secured to the metal shielding using a foam adhesive.)
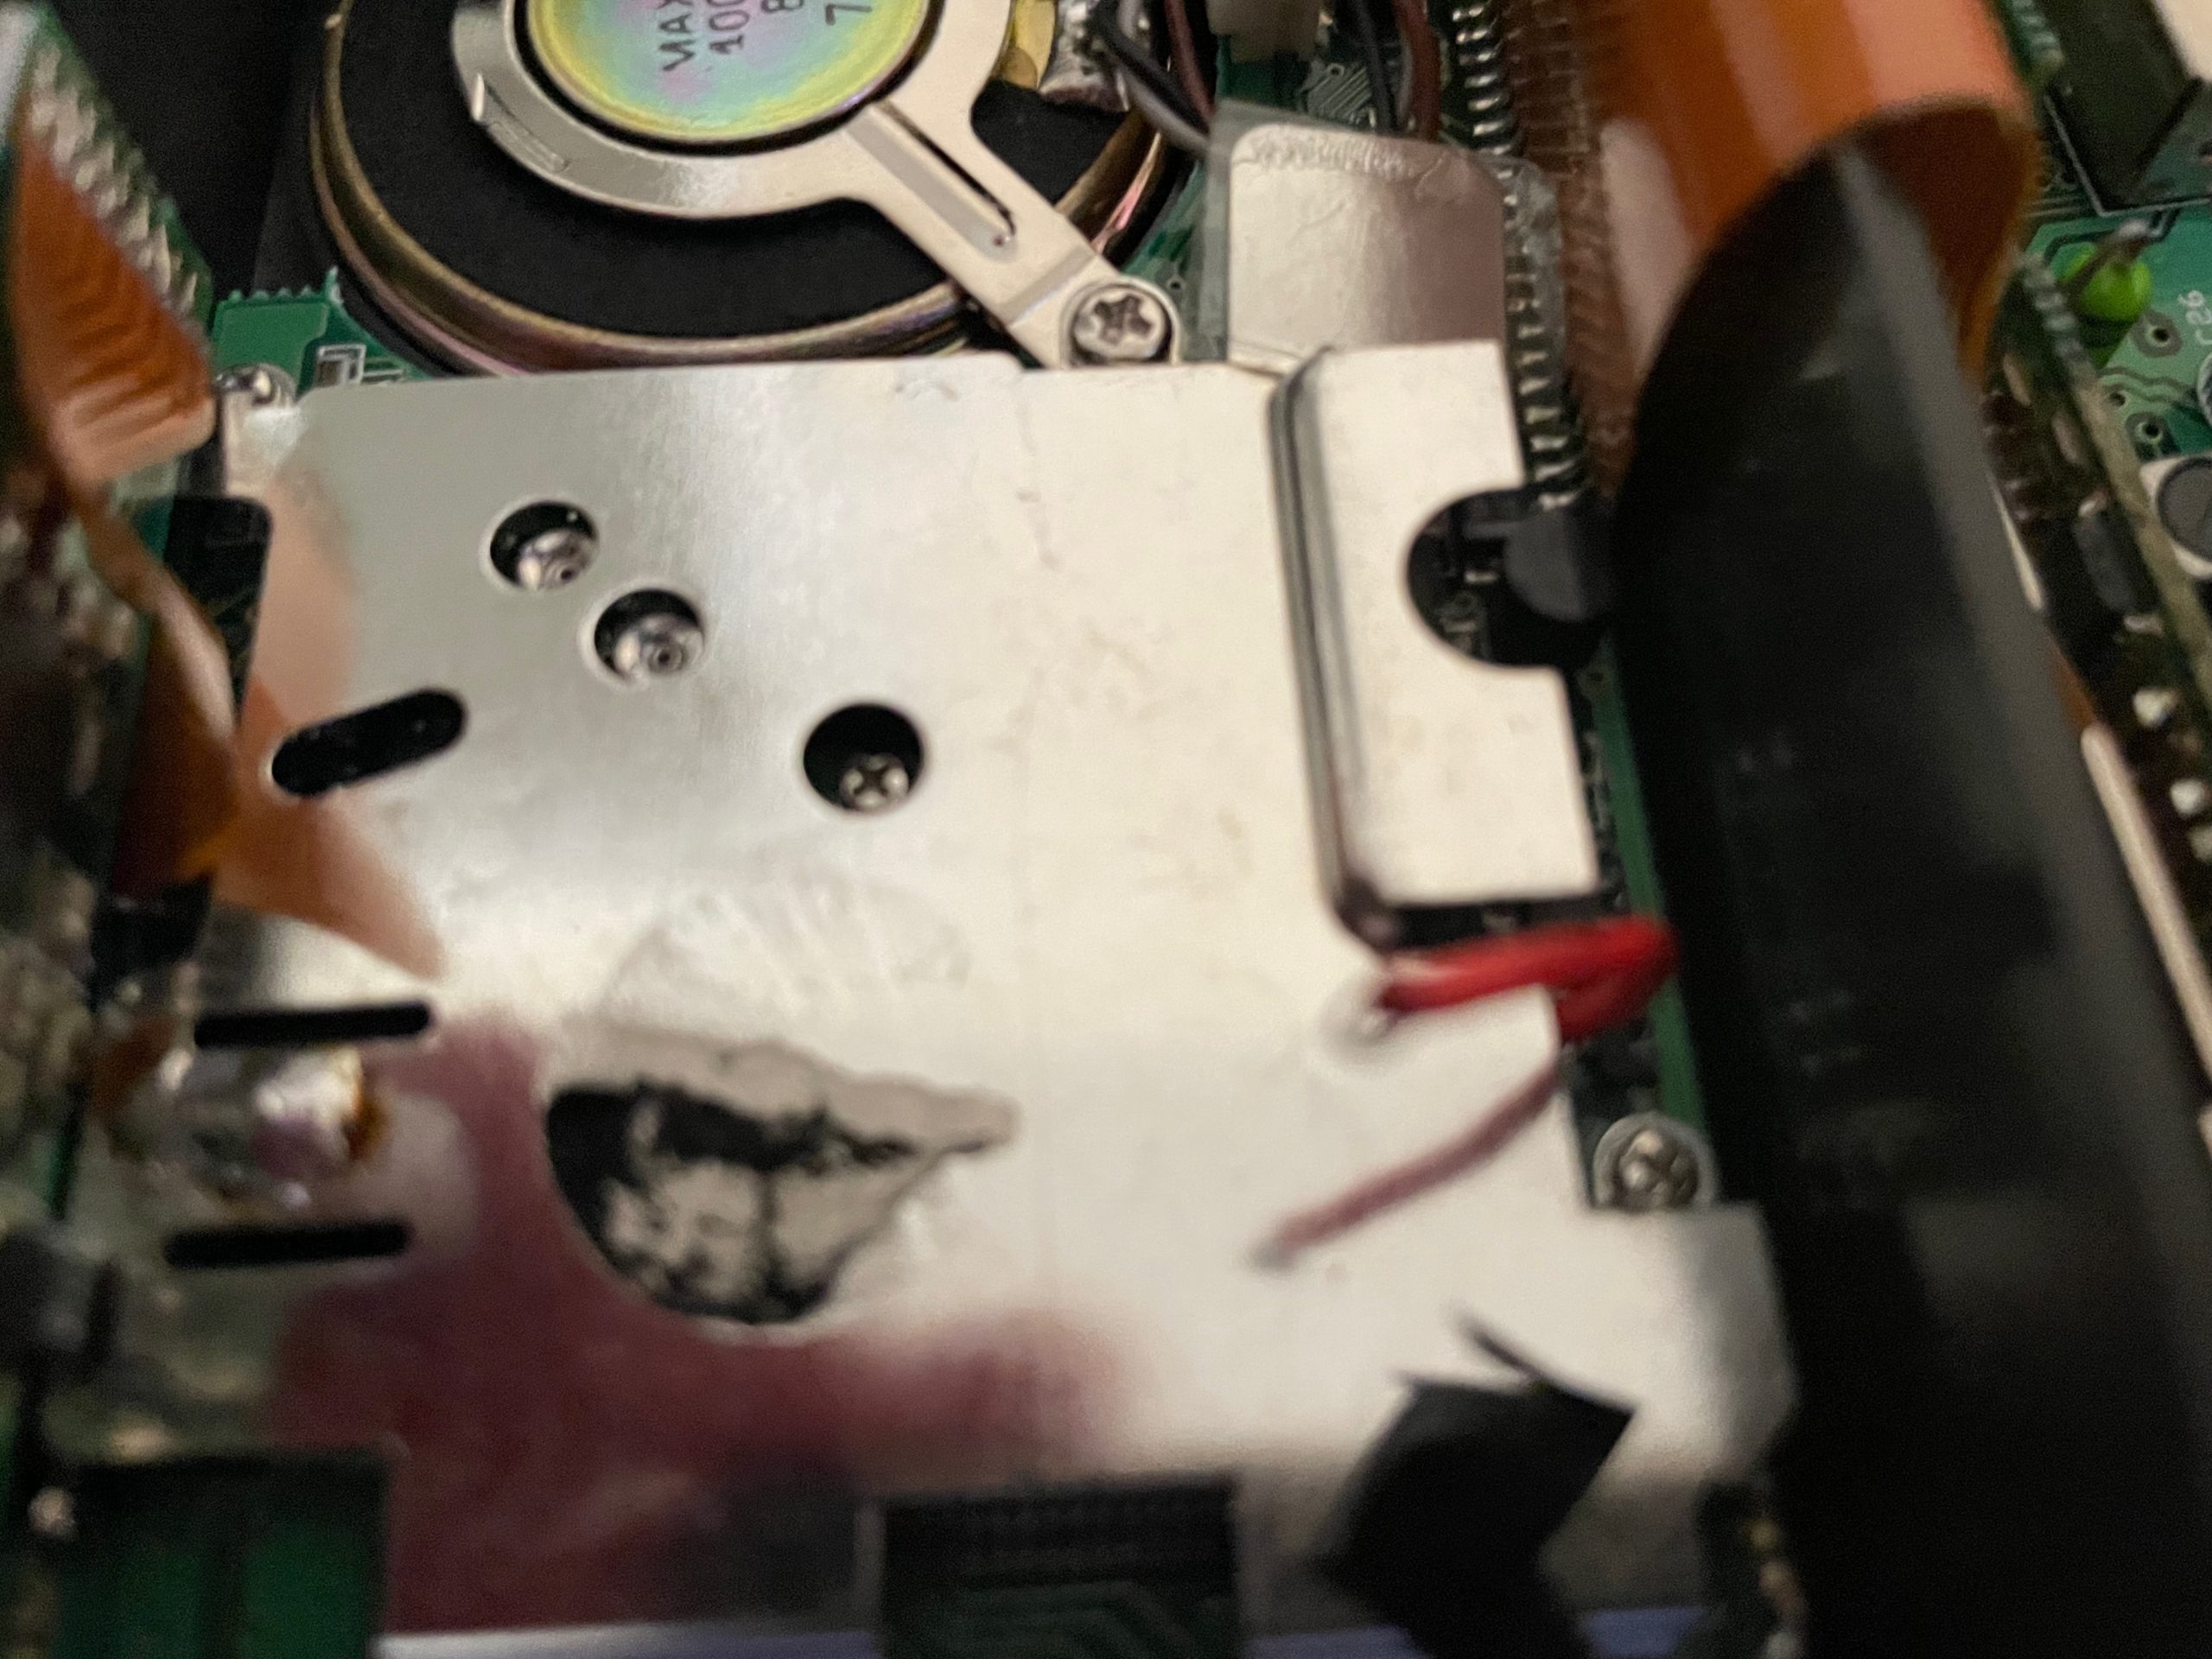
This is what it will look like when removed. I used rubbing alchohol to remove as much of the adhesive that might be left on the shielding as possible.
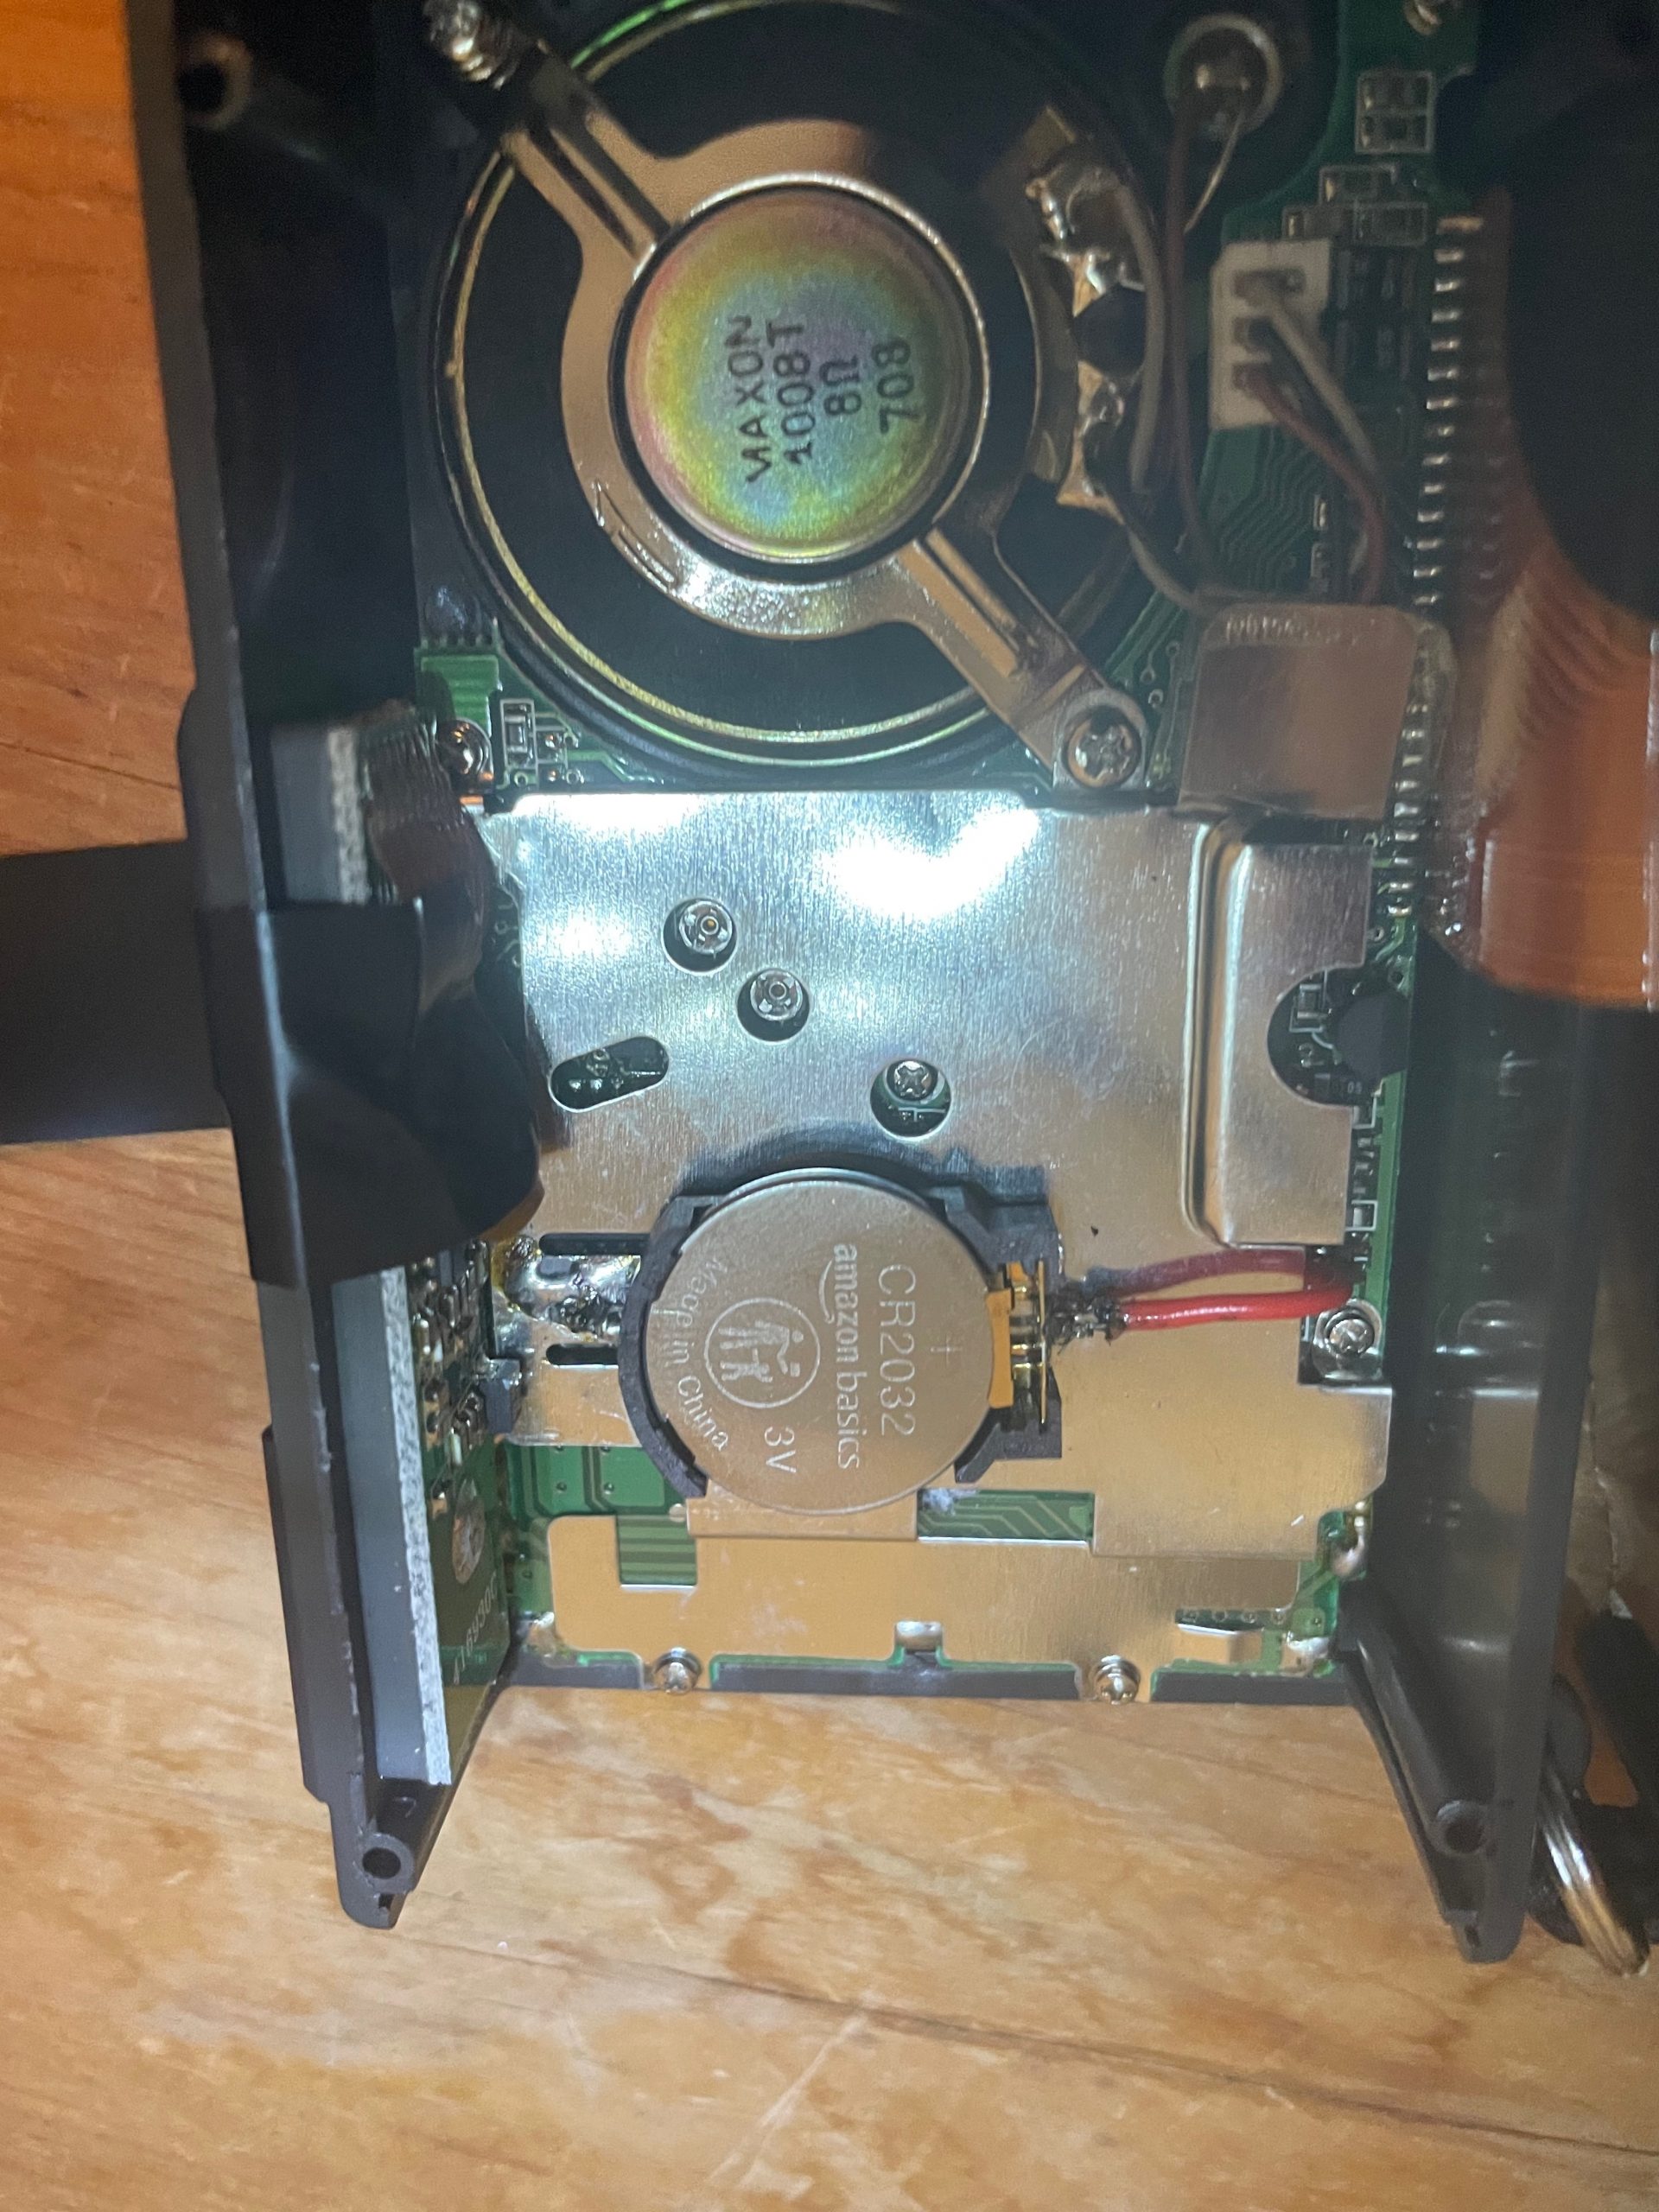
We will now place the button battery holder into the radio. Bend down the negative terminal of the battery holder so it naturally makes good contact to the shielding. Using tape or double sided tape, secure the battery holder to the metal shielding inside the radio. Then solder the negative terminal to the shielding making sure it makes good contact. Now strip the insulation off the red positive wire and solder it to the positive terminal of the battery holder. NOTE: I used electrical tape to tape the ribbon cable to the side of the radio out of the way, as I did not want to damage it soldering the negative lead of the battery cable onto the shielding.
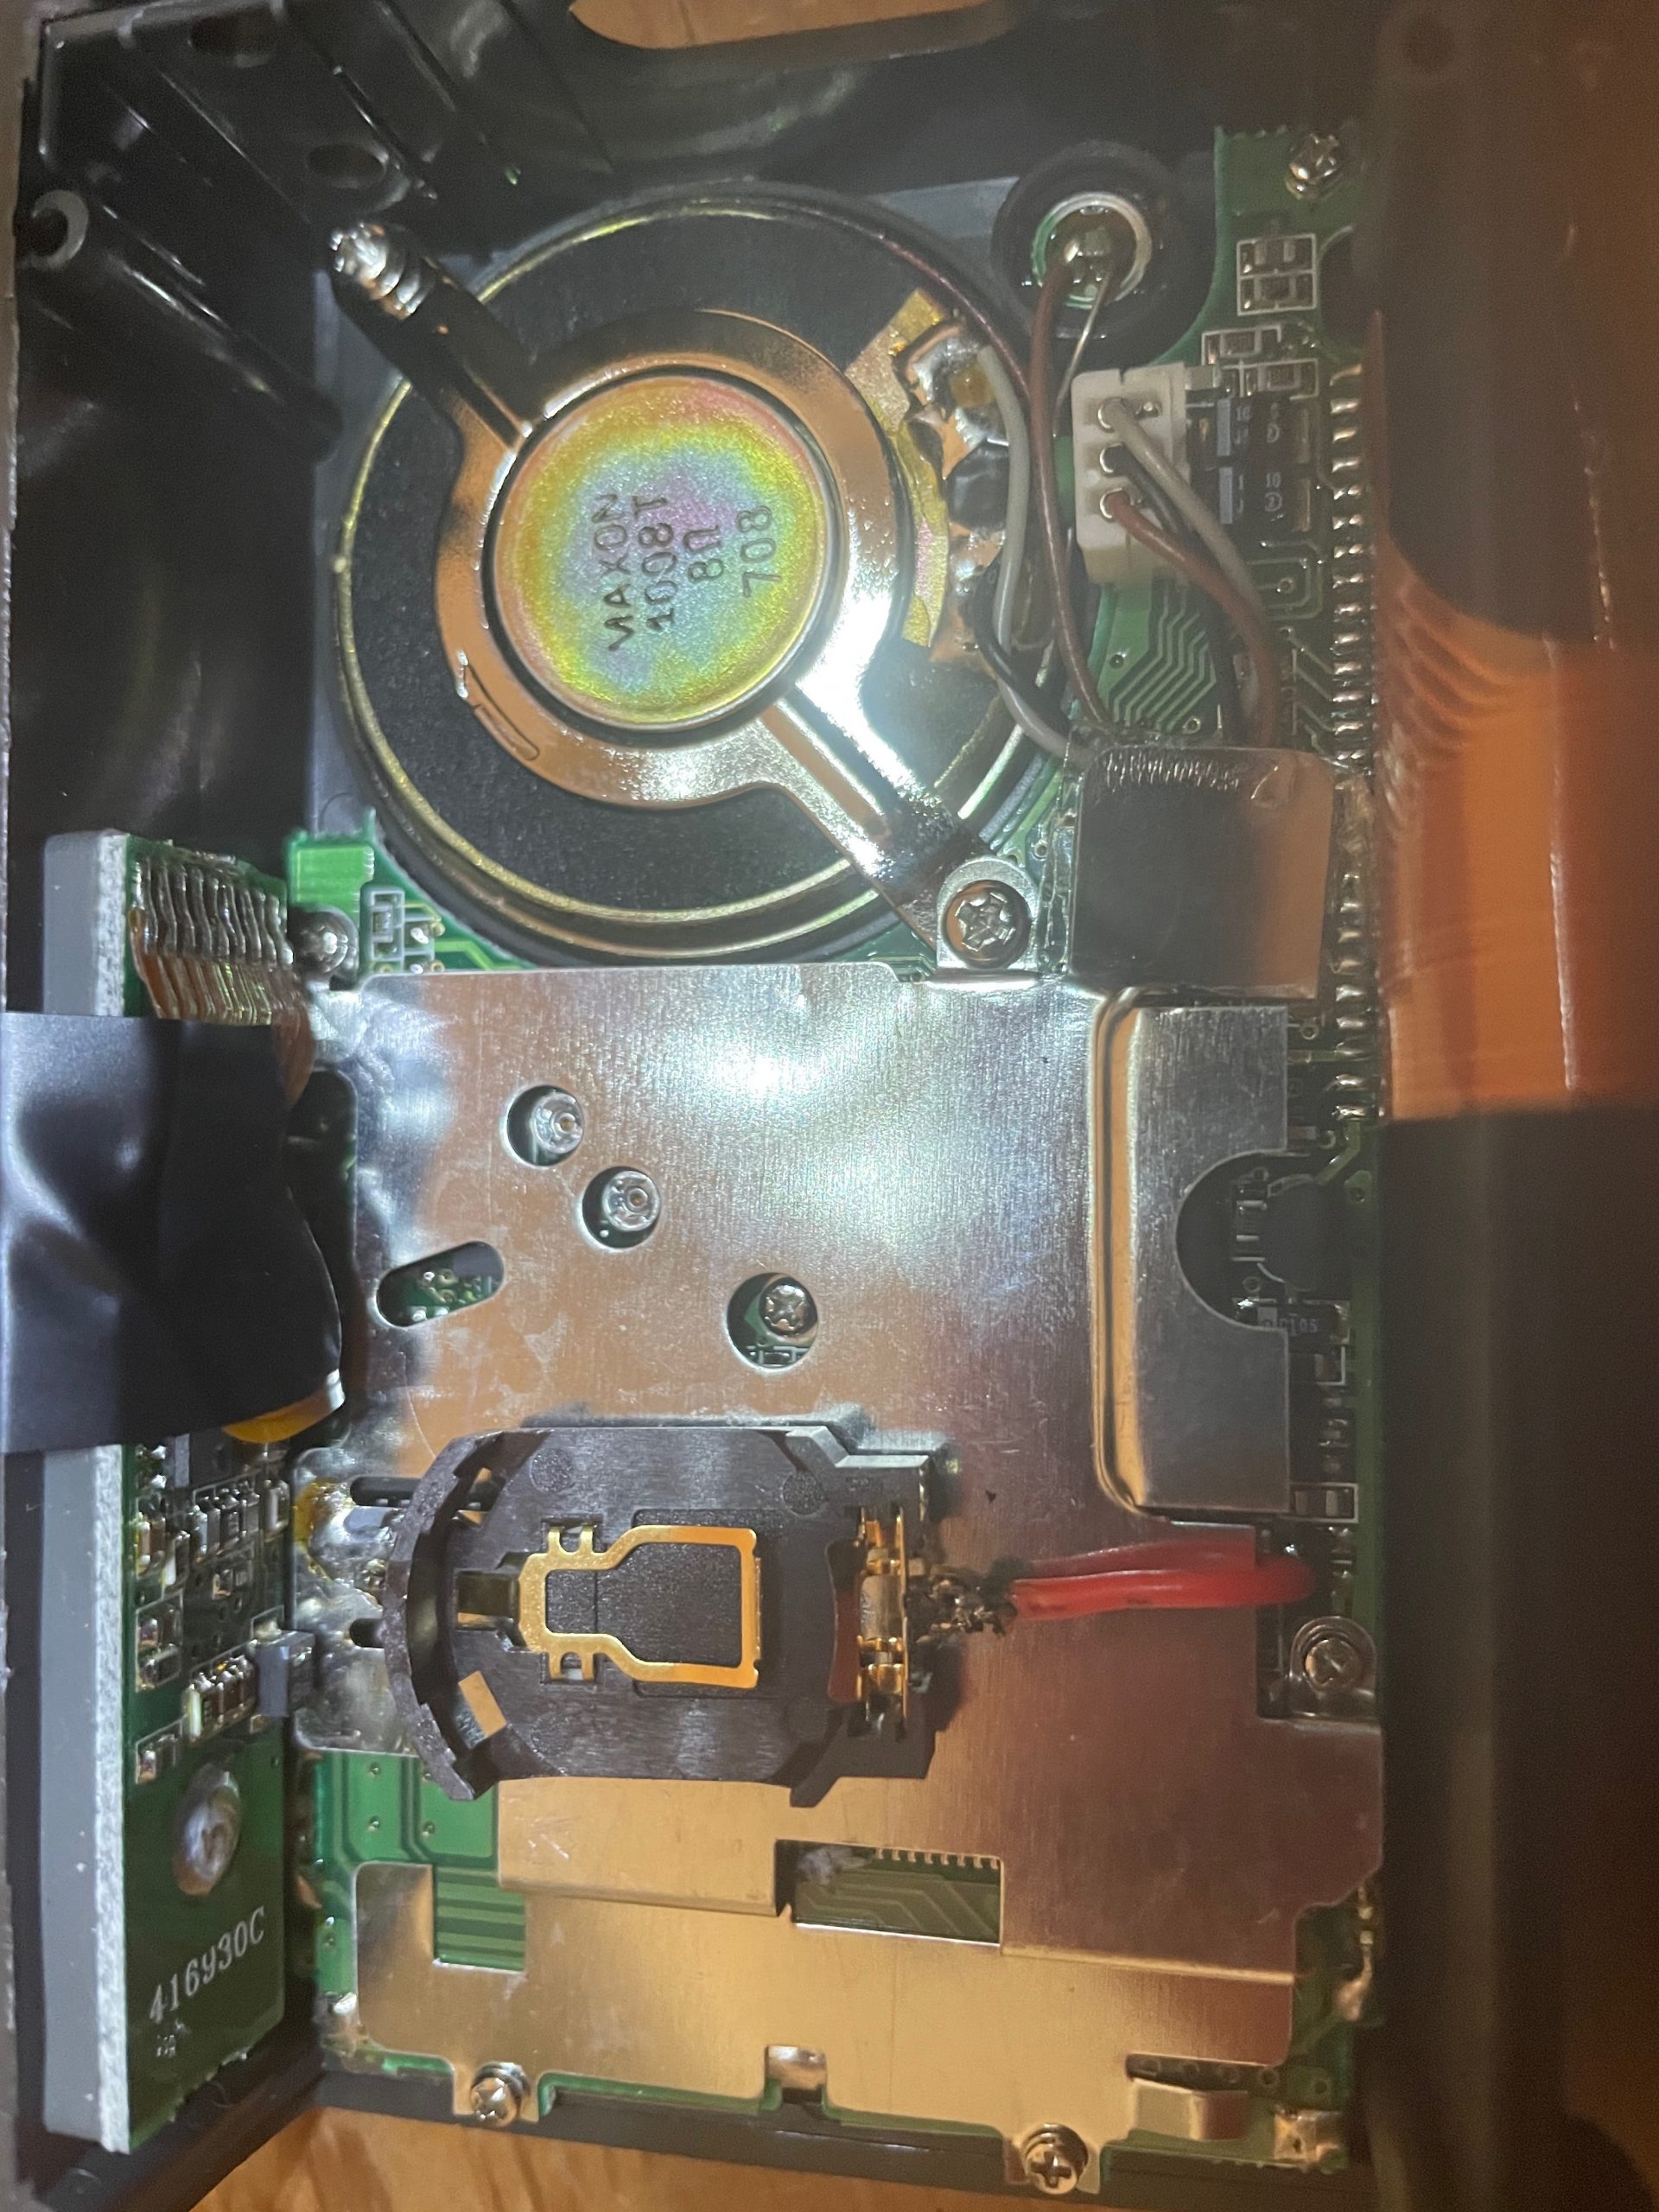
Place the battery into the battery holder.
Remove the electrical tape holding the ribbon cable to the side of the radio (If used).
Carefully reassemble the radio, once reassembled, attach the battery back, and hold down the function, and D on the keypad while powering on the radio to clear the Err 2 message. Turn off the radio, and power on again. If everything is working as it should. You will no longer receive the Err 2 message! (NOTE: Yes, I am using the 12v 600ma wall adapter to power the radio enough to test for the Err 1 message. There is not enough current to tx using the wall adapter, so do NOT try to TX, doing so may damage the radio!”
I hope you enjoyed this weeks blog! Please be sure to come back next week for more exciting content. If you wish to be notified when new content is posted, please consider registering, by clicking here.
Comments
This Old Radio – Replacing Memory Battery on the HTX – 202 & HTX – 404 — No Comments
HTML tags allowed in your comment: <a href="" title=""> <abbr title=""> <acronym title=""> <b> <blockquote cite=""> <cite> <code> <del datetime=""> <em> <i> <q cite=""> <s> <strike> <strong>