
On The Road And On The Air – Installing the Yaesu FTM-500DR
On The Road And On The Air
Installing The FTM-500DR
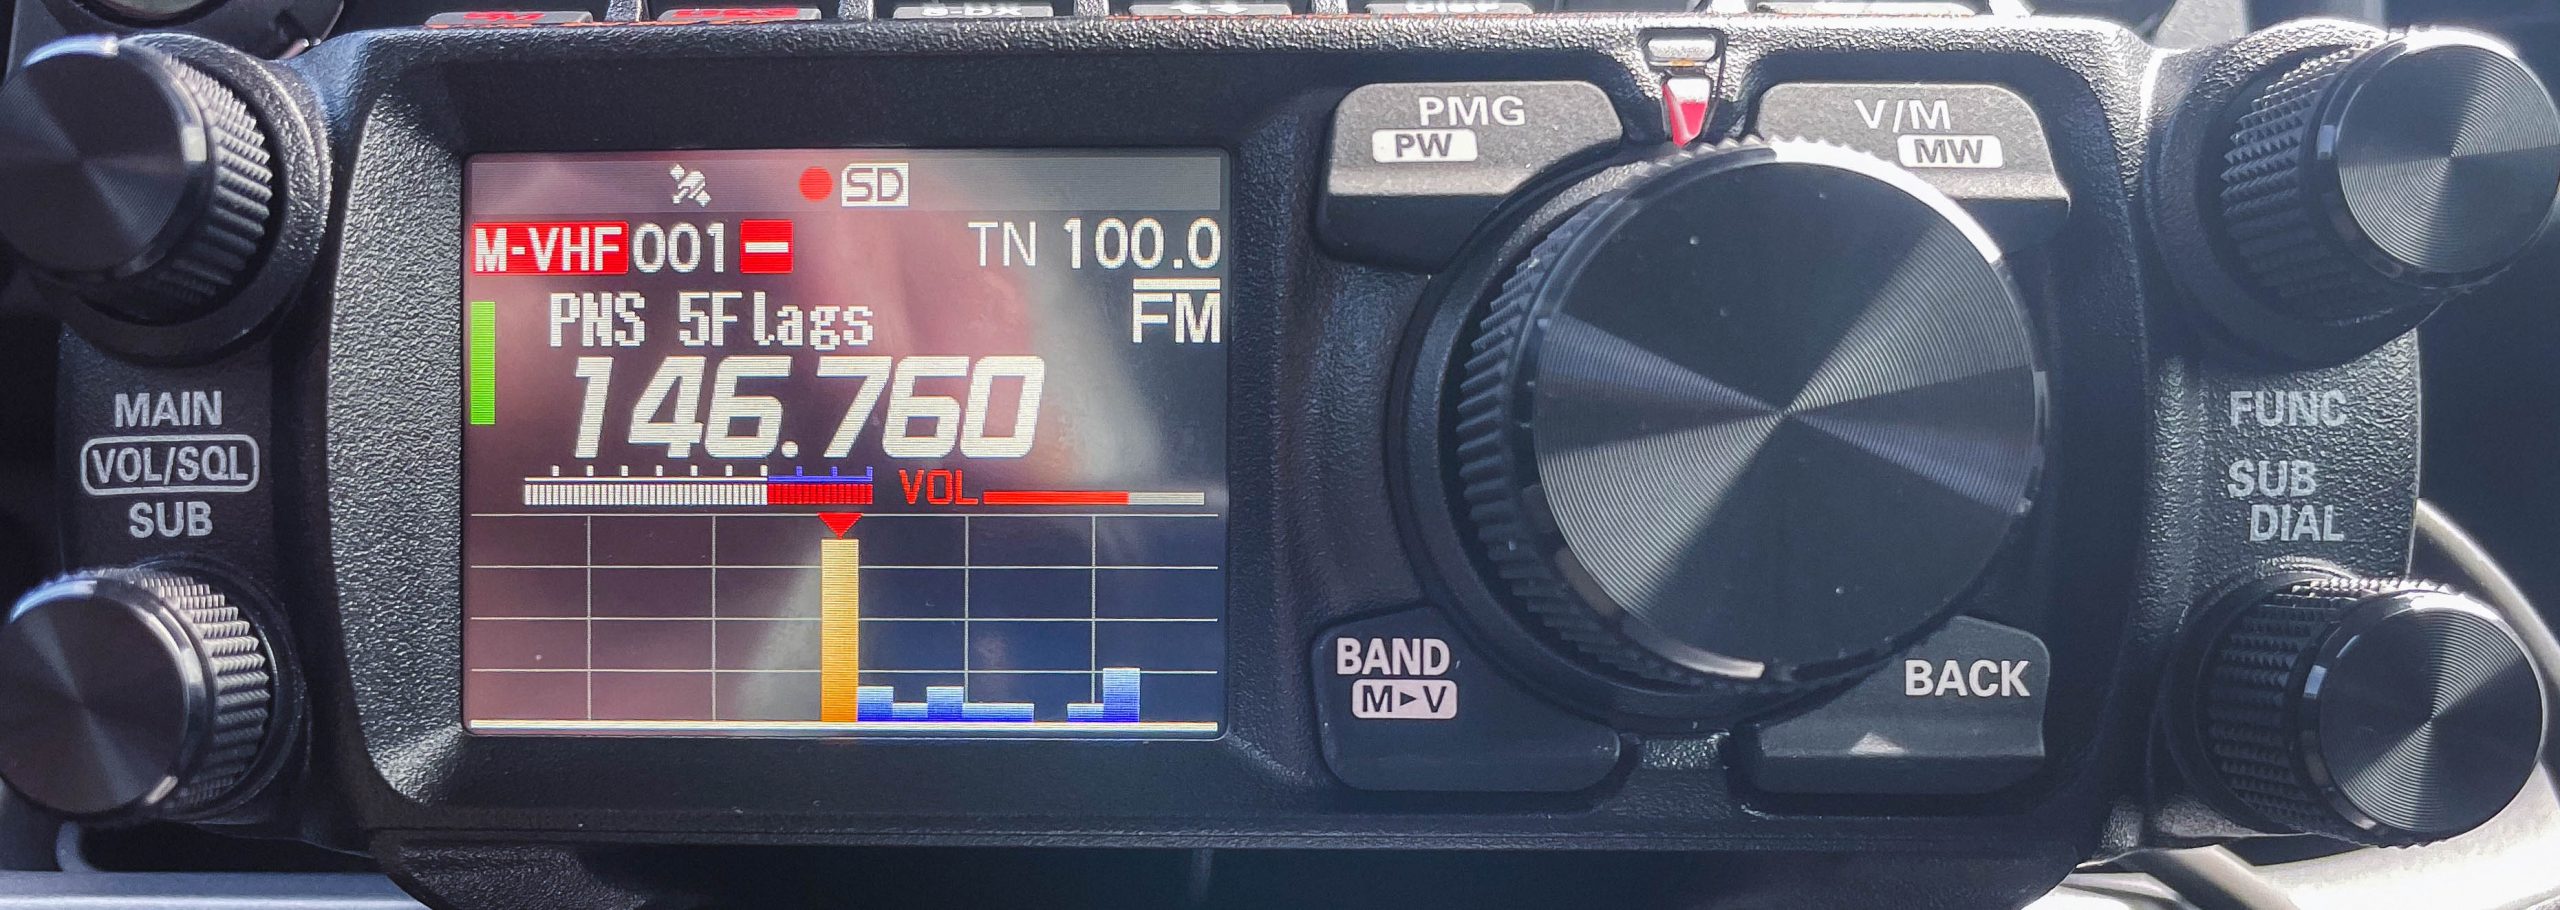
Yaesu’s flagship DualBand 2m / 70cm Radio.
One of the things I was most looking forward to once I got settled was getting settled and installing an new amateur radio station ( looking forward to HF somewhere down the road), but any good amateur loved to talk, whenever and wherever they are. This includes their automobile! So looking around at radio’s that would be a good fit I settled on the Yaesu FT-500D. While I liked the bigger screen of the Yaesu FTM-300DR and the FTM-400DR. There just are not many places to mount the larger screens these days. Looking at the pictures online, it looked like the detachable faceplate would fit nicely in the center console cubby of the Bronco Sport below the InfoTainment display.
I ended up ordering the radio and most of the accessories from *DX Engineering. The selection and ordering process online was easy and mostly trouble free, (I ended up reversing the shipping and billing address!), fortunately this was caught by their staff who called and politely set me straight!! 100% A+ service by DX Engineering!
Here is what I ordered.
The Yaesu FTM-500DR a 50W Digital (C4FM) / Analog FM 144m/430Mhz dual band mobile Transceiver.
Yaesu Transceiver Mounting Brackets MMB-103 (I ended up not using this! As you will see later.).
DX Engineering RG-8X PL-259 Low-Loss 50-ohm Coax Cable 3FT – (DKE-8XDX003)
* For the MFJ-864 SWR Meter.
MFJ 864 SWR/Wattmeter
DX Engineering DXE-281 Communications Speakers. ( I ended up not using this.)
* Yaesu Seperation Cables CT-132 (See note in blog).
* Larsen Mobile Antenna Mount NM0MMRPL. (See Notes in blog.).
So after a couple months of procrastinating, and the radio sitting in the box, I finally set about installing it in my Bronco Sport!
I had a really good idea how I had wanted to do this! Taking most of my inspiration from the zero drill installation of the Kenwood TMD-700 in my 1998 Ford Ranger.
So the first task, was to find a way to run the power cables from the battery through the firewall. This was accomplished by a rubber through plug to the left of the brake pedal. I removed the plug and used the tip of a drill bit to push the power leads through (I punched two holes for each of the positive and negative leads, removing the fuse and fuse holders).
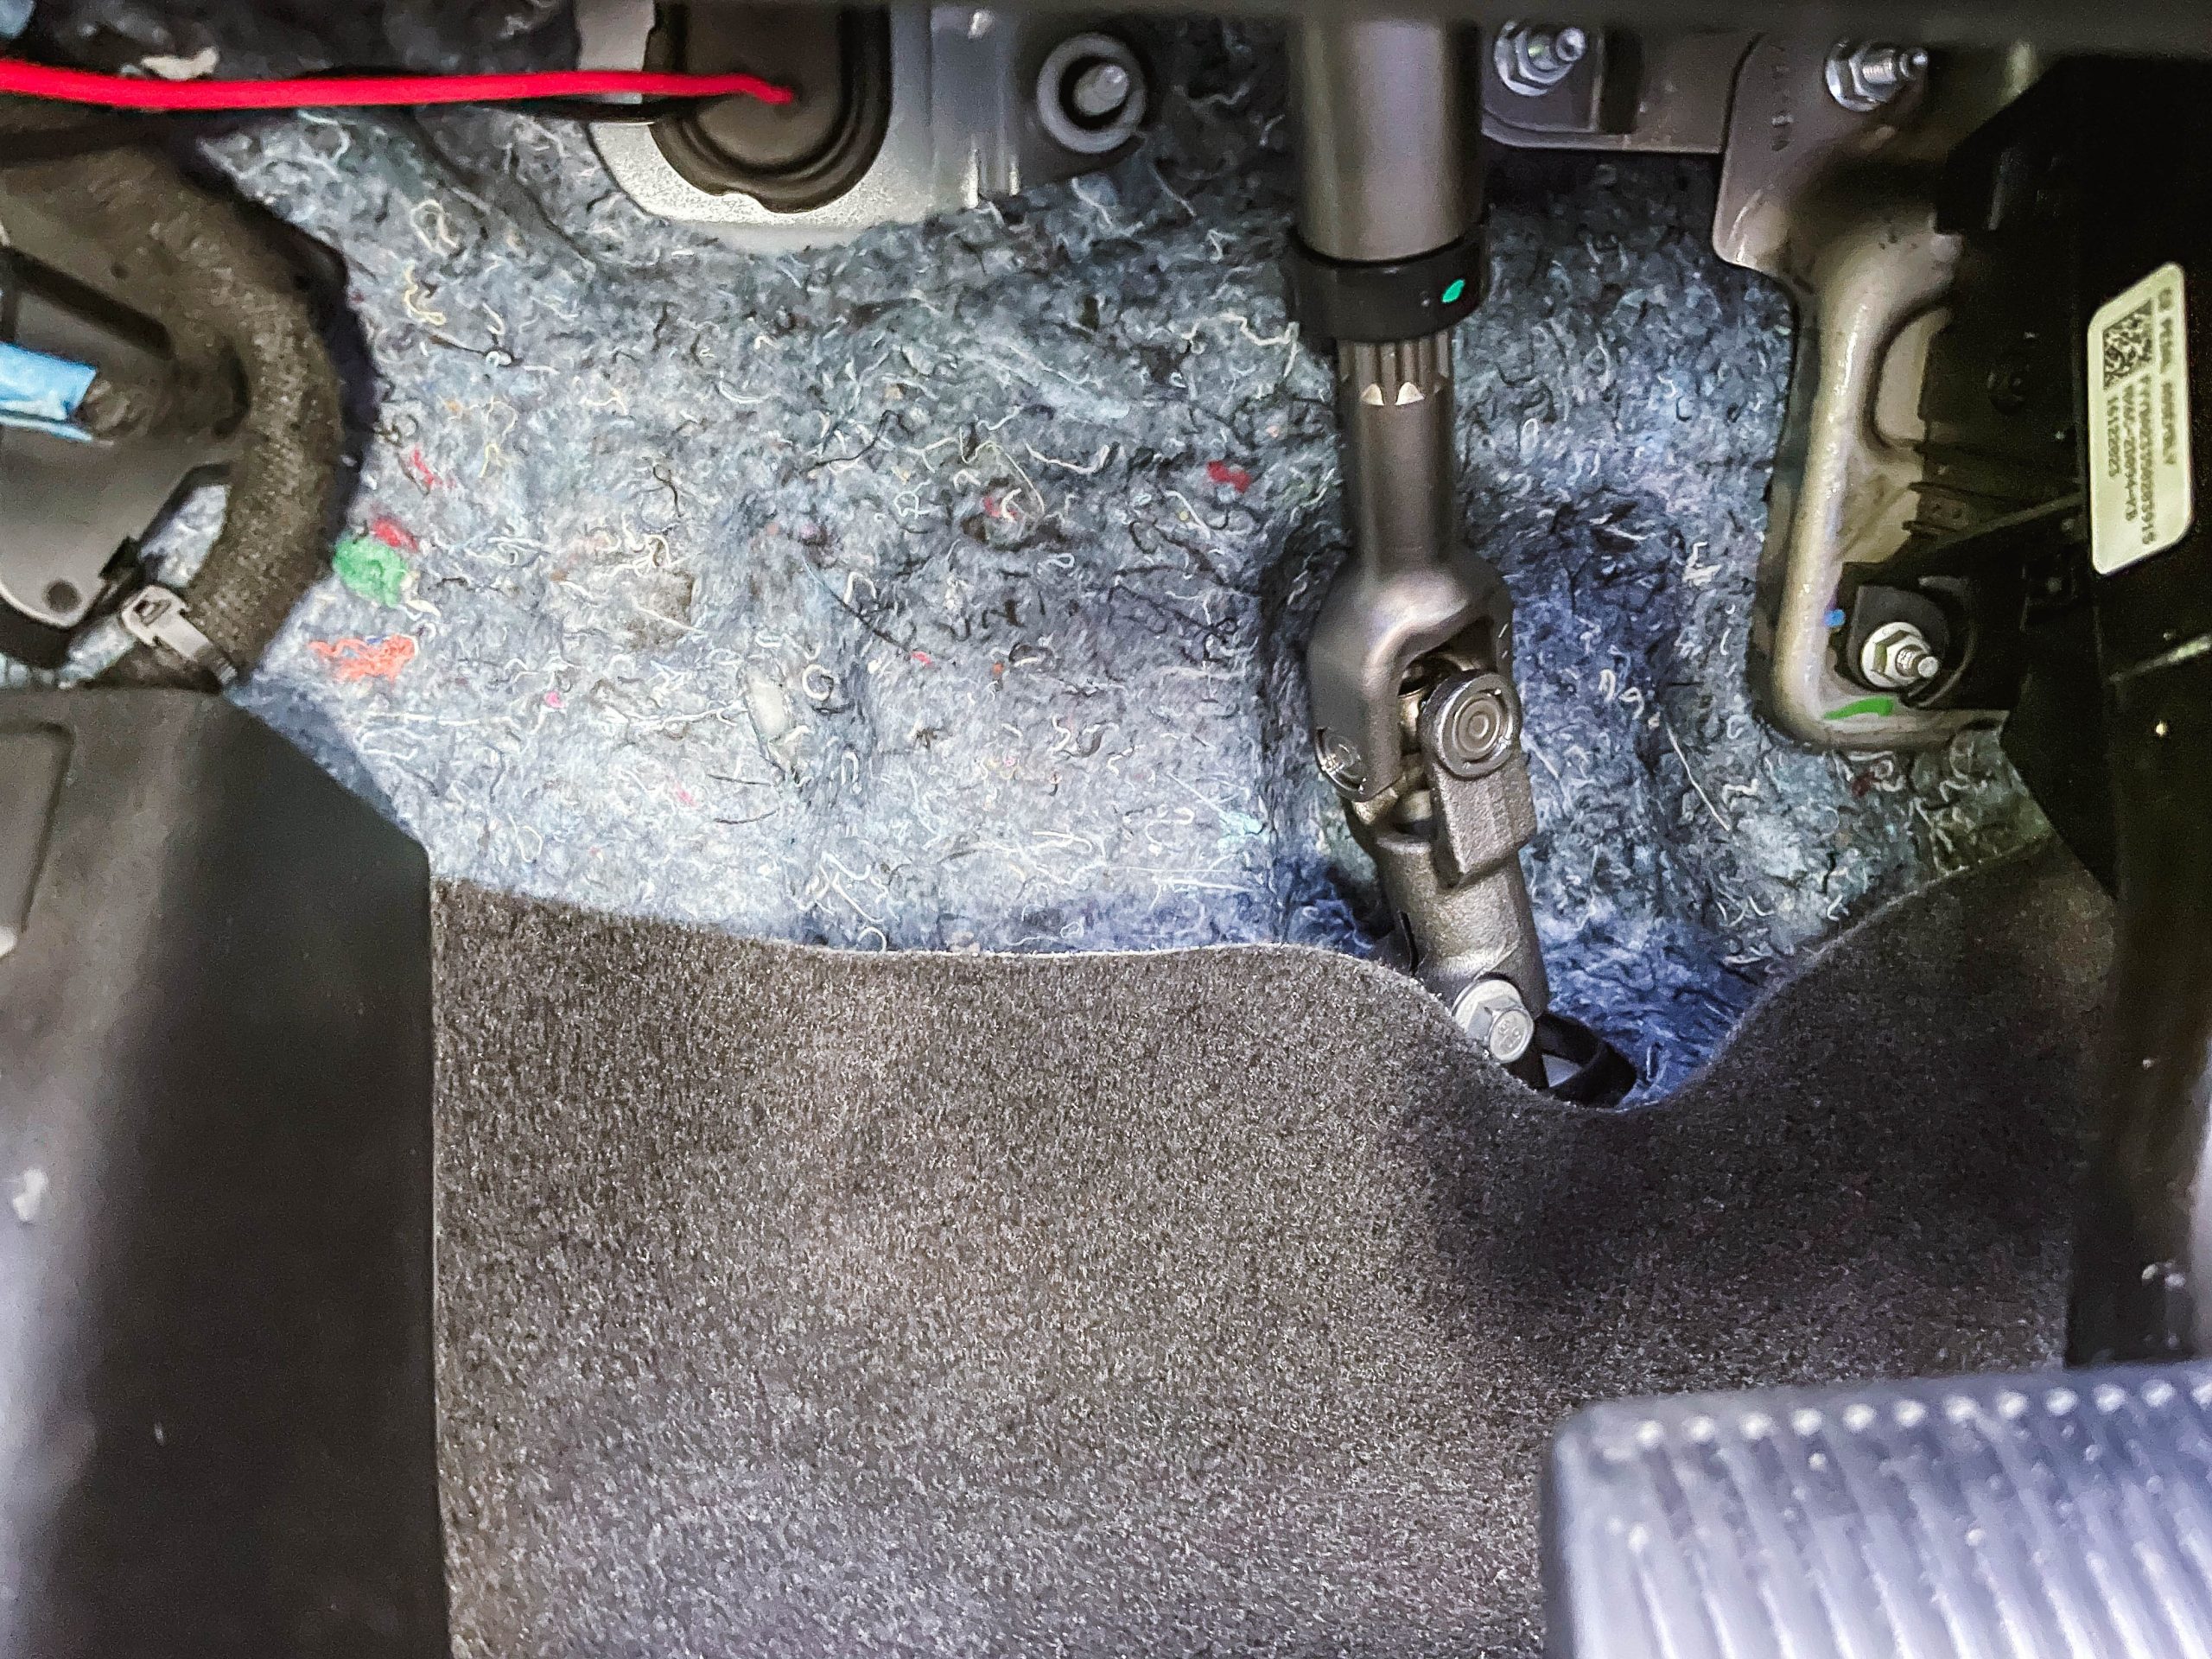
I then ran both leads under the plastic molding under the door back to where the radio mounts under the drivers seat.
I then attached the positive and negative leads directly to the battery terminals as pictured.
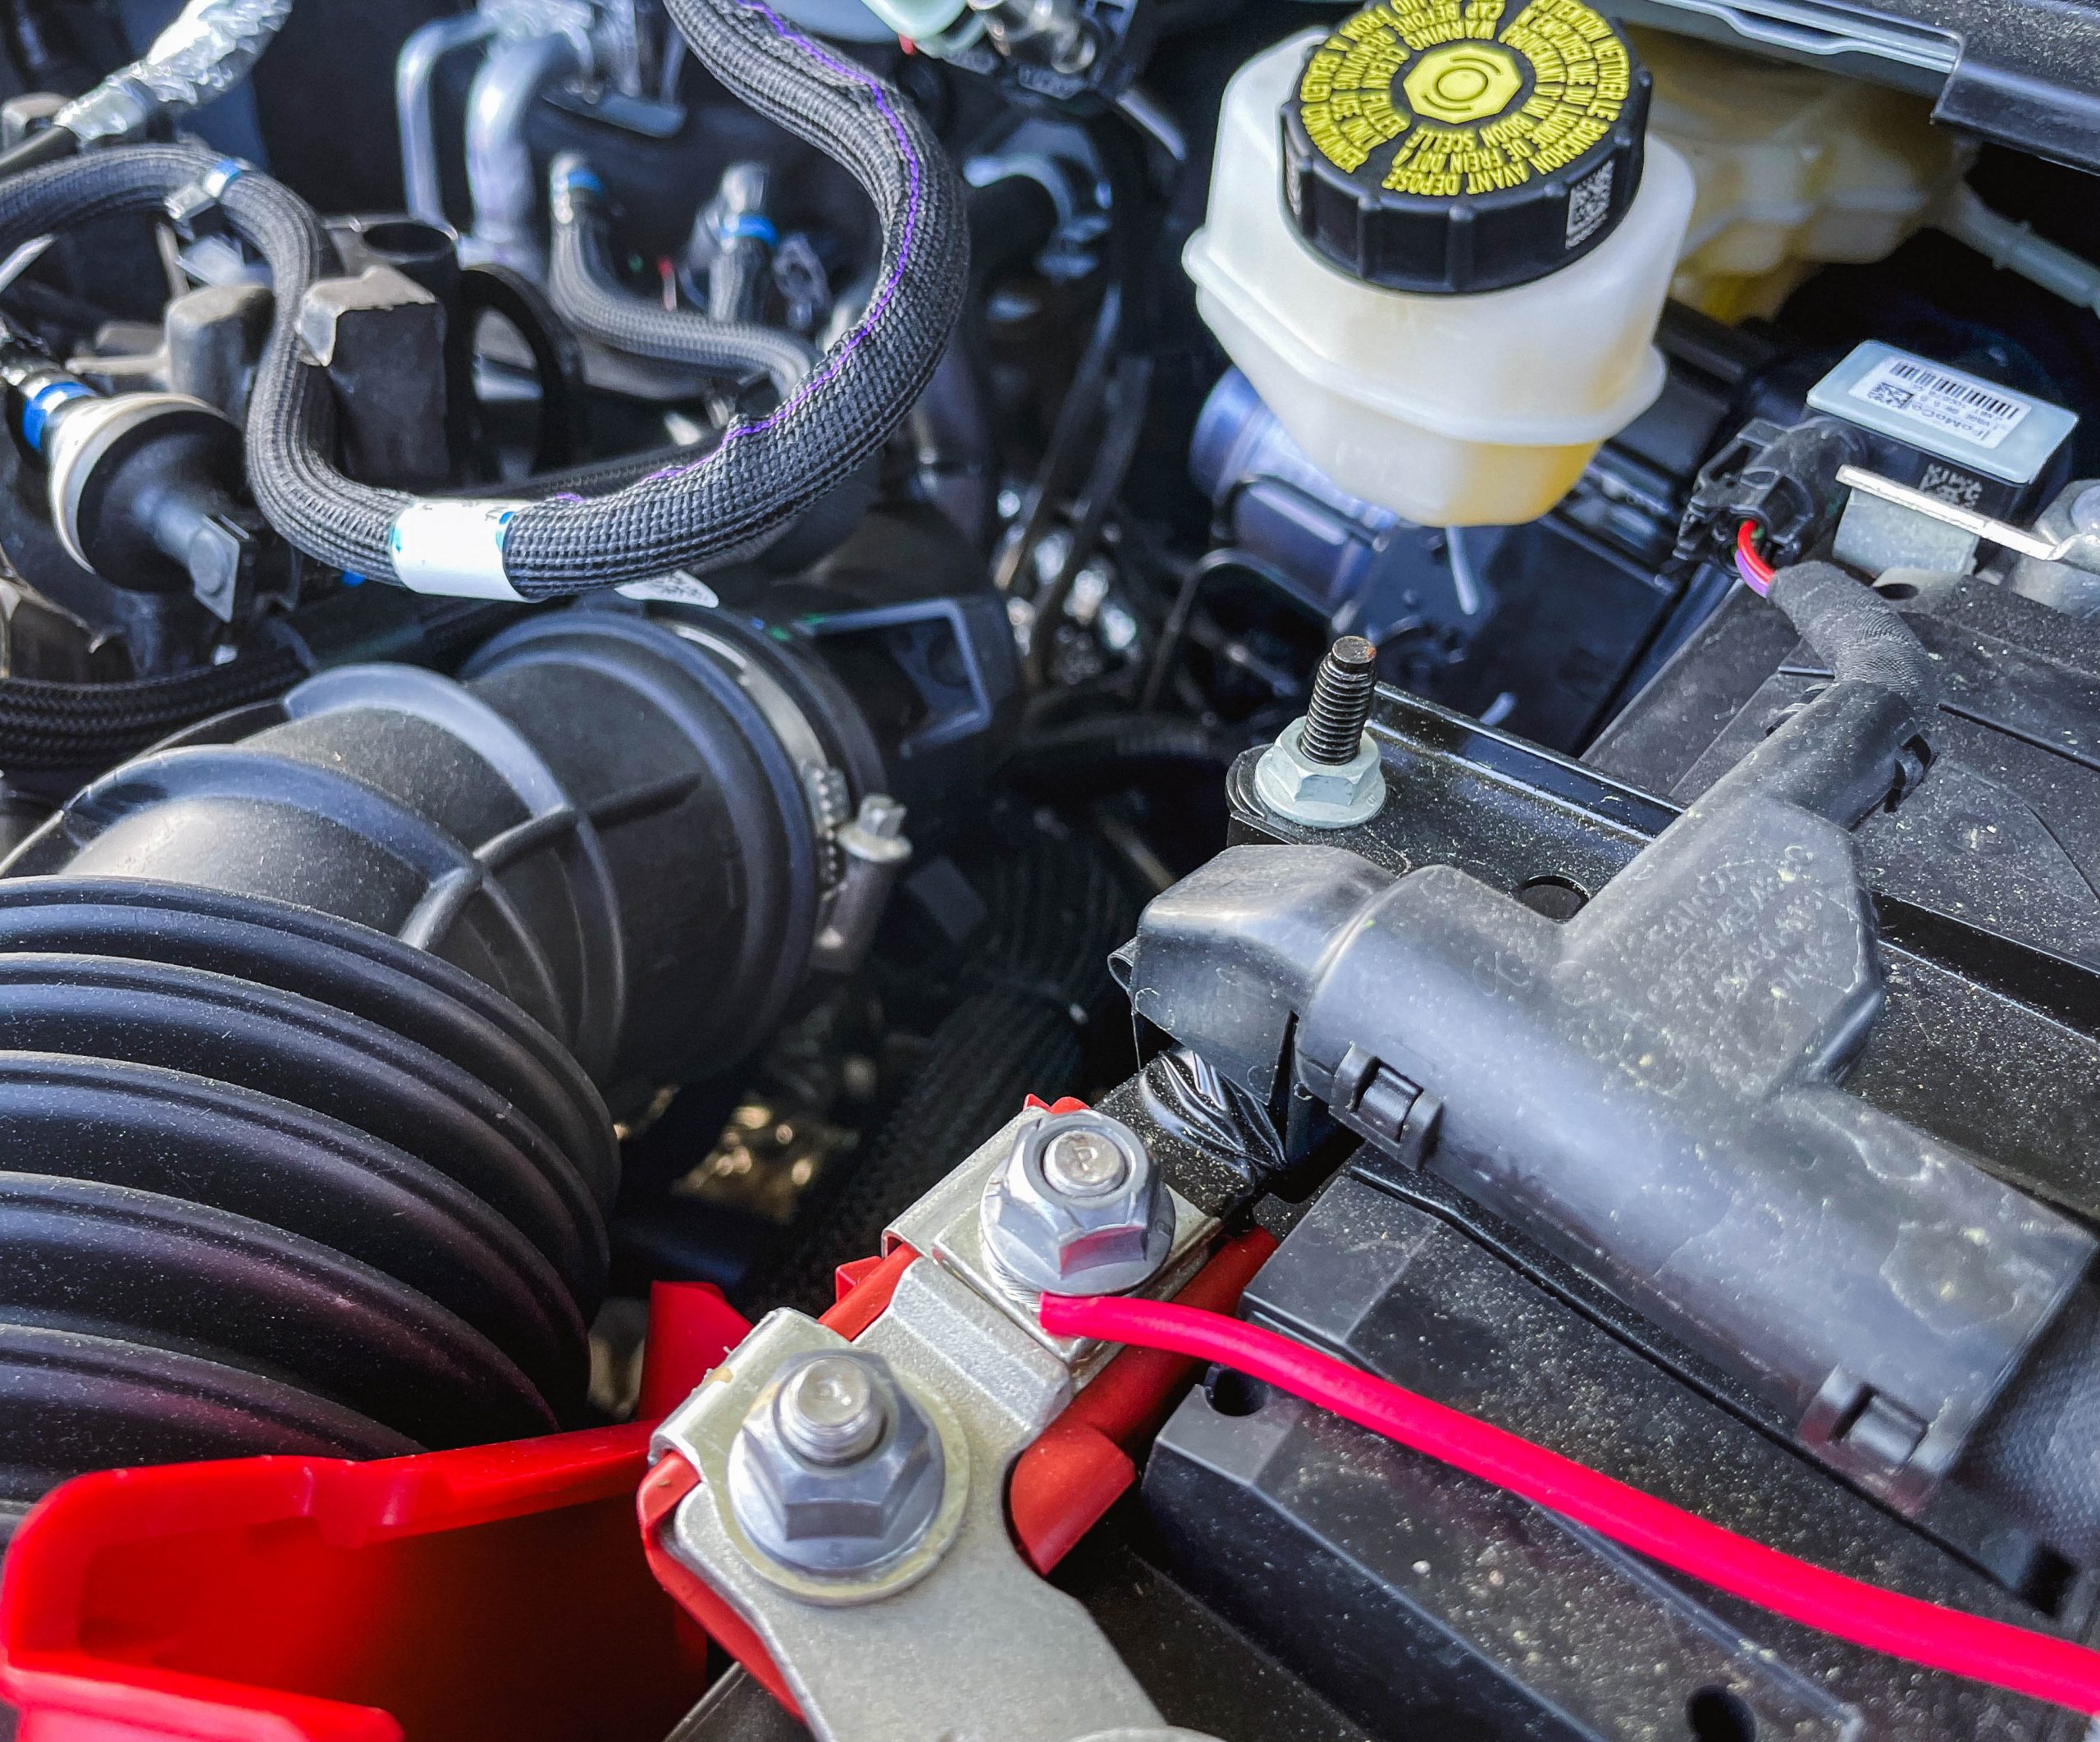
I then attached the fuse holders and fuses.
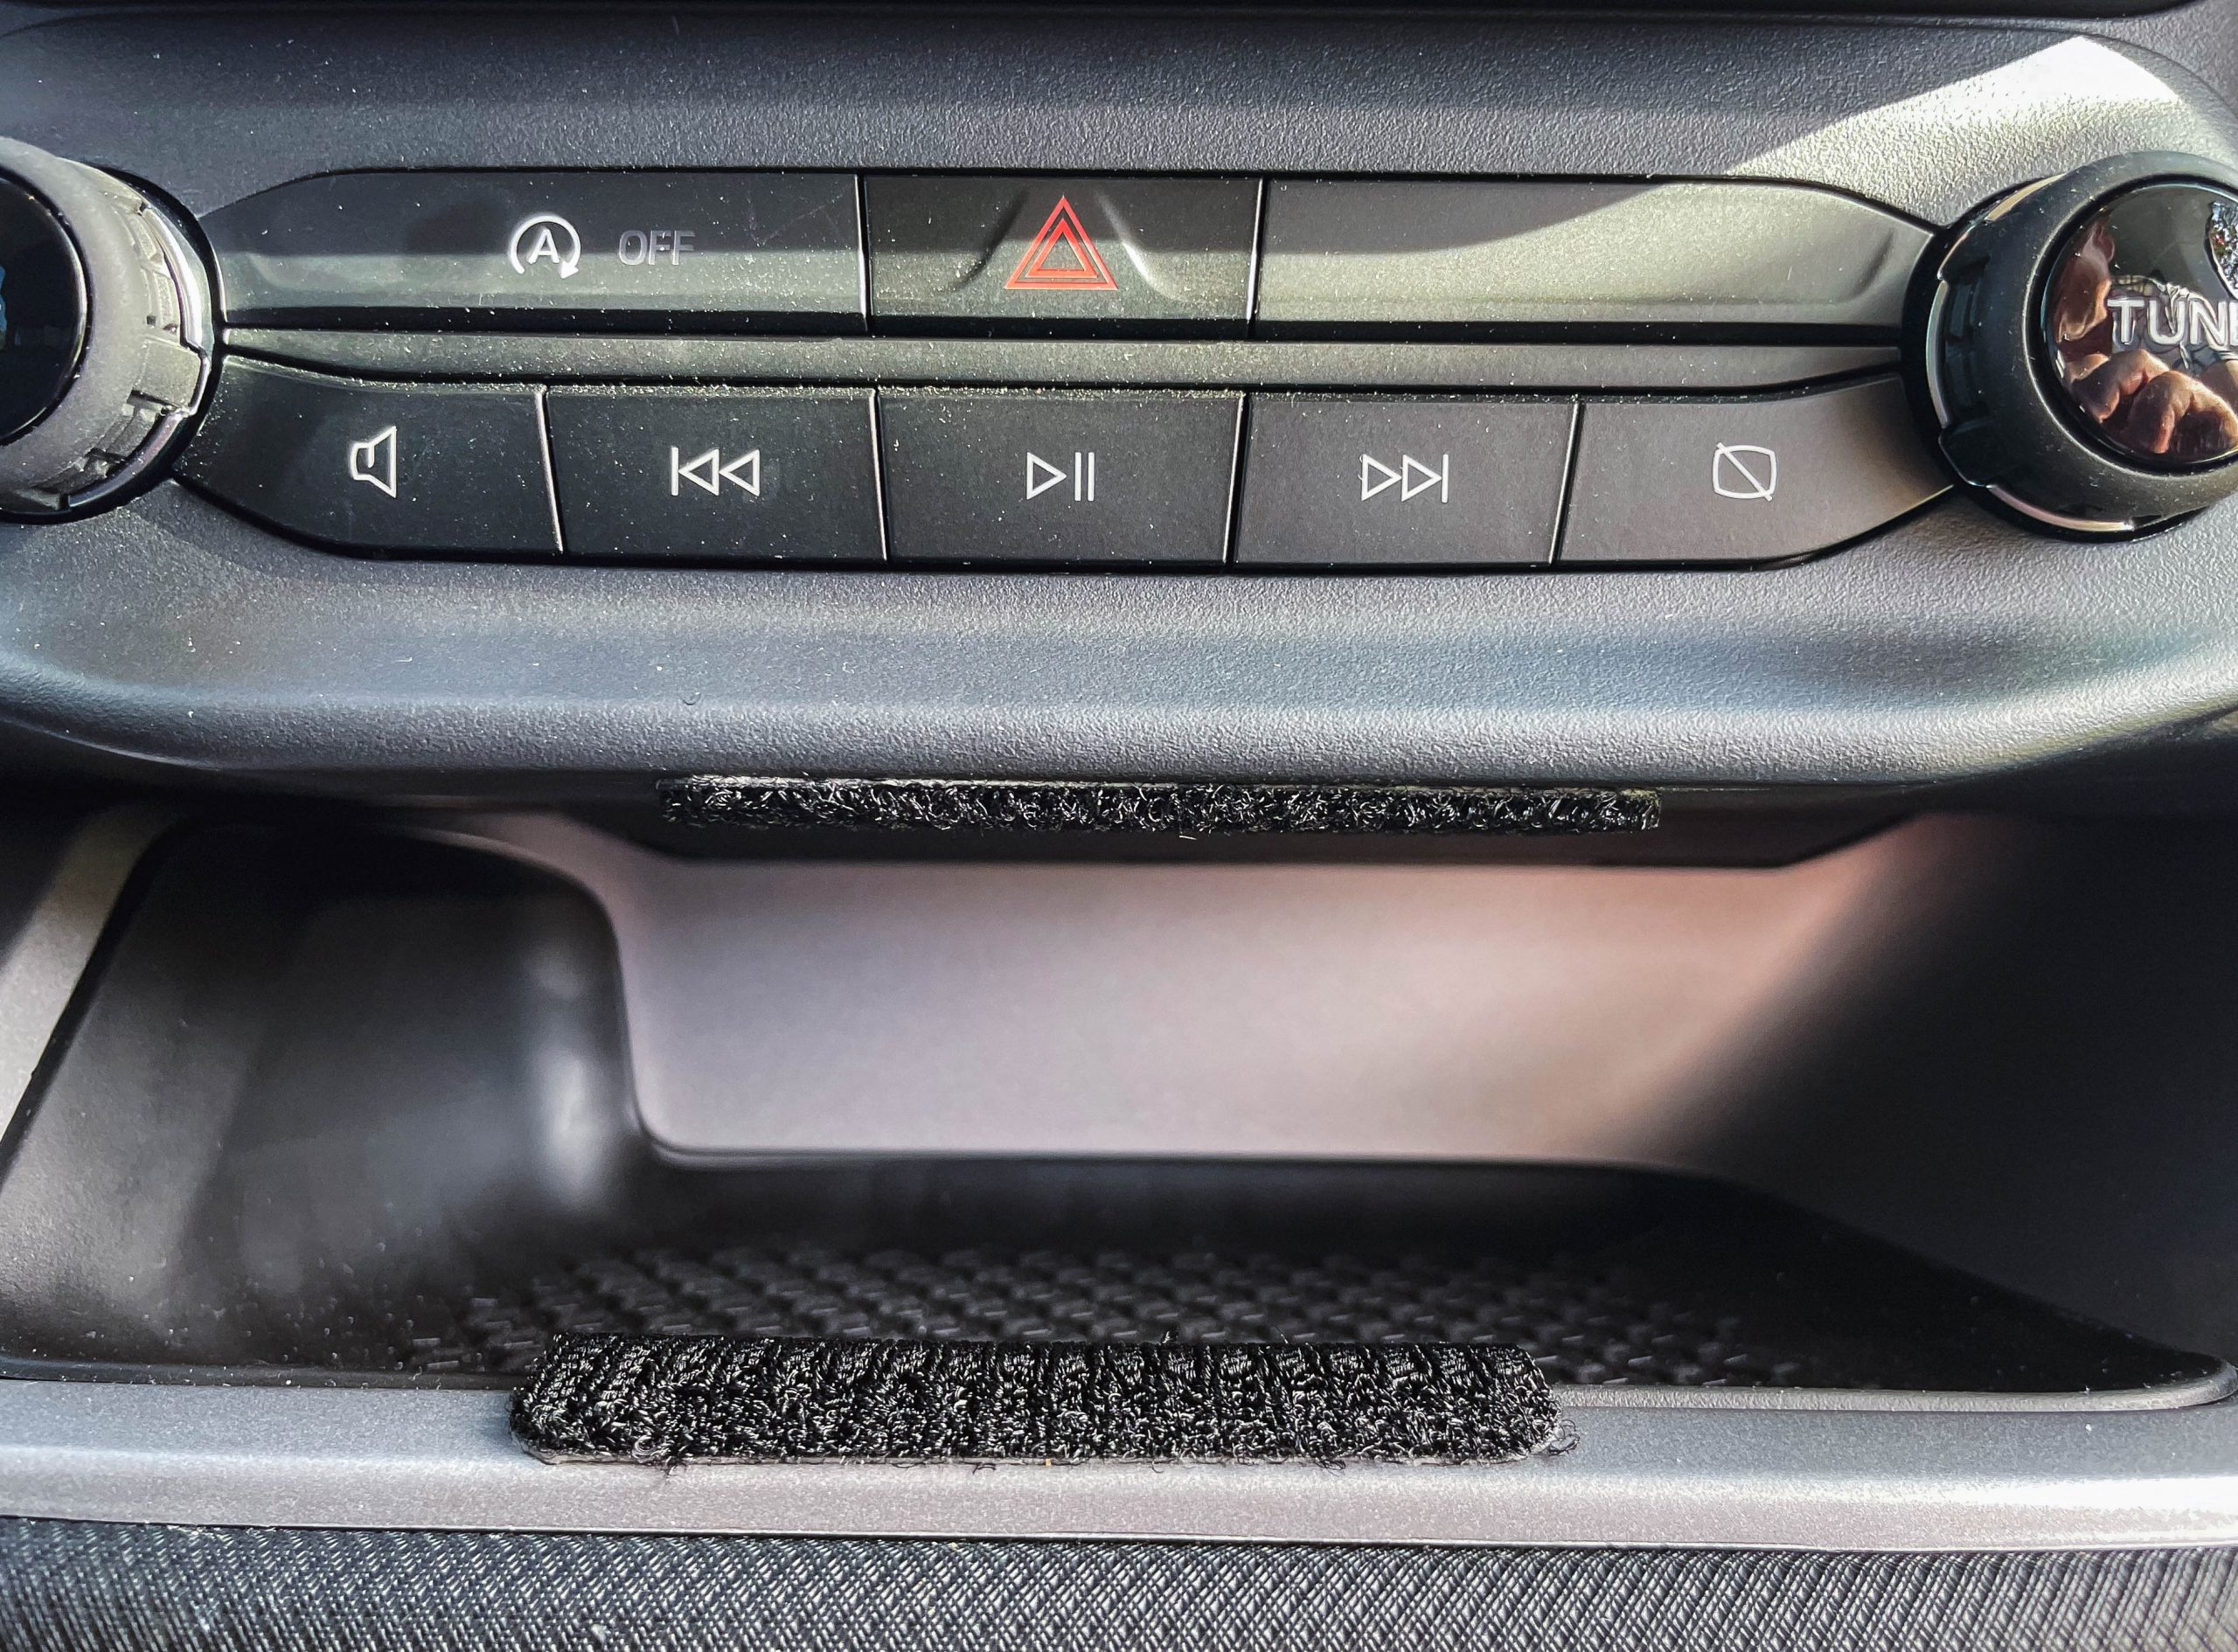
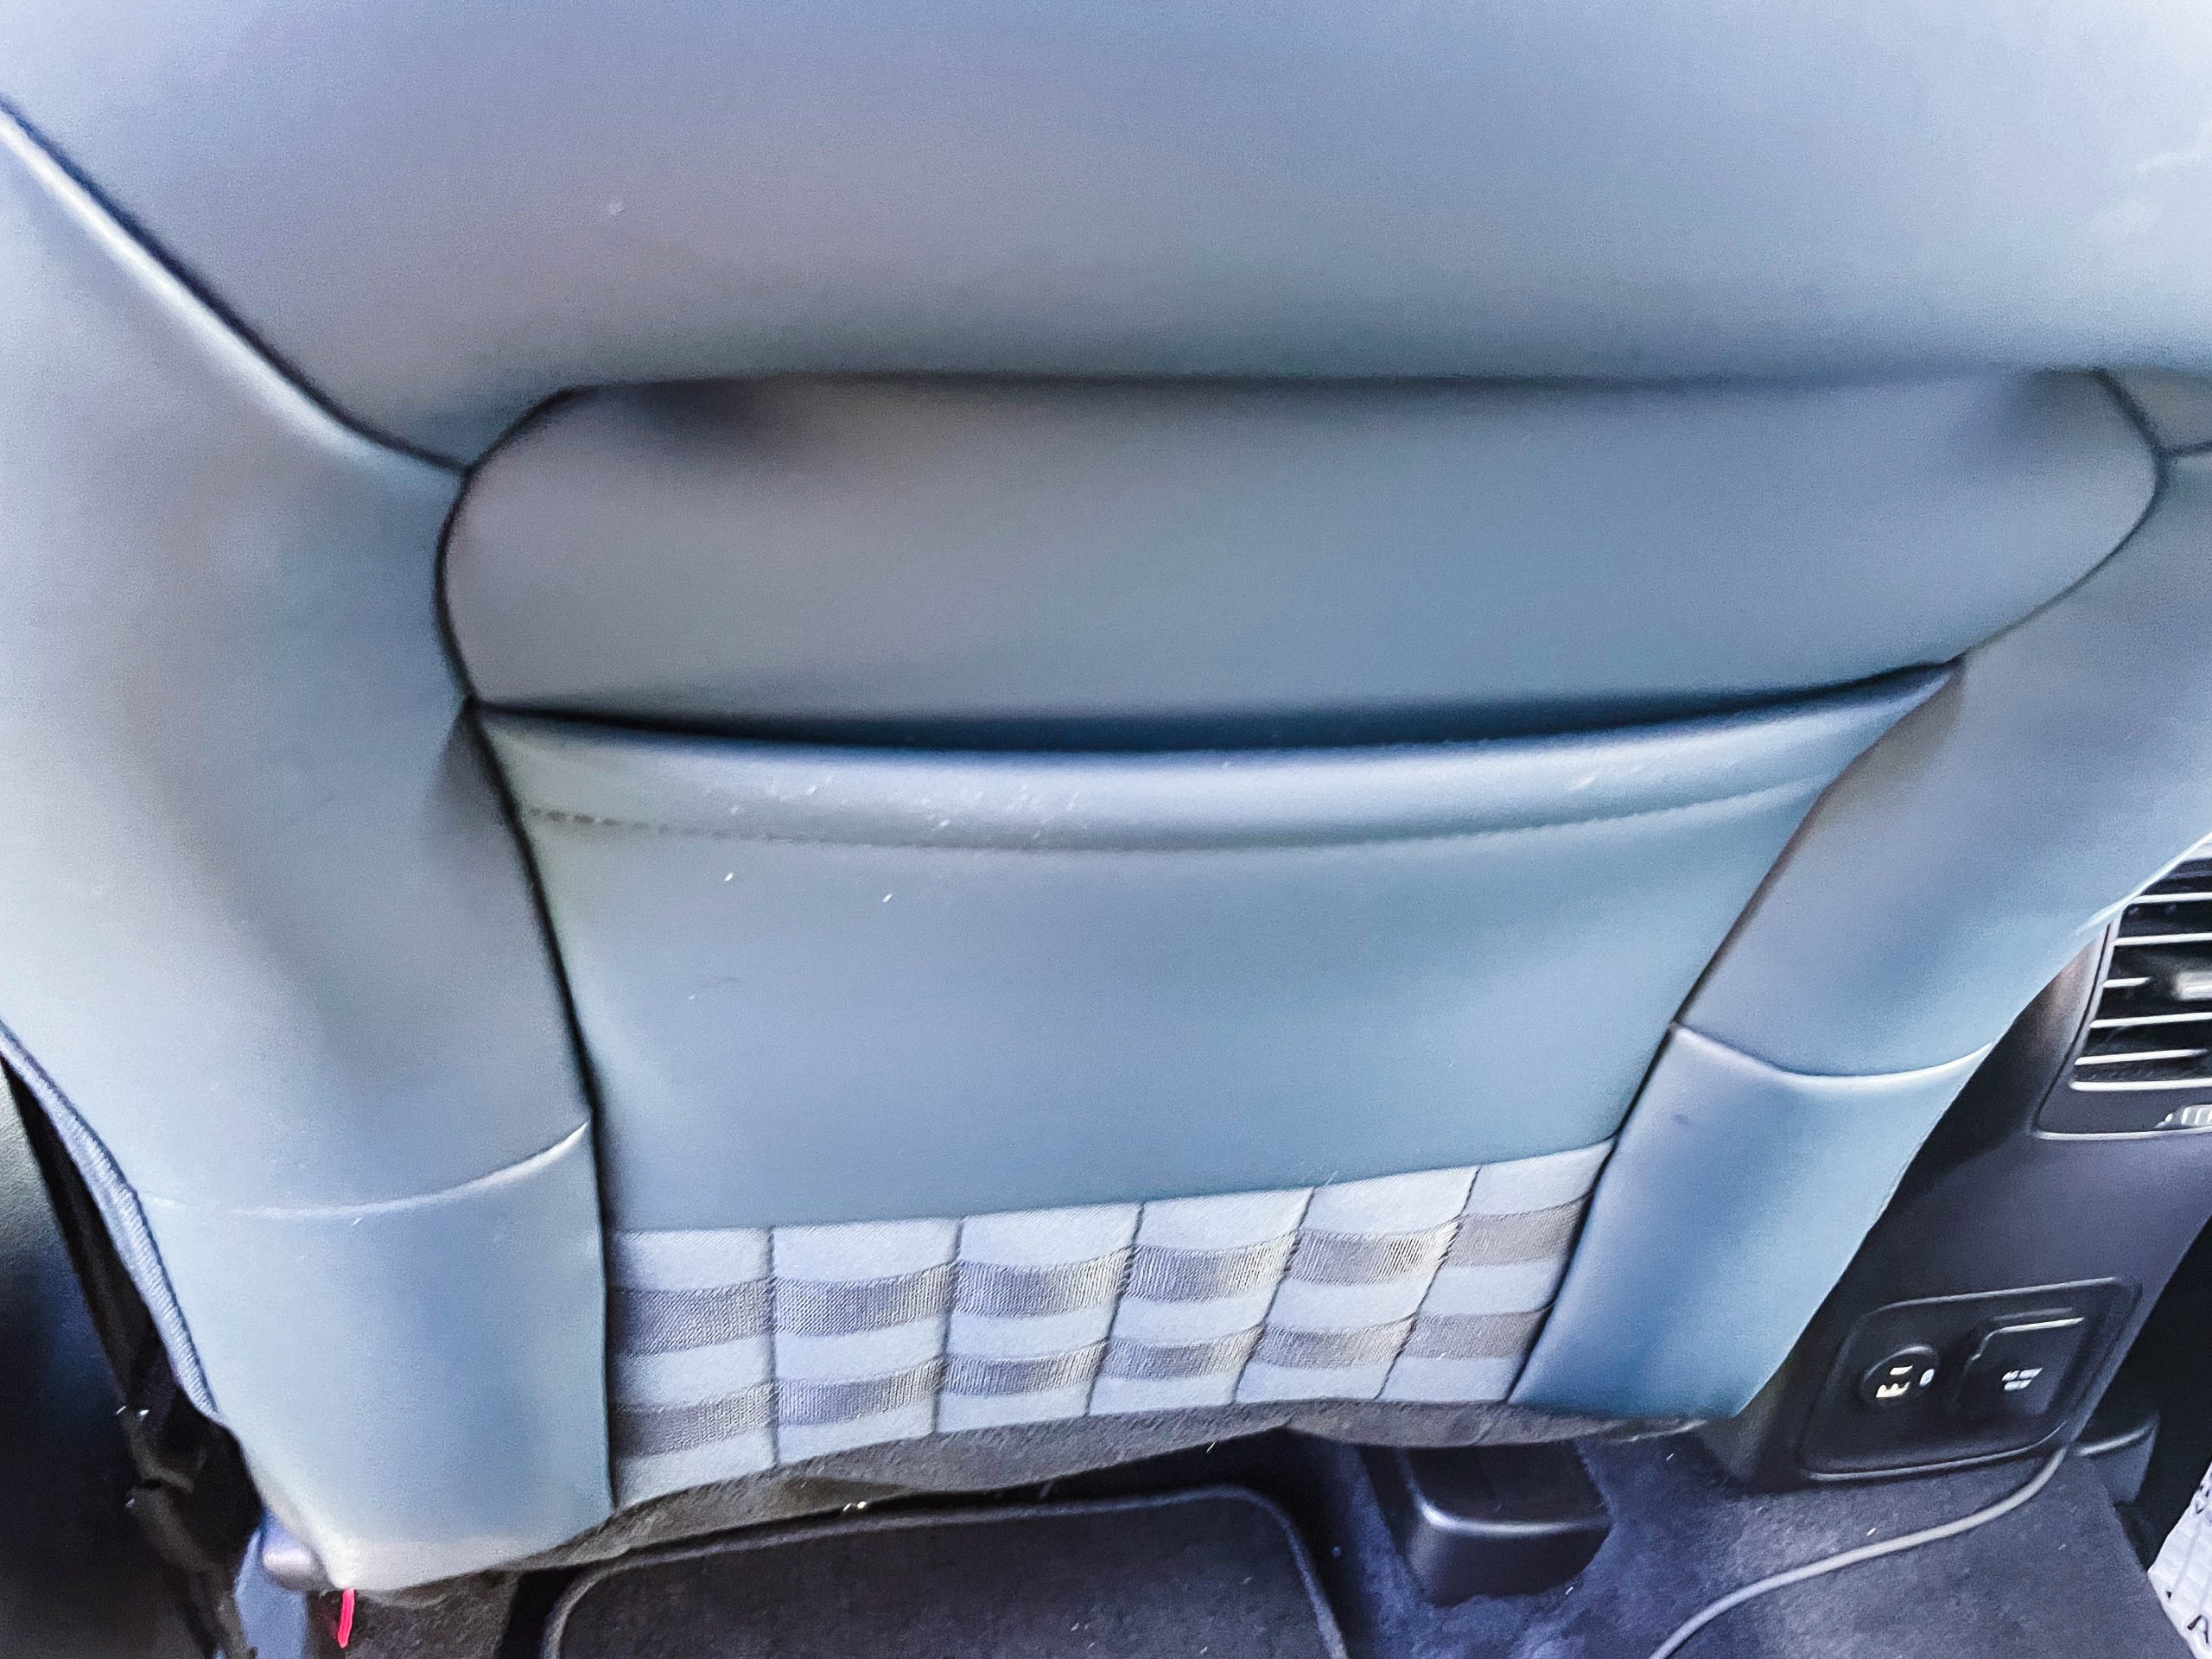
As mentioned above, when looking at the Bronco Sport, I had a fairly good idea that I wanted to mount the remote head in this space in the center console. However, I ran into a problem where the remote mounting bracket just would not fit! So that seemed to be a non starter!
I then looked around online, and found a video of a Bronco Sport mounting the control head of a GMRS radio using a bracket that clipped onto the plastic of the cubby. The mounting bracket of the radio, as a “tripod” screw in the middle for attaching to it’s bracket and I drilled out the ProClip to accommodate this, however the screw was too short for the bracket! Going through my camera gear, I found a bold that would fit, but it was too long, and started deforming the Yaesu faceplate bracket. So this was another no go!
I then figured I could use some heavy duty Velcro I bought from Amazon to secure the radio to the carpet under the driver’s seat. This worked well, but I felt the control head stuck out too far, to be ergonomical to read the display while driving. It just did not feel right!
So back to square one!
My next idea was to make a template of the shape of the top of the cubby, and have a custom piece of plywood made at Home Depot, that I could fix the mounting bracket to and then Velcro it into place inside the cubby. Then then light bulb went off, and I had a moment of epiphany! While the mounting bracket would not fit in the space, the back of the control head would! So if I could cut the Velcro to fit along the top and bottom of the control head, there should be enough of a hold to keep the control head in place during vehicle operation, and also while operating the control head!
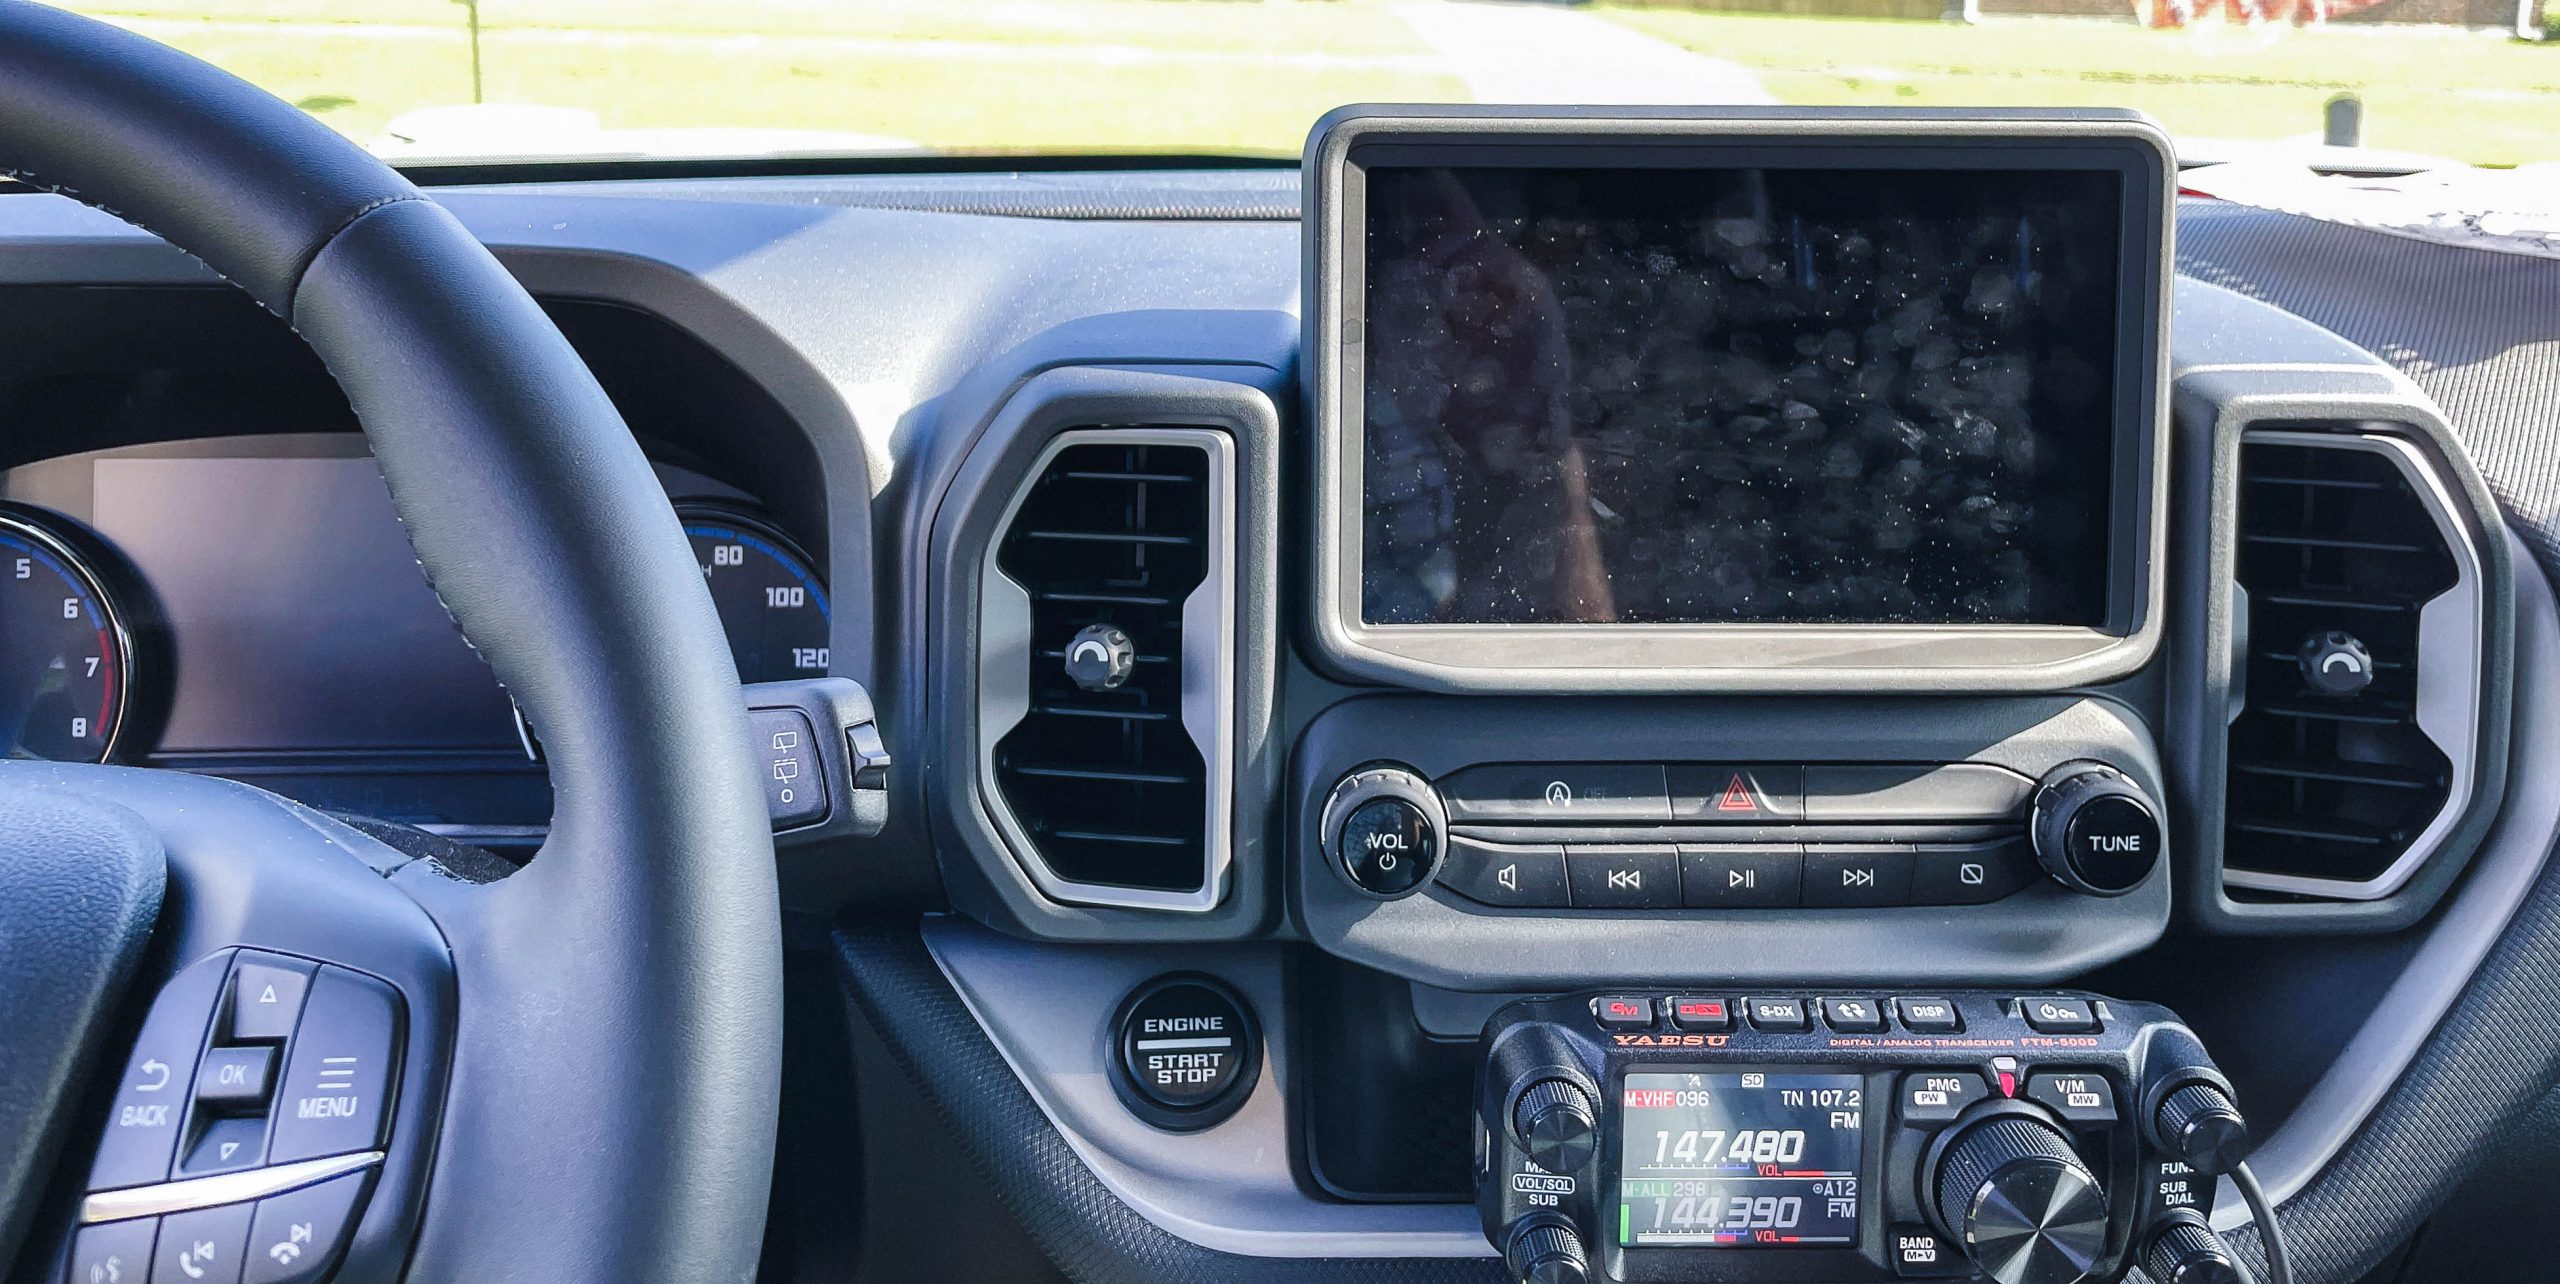
So I cut the Velcro to fit the control unit, affixed the other side to the tops and bottom of the cubby, and proceeded to pray! VIOLA!! Not only a perfect fit, but the Velcro held the control head in place!

 Next came the task of fitting the radio under the drivers seat, I was originally concerned there would not be enough space under the seat due to the power seat mechanism and heating, but there was a sunken out area of the floor, that almost perfectly matched the footprint of the radio unit!
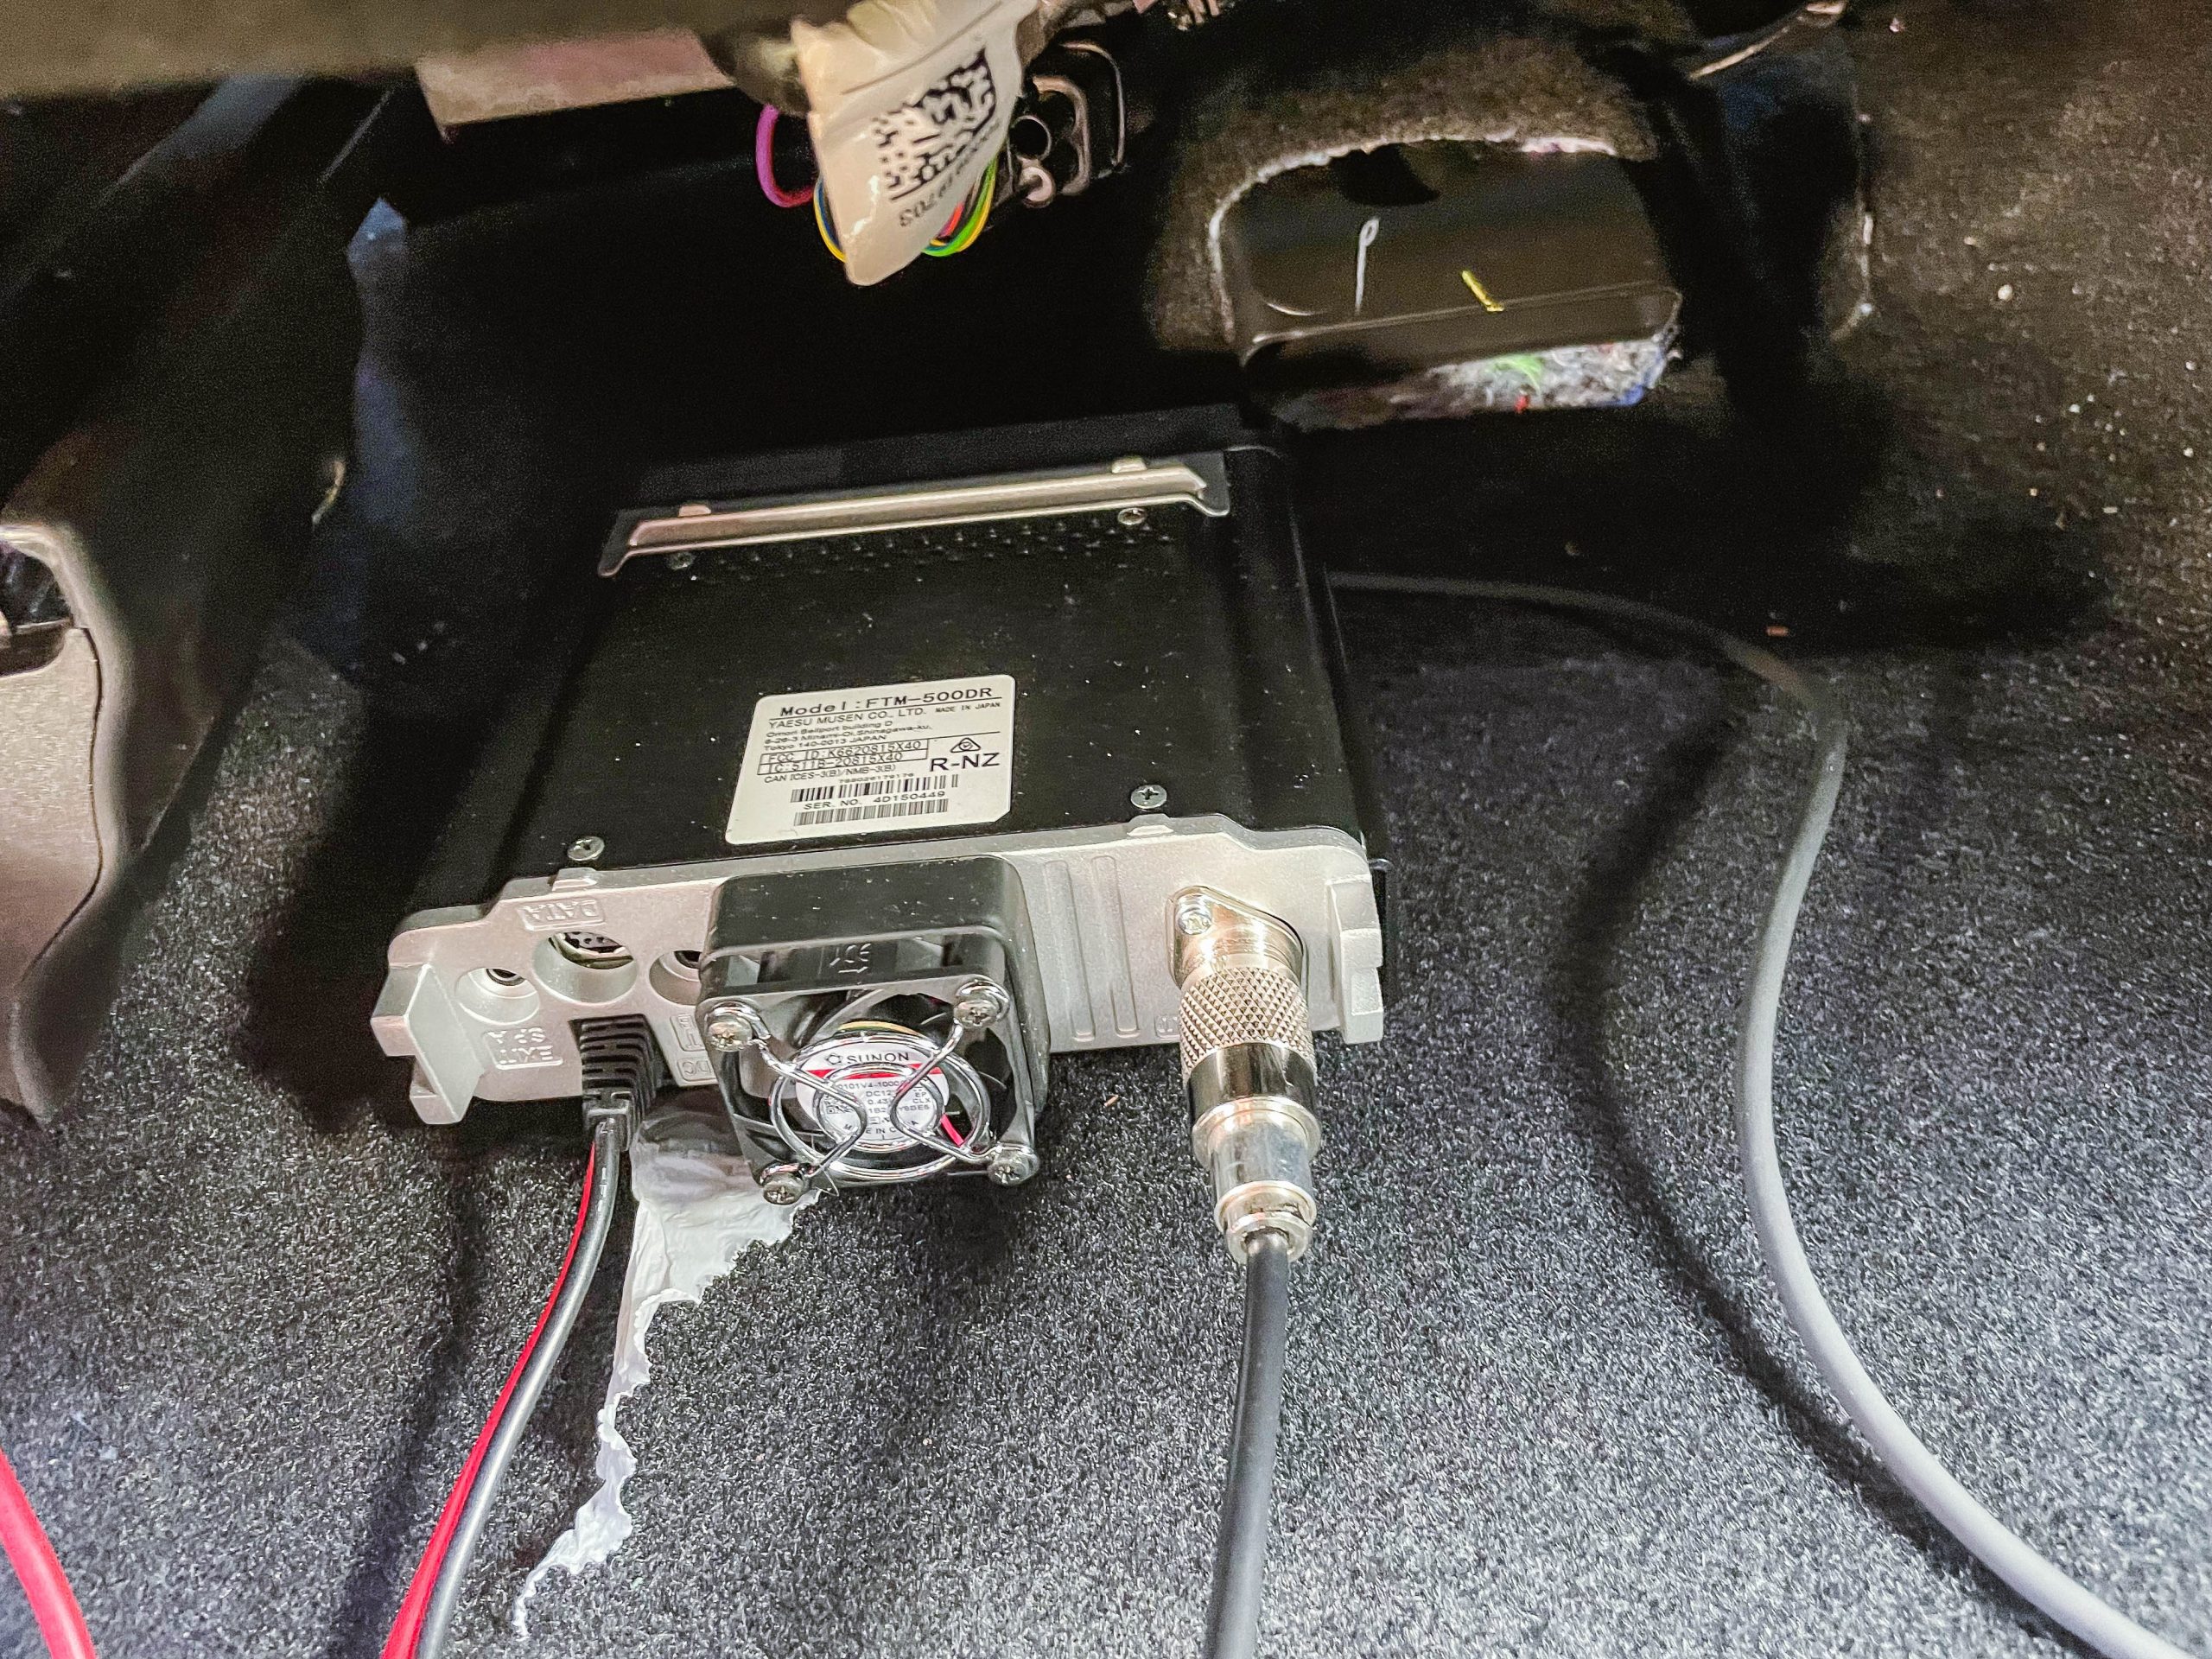
I thought the placement of the radio looked rather nice once the floor mat was put back into place.
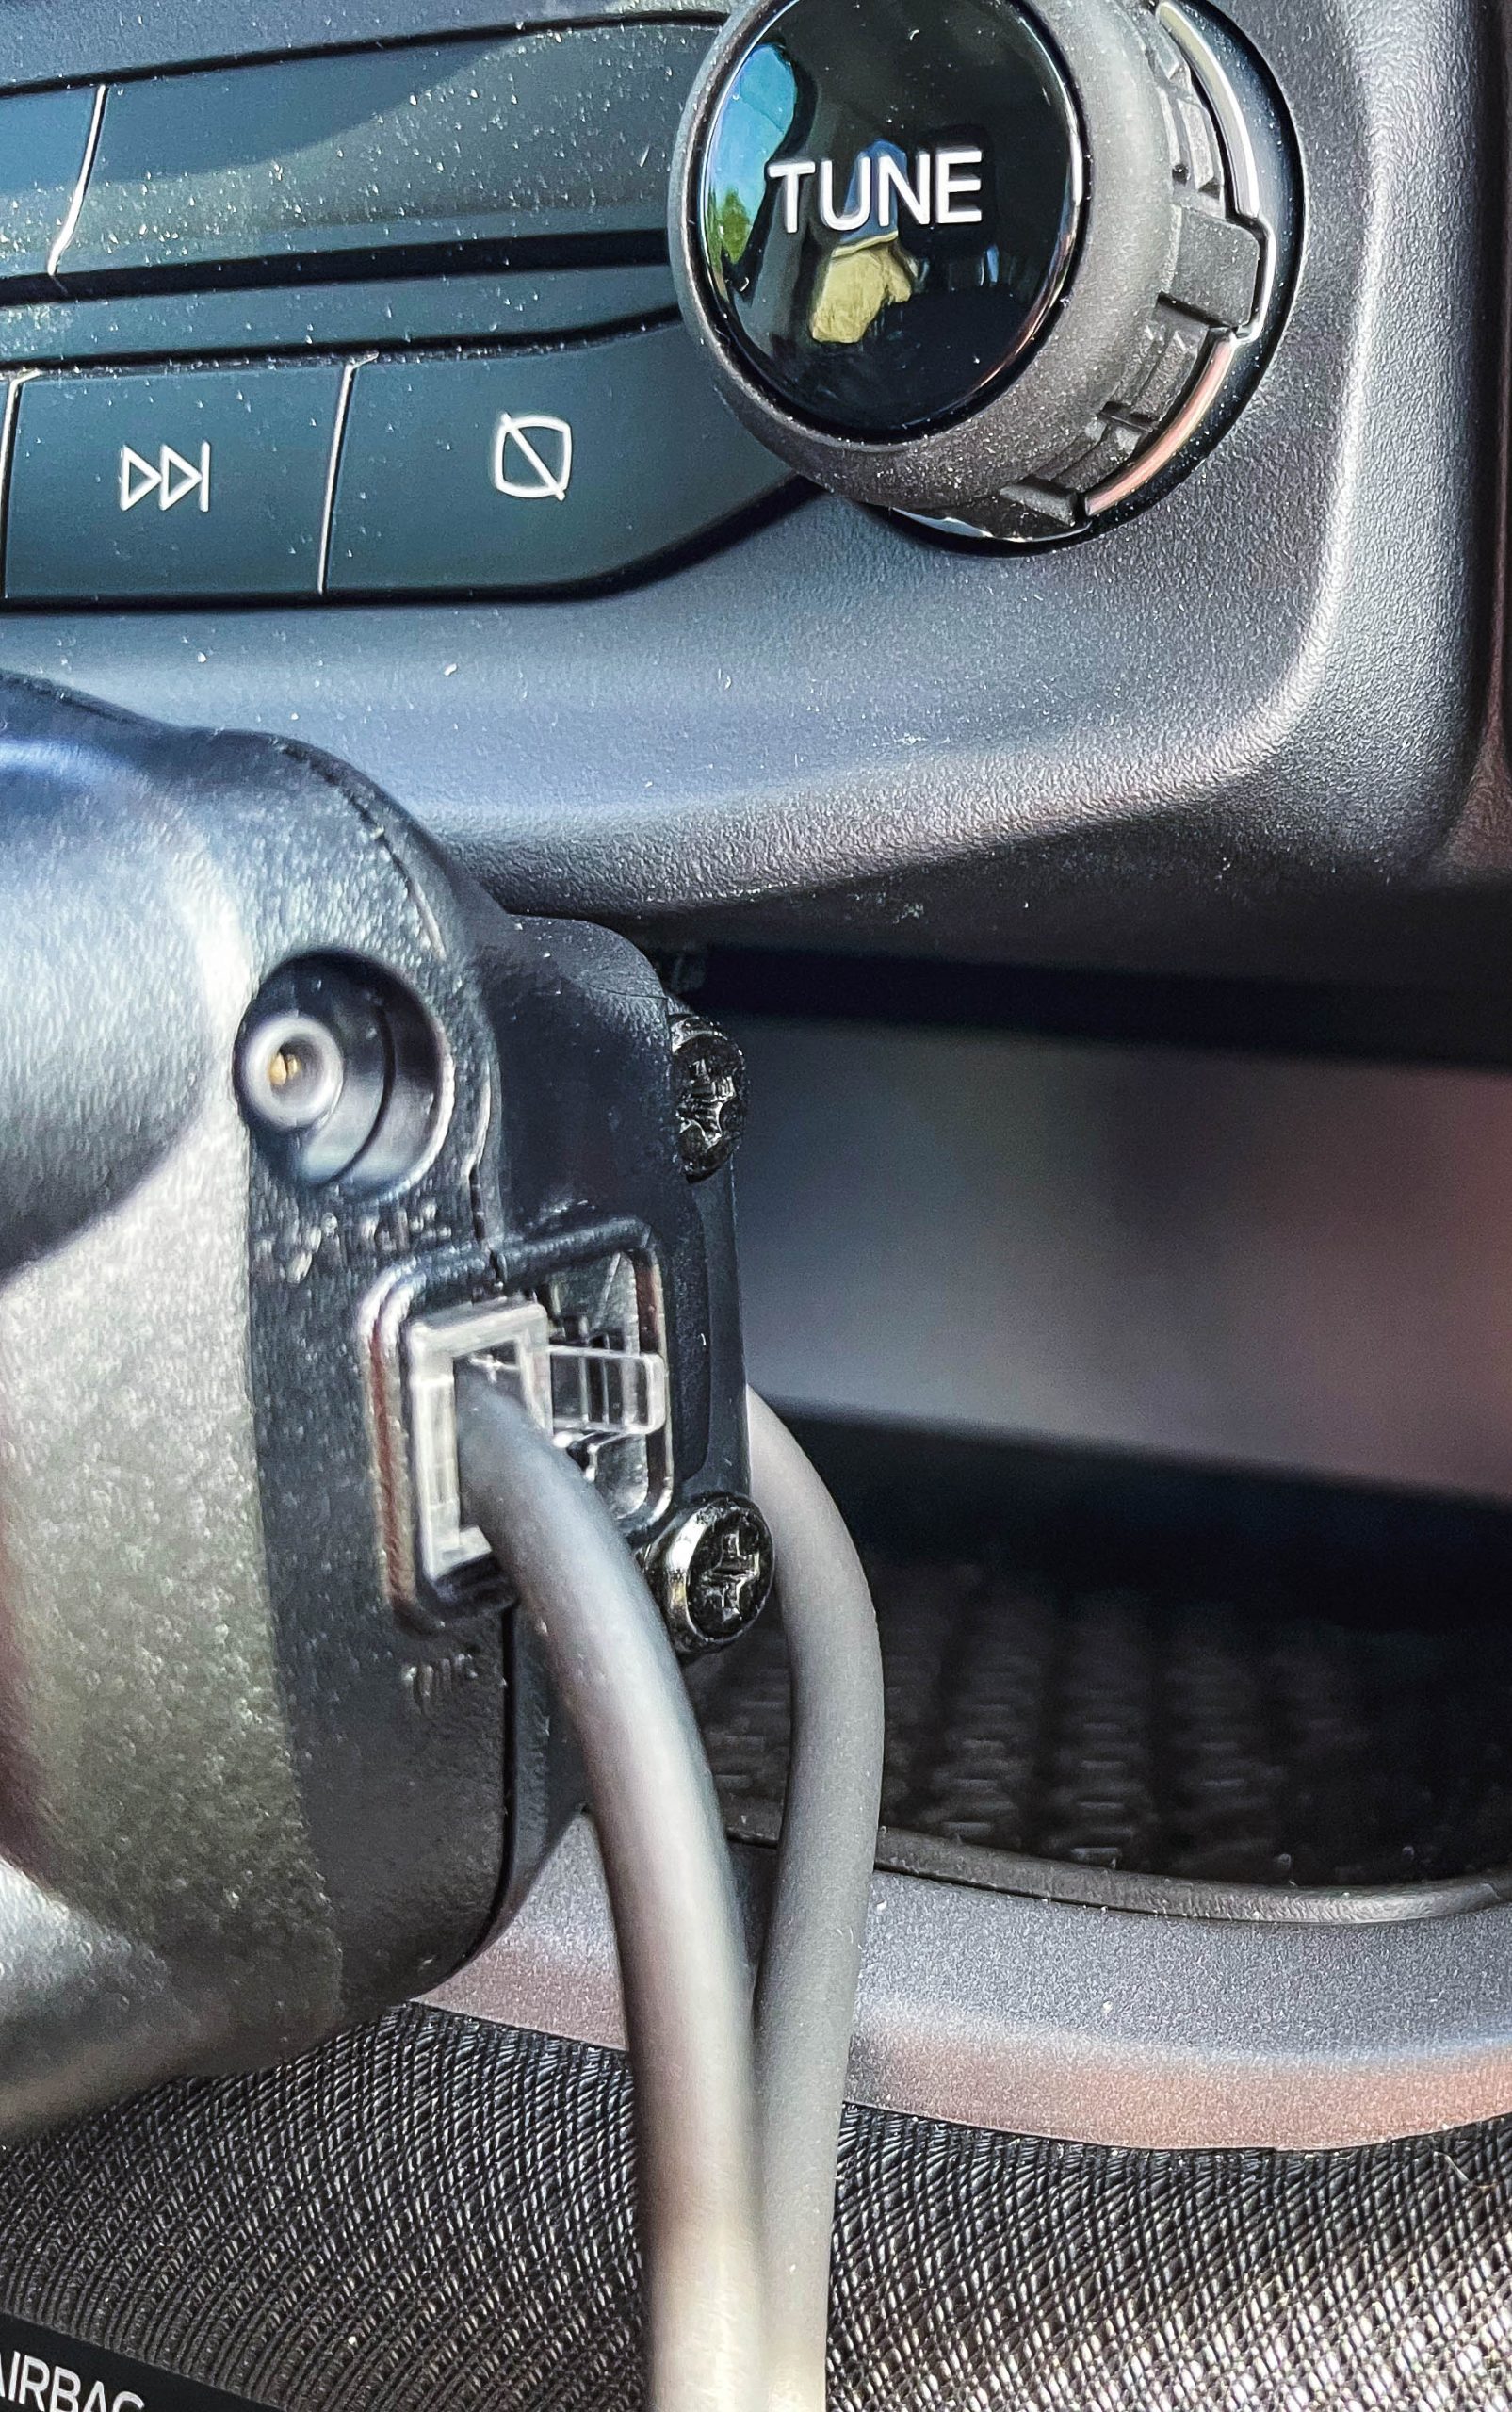
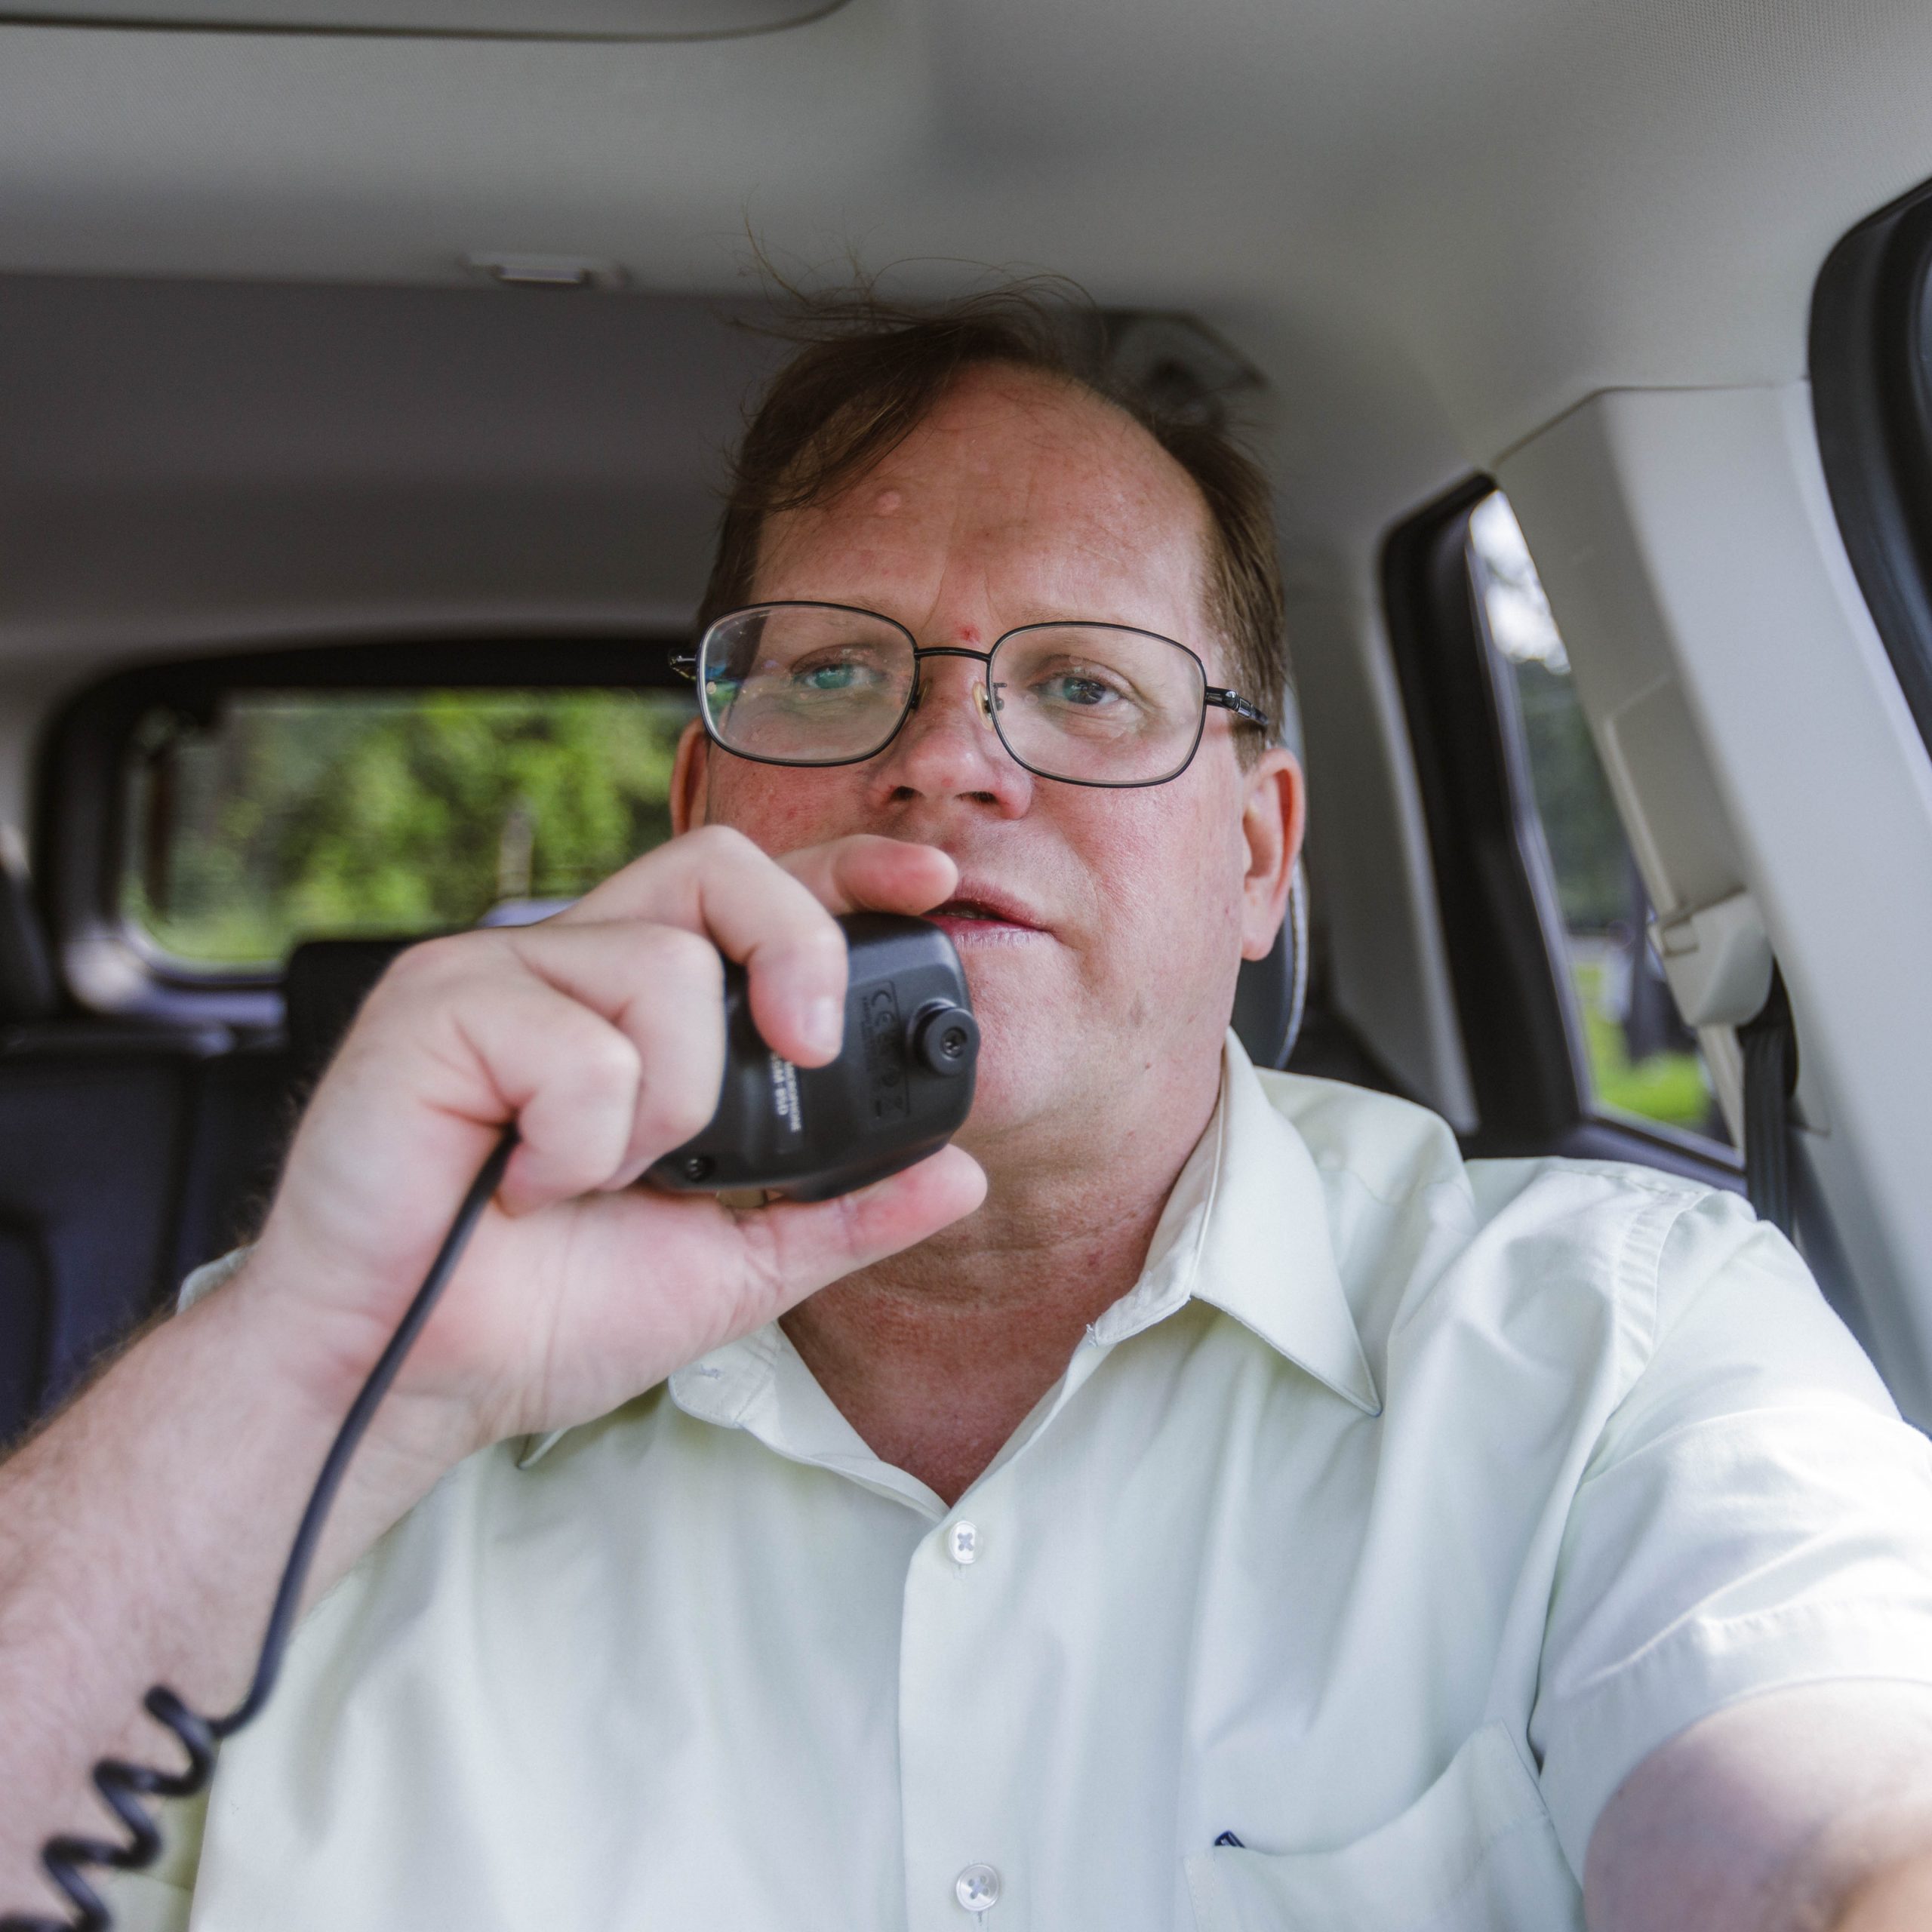
This is the first of two incidents were reading and understand the manual or the specs before undergoing an installation project comes in handy. I originally plugged the microphone into the port on the radio unit and was concerned that the mic cable was too short, and under a bit of tension when being operated in the driver’s seat! I made a mental note to order an extension cable for the Microphone. It was not until I ran and connected the control cable that I realized there was an additional port for the microphone on the control head! Problem 1 solved by Yaesu!
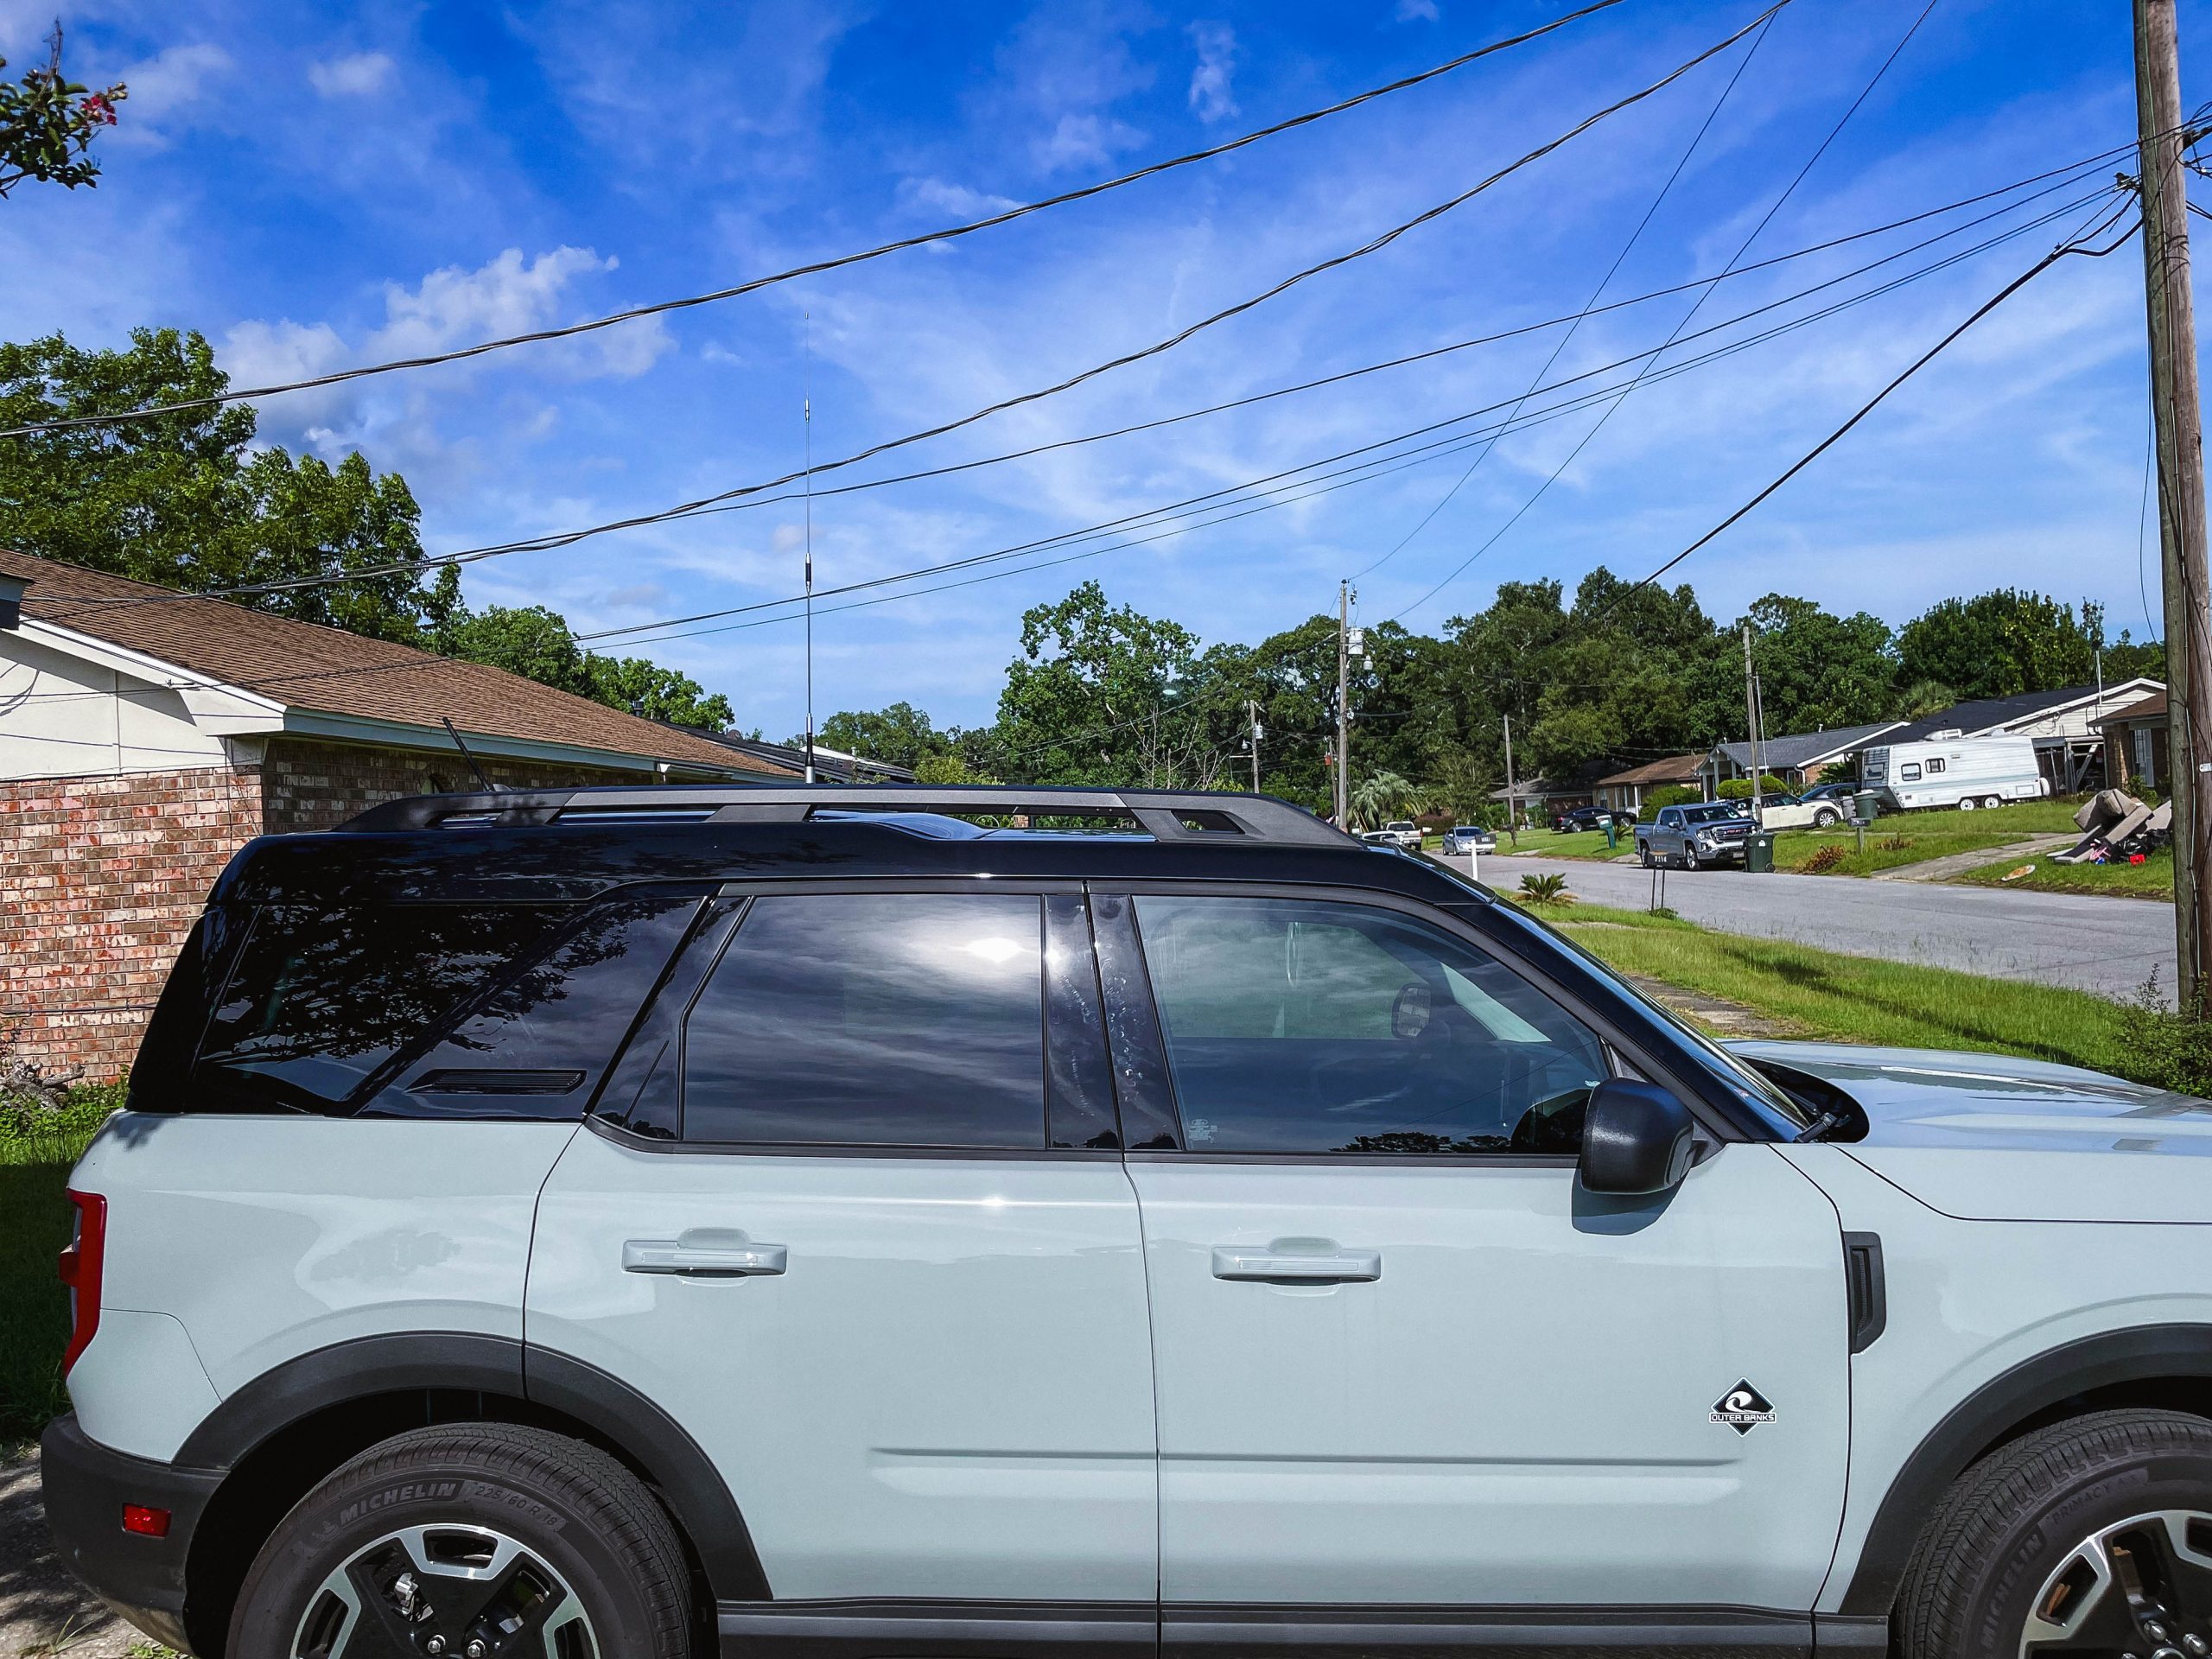
Once that was done, it was time to mount the antenna. I am using the Diamon Super Gainer 7900. My only mistake was ordering the Larson 3.5 inch UHF mount, which does not have as much holding power to the roof of the vehicle as I would like! I will be ordering a 4 inch diameter mount before my first road trip next month!
The 3rd and final logistical challenge was were I was going to mount the external speaker? I had ordered a DX Engineering DXE-281 external speaker, as the audio would probably be too muffled with the radio mounted under my seat. This was most likely going to be the biggest headache, as stated earlier the goal was to drill no holes! I was able to get away with this in my Ford Ranger by repurposing a screw in the back of the cab used to hold the plastic molding in place. I doubted I was going to have such luck in the Bronco Sport! Added to that, was all of the passenger compartment airbags, and I was in for heck of time.
Yaesu came through AGAIN, with a speaker built into the remote control head! So, this suddenly became a non issue!
I am very happy with the radio, it has all of the bells and whistles that I expect for a good Dual Band mobile radio, with the added benefit of a *built in GPS, and TNC (Radio modem) for APRS use. Below is an Automatic Packet Reporting System “APRS” track of me after leaving church.
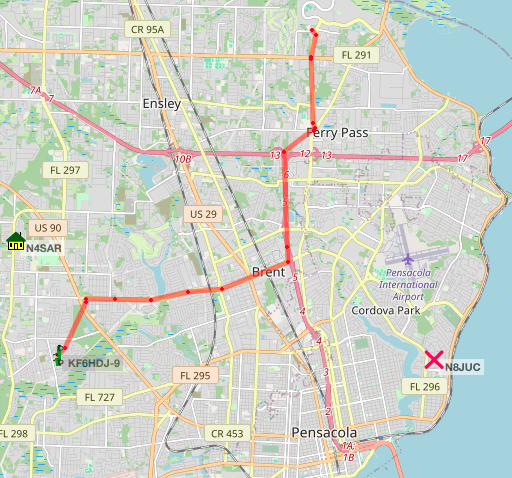
Screenshot
As I use the Yaesu FTM-500D on a couple of upcoming road trips, I will be able to provide a more indepth review. Until then please enjoy more blogs from Brent’s World!
73 de KF6HDJ!
If you wish to discuss this, or other blogs from Brent’s World, head on over to our free forums by clicking HERE!
If you are considering purchasing equipment for a mobile ham radio station, Please consider supporting Brent’s World by ordering through the Amazon Affiliate Program.
Yaesu FTM-500DR 50W C4FM/FM 144/430MHz Dual Band Digital Mobile Transceiver.
https://www.amazon.com/dp/B0CLSGMLPC/ref=nosim?tag=catracing1-20
Diamond NR7900A Dualband Mobile Antenna (UHF Mount
https://www.amazon.com/dp/B01F43HD8Y/ref=nosim?tag=catracing1-20
Other parts needed, not through affiliate program.
Diamond Antenna Magnet Mount (UHF Mount)
https://www.dxengineering.com/parts/dmn-k702m
Yaesu SCU-62 (10 Ft Separation Cable)
https://www.dxengineering.com/parts/ysu-scu-62
If you need a longer separation cable (20Ft) order the CT-132).
https://www.dxengineering.com/parts/ysu-ct-132
I hope you enjoyed the latest technical blog on Brent’s World!
Please visit next weekend for more new content.
If you wish to be notified by email when new content is published, please consider registered by clicking HERE!
Not trying to be a jerk, but a few things to consider.
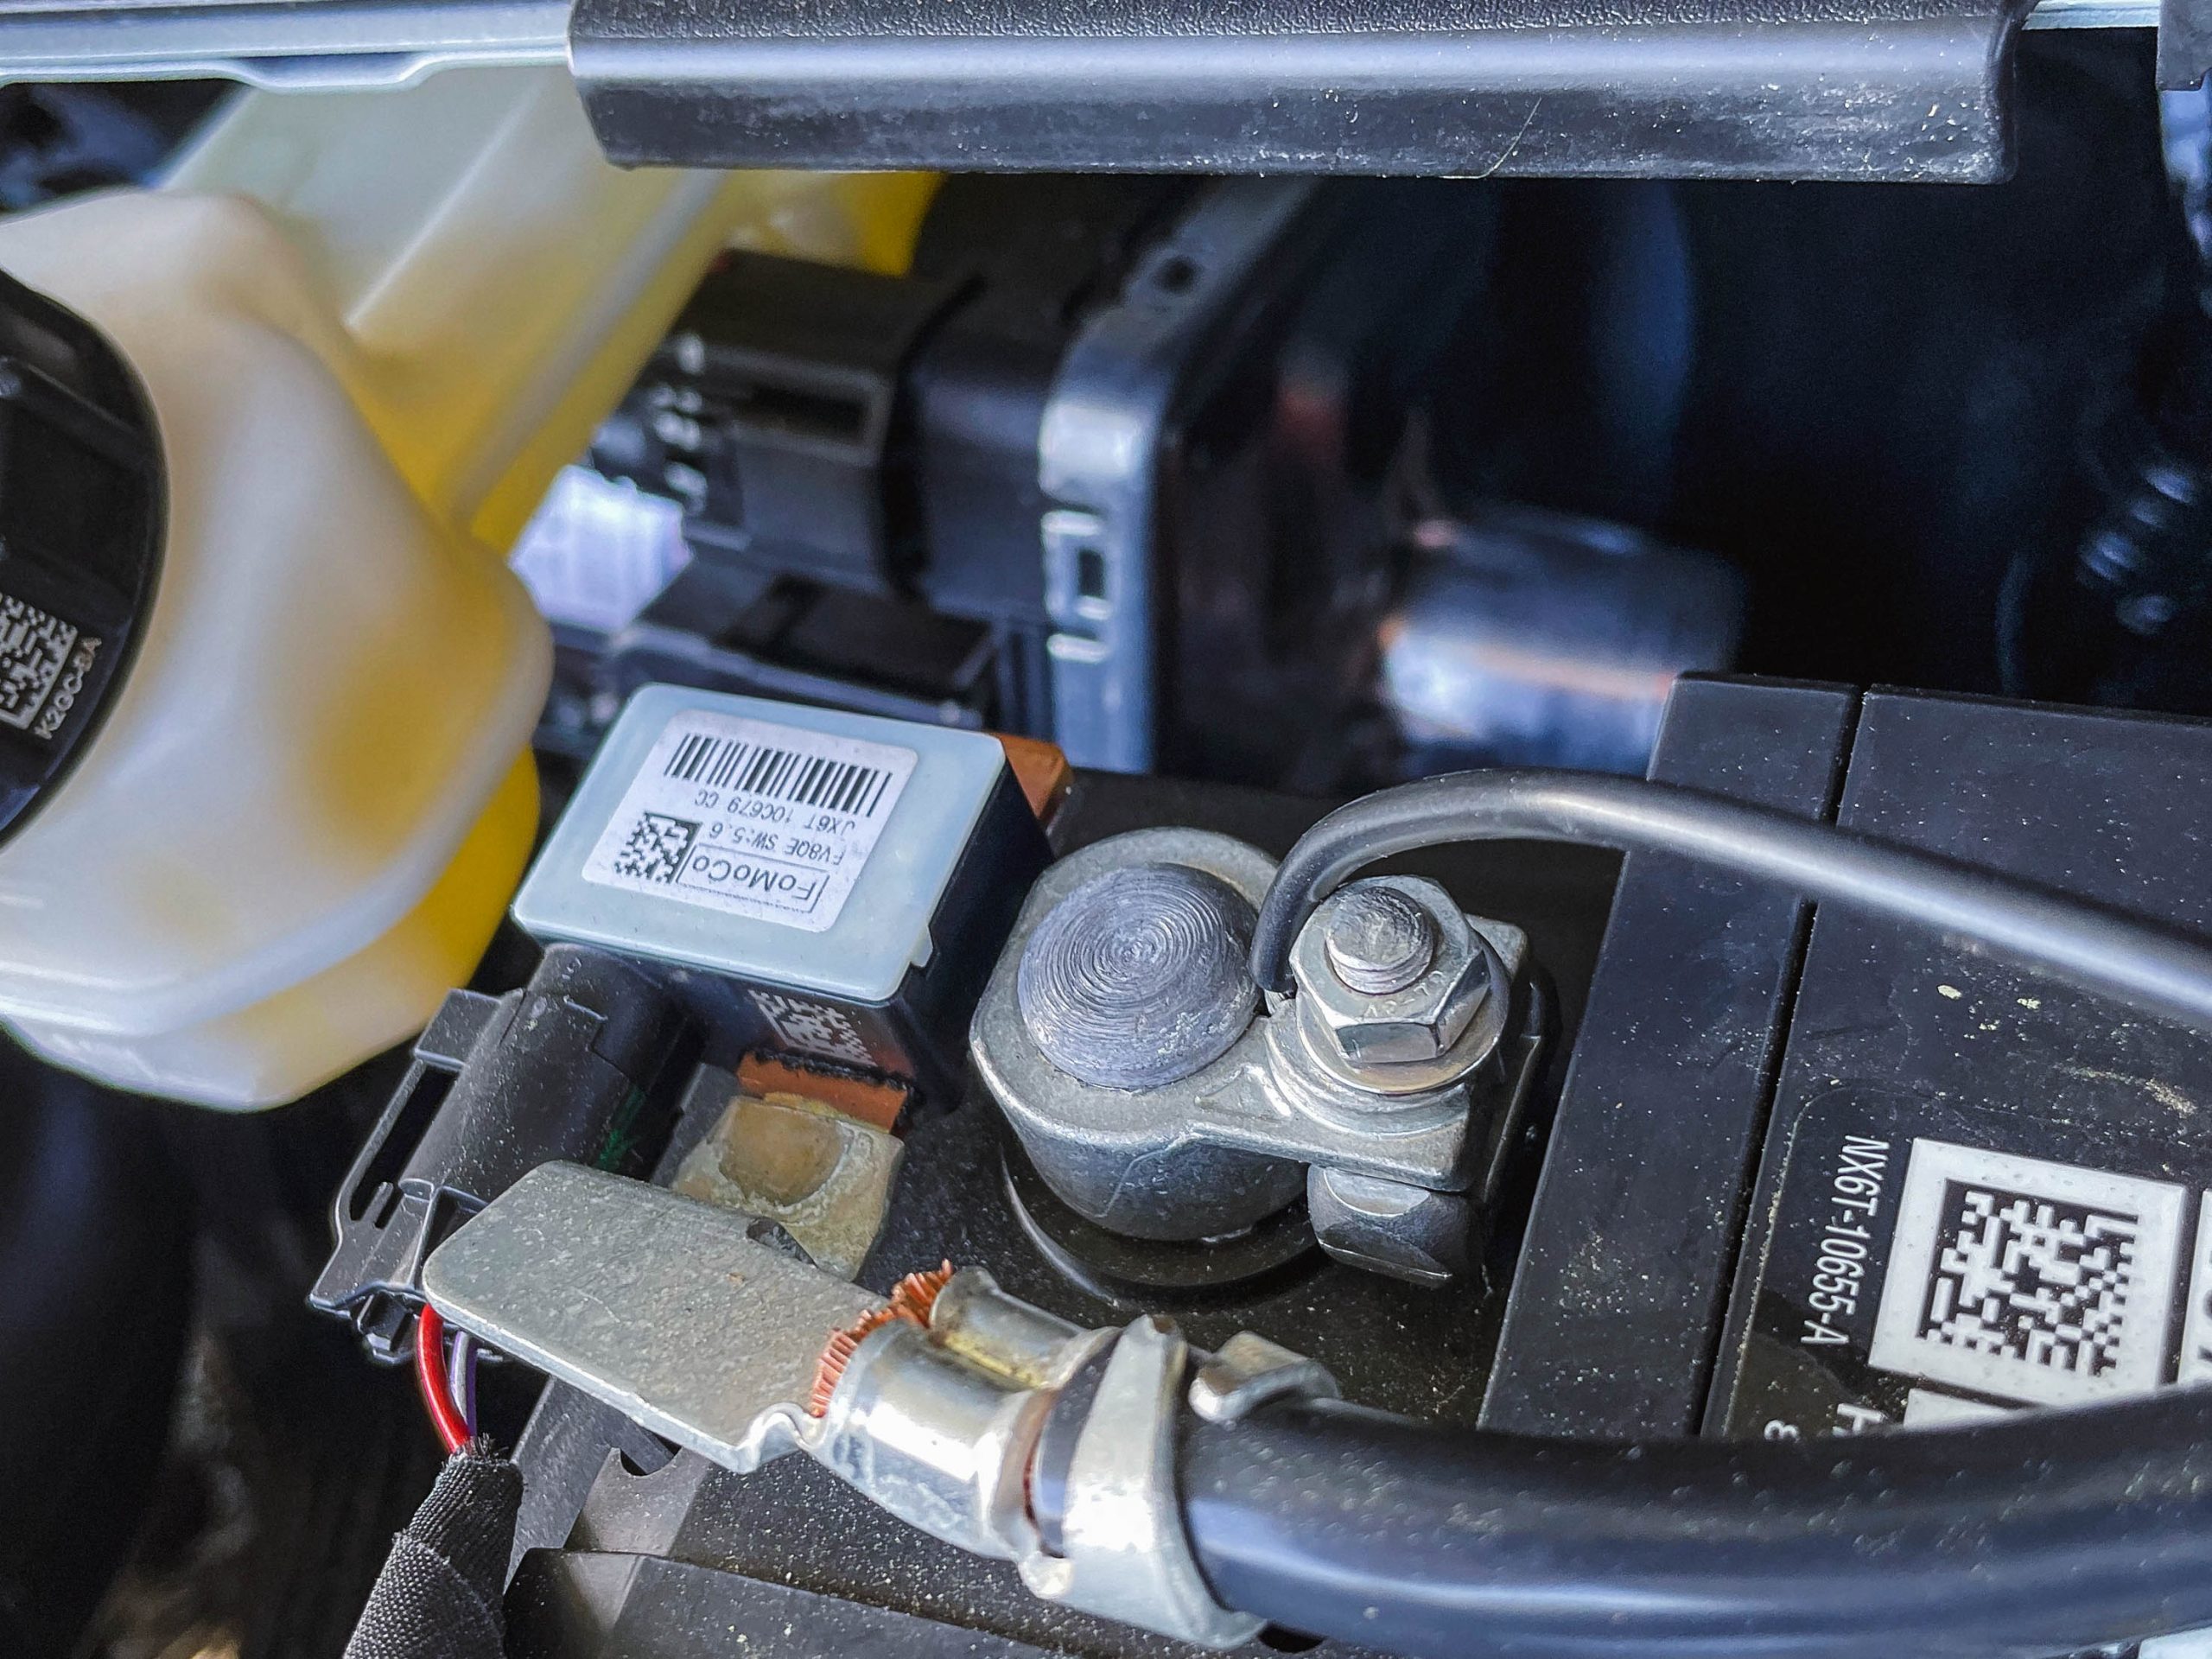
1. Newer cars may or may not have battery monitoring technology on the negative. Putting negative on the battery could by-pass this. Pick up your negative inside the cab on the chassis, which is recommended because you don’t want to be in a situation where should you lose the ground on the battery, you’re likely to have DC flowing to ground through your antenna connections. It will destroy your radio. Ground the radio chassis to the same point as well.
2. Ring terminals on the positive lead to the battery. Fat, wide ones, that give lots of surface area for contact.
I will try rewiring the negative to chasis ground inside the engine compartment. I would like to keep fuses and everything forward of said fuse outside the passenger compartment. I connected the radio to the battery per the radios instruction manual. Now that I know everything is functional I am alter the install, if something performs less that optimum I know I had the original install per manufactures specs. Copy on the ring terminal, Though if I remember correctly the battery terminal nut does not come all the way off the bolt. So I was thinking of getting a large fork style terminal from an RV or Marine hardware store.
On my Ranger, the dealer was nice enough to put my radio terminals into the battery terminal press fittings during a service.
I’m in the process of installing a CB radio in my 2023 BS. I plan to use a magnetic mount roof top antenna. My question is how did you route the coax cable into the car?
I just ran it through one of the passenger doors, there is enough space in the door well to secure it out of the way, then ran it under the carpet. The passenger space is so cramped, I figured I am not going to be transporting self loading cargo that often to worry about it. I will post pictures of that in the forums later today…
As promised… Hope this helps! Thanks for visiting Brent’s World! Feel free to join and participate in the forums.
https://www.catracing.org/hendrb/forum/viewtopic.php?t=27596