
macOS 10.14 Mojave
macOS 10.14 Mojave
Just when you got settled with Apple’s “Fully Baked” macOS X 104.13 ‘High Sierra’, it’s time to upgrade your OS to Apple’s latest version 10.14 Mojave. Like most causal Mac users, you’re asking yourself some basic questions. Such as, “Will the new OS run on my hardware?”, “What features would compel me to upgrade?”, “What is the safest way for me to upgrade?”, and if you have multiple Mac computers in your house or business, “What is the best way for me to upgrade multiple machines.” In this month’s technical blog, I will answer these questions for you. So grab some coffee or tea and let’s get started.
Will Mac OS X 10.14 Mojave run on my Mac?
Direct from Apple the list of Macs that will run OS X 10.14 Mojave
MacBook (Early 2015 or newer)
MacBook Air (Mid 2012 or newer)
MacBook Pro (Mid 2012 or newer)
Mac mini (Late 2012 or newer)
iMac (Late 2012 or newer)
iMac Pro (2017)
Mac Pro (Late 2013, plus mid 2010 and mid 2012 models with recommend Metal-capable GPU)
If your Mac is listed above it will run OS X 10.14 with no issues, If you have an older Mac, and you REALLY want to try installing OS X 10.14 there are instructions on the web, but this is not supported by Apple and not recommended by me.
So, I am happy with OS X 10.13, why should I bother upgrading? What are some of the compelling features of Mac OS X 10.14 Mojave?
APFS (Apple File System) Support for fusion and legacy spinning hard disks
New Dark Mode.Mac OS X 10.14 Mojave now has a dark mode, see the below for comparison.
macOS 10.14 ‘Light Mode’
macOS 10.14 ‘Dark Mode’
Finder stacks, News, and new screen shot utility app.
Facetime Group Chat (Chat with up to 31 people).
Safari favicons.
For stability and security, it is always recommended that you use the latest version of your computer operating system. The only compelling reason to not upgrade would be if you have applications that will not run under macOS 10.14. In that scenario I would recommend virtualizing your computer, upgrading then running the previous version of the OS on a virtual machine.
Before You Upgrade – Be Sure To Backup Your Data
So you have decided to upgrade. What is the safest way to upgrade your Mac? If the upgrade fails will you be able to recover your data? Or if you discover a critical application either does not run under macOS 10.14 you can go back to exactly how your Mac was before the upgrade. The simple answer to this is to make sure you have a current backup of your system volume before you start the upgrade. There are several methods of accomplishing this. We will now take a look at the Apple recommended method using Time Machine.
Apple’s Time Machine is a built in OS composite that backs up your OS, application, and data to external storage, so you can recover your system in the event of hardware failure, OS corruption, or accidental deletion. If you do not currently have a Time Machine solution configured, we will quickly demonstrate how to set one up. For this demonstration I am connecting an external hard drive that is slightly bigger then my demo Mac’s hard drive.
NOTE: These steps will erase all data on the external hard drive, use this only on a new hard drive intended for this purpose, or a hard drive with no important data.
Once we plug in our brand new 120GB Hard Drive (Pre Mac formatted). If you are not presented with a Dialogue box asking if you would like to use the newly mounted drive as a Time Machine volume. Go to System Preferences > Time machine.

Click on the ‘Select Backup Disk Icon.

Click on the newly mounted Time Machine volume, and click Use Disk
NOTE: For this demo I am not electing to encrypt the backups. If you have any type of personal data on your hard drive (Addresses and Phone numbers in your contacts.) I would highly recommend that you encrypt your backups (Especially if they are on external drives.).
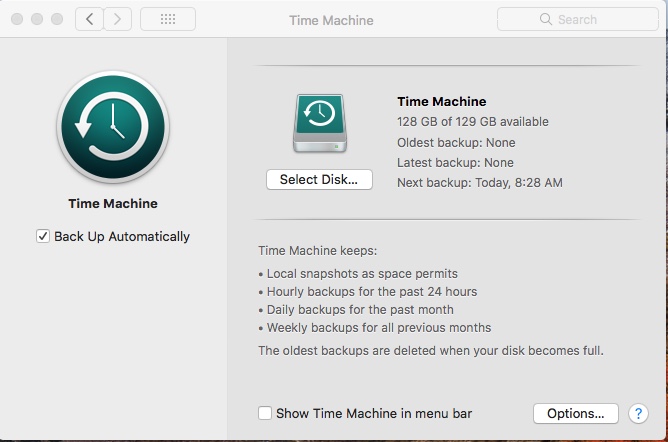
The Time Machine preference pane will now look like this. You will see the ‘Time Machine’ volume listed with additional details of how much space is available, and when the oldest and latest backup occurred, followed by the next backup time.
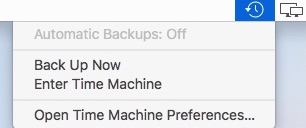
Click the ‘Show Time Machine in the menu bar’, so the box now has a check mark in it.
NOTE: Since this will be a onetime Time Machine backup, I will uncheck ‘Back Up Automatically’
Go to the Time Machine icon in the menu bar, and select ‘Back Up Now’
Depending on how much data you have on your Mac will determine how much time this will take to complete the backup.
Once the Time Machine Backup is complete. Indicated by the backup complete notification shown below.

Dismount the Time Machine volume (Drag it to the trash.), power it off, physically disconnect it from the system and set it aside. We will only need the backup if for some reason the upgrade fails. I would recommend keeping this backup for at least 30 days, to give yourself a chance to thoroughly validate the stability of the upgrade.
You can use third party imaging or backup tools as well, as Apple no longer supports making disk images within disk utility. Time Machine is the only Apple supplied and support solution.
Upgrading to OS X 10.14 Mojave
Now that we have our system and data backed up, we can begin the actual install.
Step 1 – Download Mac OS X 10.14 Mojave from the App Store
Launch the App store application and click on the macOS Mojave banner.
 Click on the download link to the left
 macOS Mojave will begin downloading (hereis another opportunity to take a break. Download times will vary depending on your internet connection.
Once the download is complete, the installer will launch.
If you will be installing on multiple Macs, quit the installer at this time, otherwise continue to the next step.
Go to /Applications
Locate Install macOS Mojave and right click
Select Duplicate
We will use the duplicate installer to create a USB install drive in Step #4 ‘Installing macOS 10.14 Mojave on multiple Macs.’
Double Click Install macOS Mojave to continue install as normal
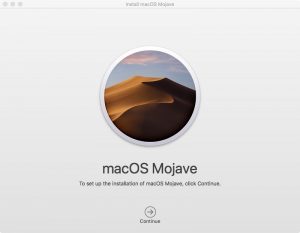
Click ‘Continue’
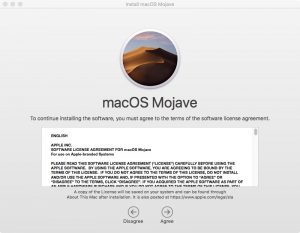
Read the software license agreement, and click ‘Agree’
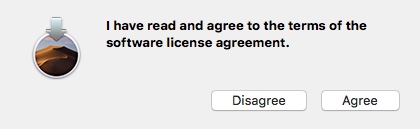
Click Agree again when the dialog box appears.
The installer will now display which hard disk the OS will be installed on.
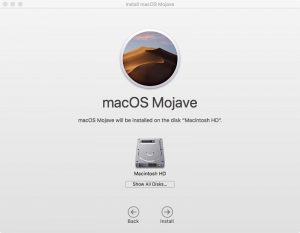
Click ‘Install’
You will now be prompted for a privileged account username and password. Enter the User Name and Password and click the ‘Add Helper’ button.
The installation will now continue, the installer will copy necessary files and prompt you to restart when done.

Once restarted, the main install will occur and can take upwards of 1 hours, your Mac may restart a couple of times eventually presenting you with the normal macOS login screen. Login with an administrator account, answer the questions regarding Analytics, Choose Light or Dark mode, and your install will be complete!
Creating A USB Install Drive
If you are installing on multiple Macs or want to have physical copy of the install media, in case you lose your entire system volume, or upgrade the physical drive in your Mac at some point (I actually find it kind of strange to not be saying hard drive.). Follow the below steps.
You will need a eternal USB flash drive formatted with a GUID or Apple Partition Map with at least 8 GB Free (I recommend using a new 8GB USB thumb drive, or one that you are not intending to keep the data on. Neither I nor Brent’s World are responsible for you losing data by following these instructions.)
Insert the USB flash drive, and launch Disk Utility, this is located in /Applications/Utilities/Disk Utility, from the finder you can use the <Command> – Shift – U keyboard shortcut, and double click on the Disk Utility App.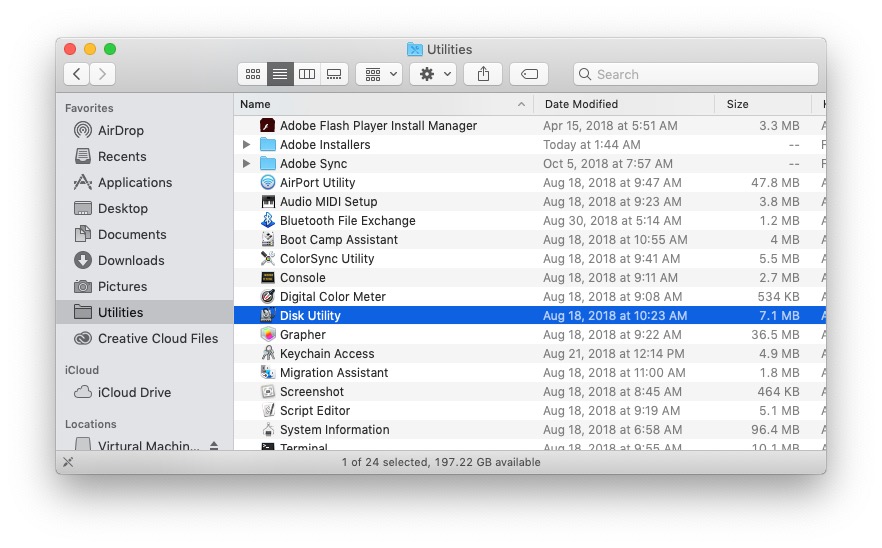
If this is the first time you have used the Disk Utility App, it defaults to showing only volumes, we need to change this to ‘Show All Devices’. You can select this under the View Menu.
Select your USB Device, in this case it is named ‘General USB Flash Disk Media’
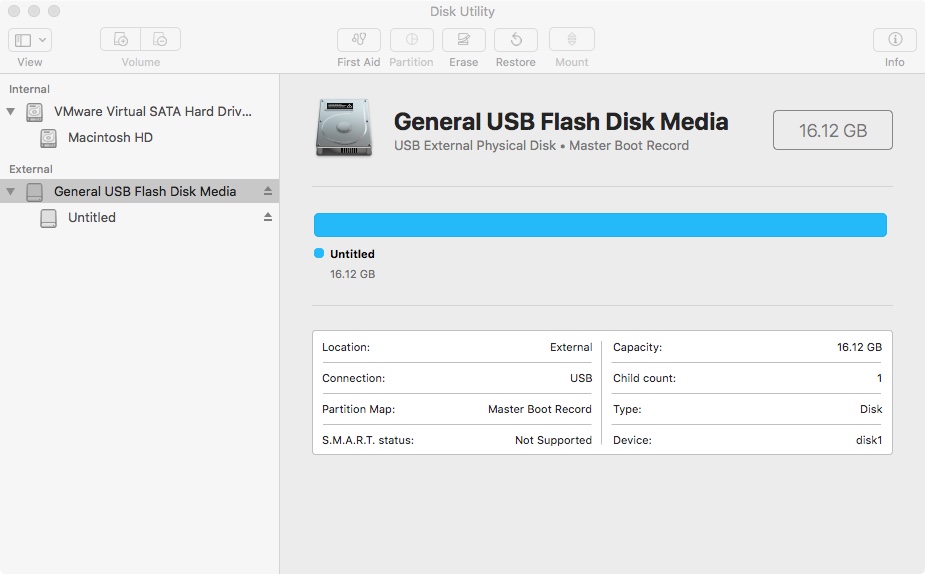
Click ‘Erase’
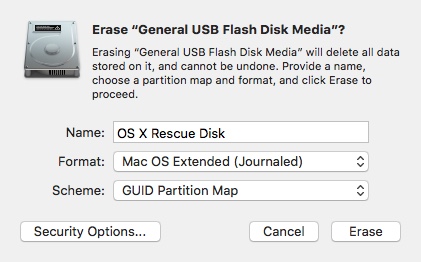
When Erase “<Disk Name>” dialog box appears.
Name the disk whatever you want, I will name it “OS X Rescue Disk”
Click the Format selection arrows and select “Mac OS Extended (Case-sensitive, Journaled)
Click the Scheme: selection arrows and select GUID Partition Map
Click Erase
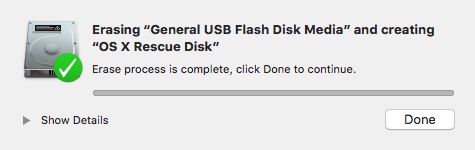
When the formatting is completed, click Done.
Now that we have our USB drive formatted, open the terminal.app under /Applications/Utilities.
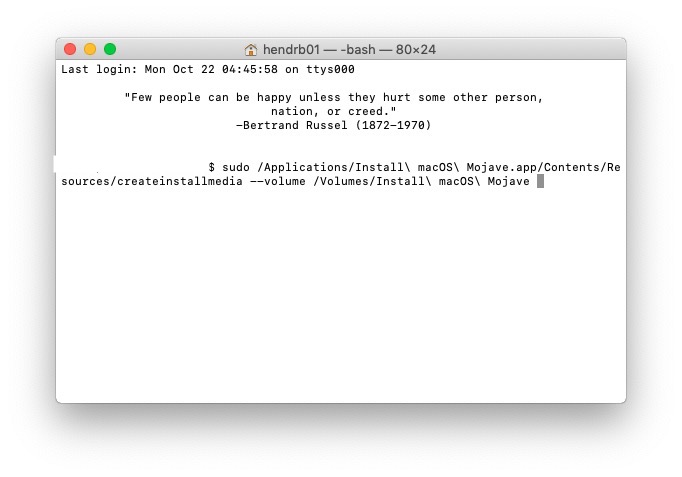
Once the terminal window opens at the command prompt type sudo and then return to your system volume and under /Applications locate the installer application that we duplicated, drag it into the terminal window. Backspace and type /contents/Resources/createinstallmedia --volume <SPACE> (Now go back to your desktop and drag your “OS X Rescue Disk” icon into the terminal window.
You should now see something like the terminal window below.
You will be warned that continuing will erase the volume, check the name matches your external USB drive, and type Y <ENTER>.
The external USB volume will be erased and the installer files copied over. You now have an external bootable 10.14 Mojave install drive that you can use on your additional Macs.
We hope that you have enjoyed this tutorial and that it will give you the peace of mind to upgrade and begin enjoying macOS 10.14 Mojave.
Thank you for visiting Brent’s World, and please stop by regularly for new content. If you wish to receive notification via email when new content is posted, you may register, by clicking HERE.
Comments
macOS 10.14 Mojave — No Comments
HTML tags allowed in your comment: <a href="" title=""> <abbr title=""> <acronym title=""> <b> <blockquote cite=""> <cite> <code> <del datetime=""> <em> <i> <q cite=""> <s> <strike> <strong>