
Installing OS X 10.9 as a WM Ware 10 Virtual Host
Installing OS X 10.9 Mavericks as a VM WARE 10.0 Host
I have been pretty quiet about the fact that I have switched from using a 2008 3.0GHz 8 Core Mac Pro to a Dell Optiplex 9020 running Windows 7 Ultimate. This is only the second time that I have used a Windows computer as my primary workstation.
Why did I make the switch? I have nothing against Apple, I think they make a great product that far outlasts their competition as far as useable performance. I love the OS X operating system, it’s fast, and extremely stable, and did everything that I needed it to do. However Apple has made some changes to their hardware and software line that I could no longer support. The first being the new Mac Pro. The main reason I saved up and spent so much money on the professional level Mac desktop was for the internal expansion that it offers. The new Mac Pro removes itself from being a viable workstation replacement for be because it does not offer internal expandability. I have 4 hard drive filled with photos and video, and I do not want to lose them, nor do I want the rats next that having 4 external hard drive chassis will create. Not to mention you cannot use boot camp on an external drive. The 2nd and final nail in the coffin was the decision to kill of Aperture. Which is the photo management software I have been using for the last 5 years. While I have not yet seen the replacement photo.app, I do not see how it will offer the same speed and flexibility as Aperture. I do not want iPhoto with more features. I figured that if I have to switch to Adobe Lightroom I might as well try something completely different.
As OS X was not one of the reasons that pushed me away from the Apple Camp, I would still like to play around with it, and review the odd software from time to time. I am a big proponent of Virtual Machines, and have several with various version of Linux, Windows 8.1, etc. So I got to thinking wouldn’t it be great if there was a way to run Mac OS X as a virtual host through VMWARE..
So out to Google I go, and what do you know!! I found this blog article that describes a VMware patch that does exactly that! http://www.sysprobs.com/vmware-workstation-8-0-8-0-1-unlocker-to-run-mac-os-x-guest-in-windows-7
I wanted to find out if it works! So off I went to http://www.insanelymac.com/forum/files/file/20-vmware-unlocker-for-os-x/ and downloaded the file (I had to register first.), and downloaded and saved the file to my hard drive. Once downloaded it was simply a matter of opening the .zip file and running the patch in a command window as Administrator. Here is a screen shot showing the selectable OS Types in VMware 10.0 before and after installing the patch.
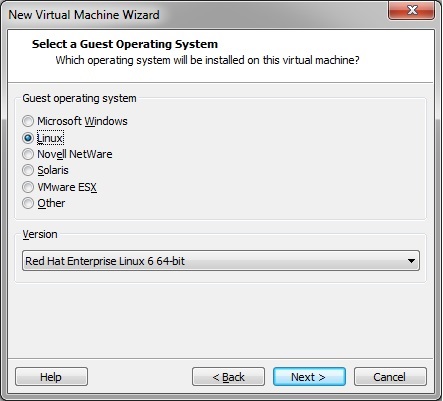
VM Ware Workstation 10.0 Before Patch.
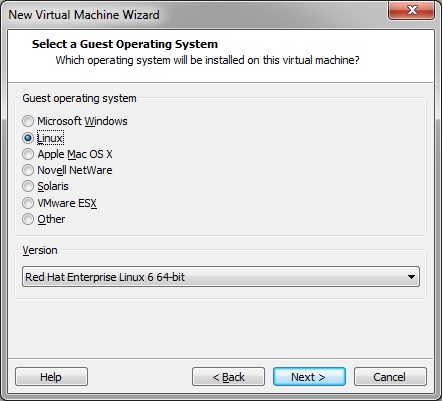
VM Ware Workstation 10.0 After Applying The Patch.
So let’s go through installing OS X as a VM Ware 10.0 guest OS on Windows.
1) Install patch
2) Launch WMware 10.0
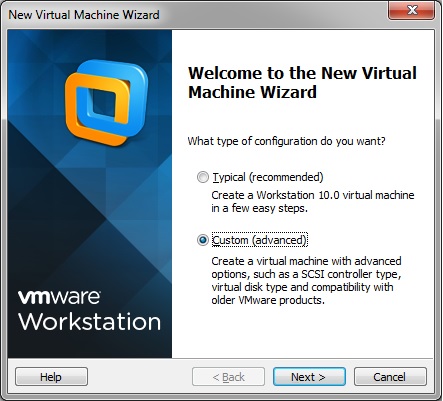
3) Select File > New Virtual Machine (CTRL + N)
4) I always use Custom Mode when creating Virtual Machines
\
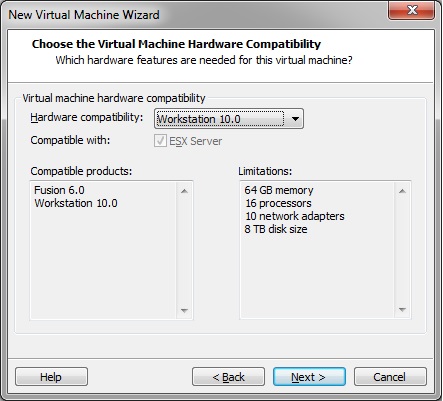
5) Keep the defaults and click Next
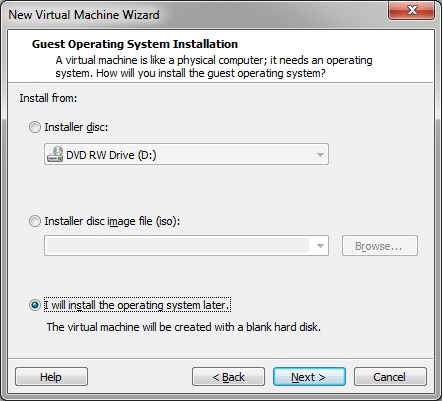
6) Select I will install the operating system later. – Click Next
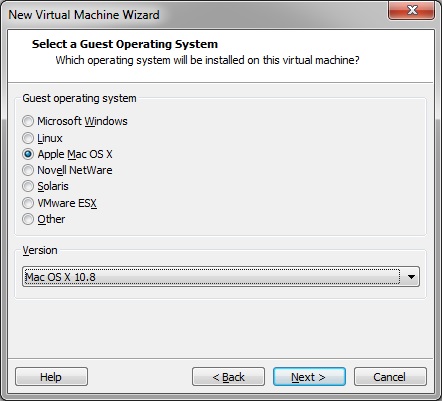
7) Select Apple Mac OS X under Guest operating system, and the version of Mac OS X you are going to install (I only have a 10.8 DVD, so I will choose 10.8 here.) – Click Next
8) Name the Virtual Machine – OS X 10.8 test
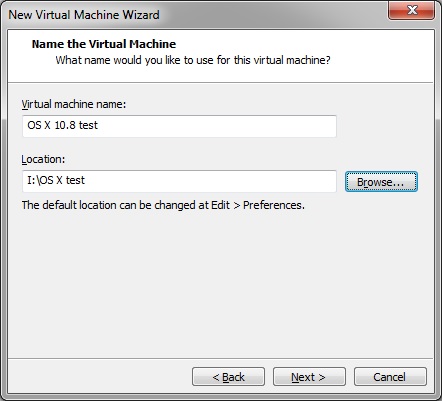
9) Choose the location of the virtual machine.
10) Click Next
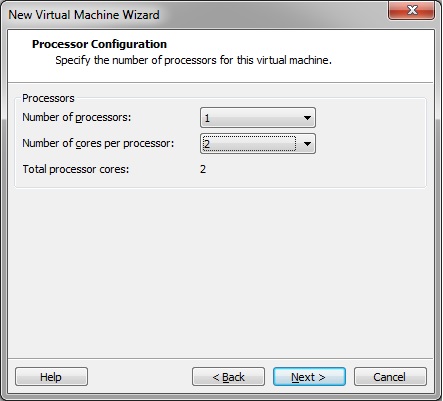
11) Choose the number of Processors and the number of cores (1 processor and 2 cores sounds good)
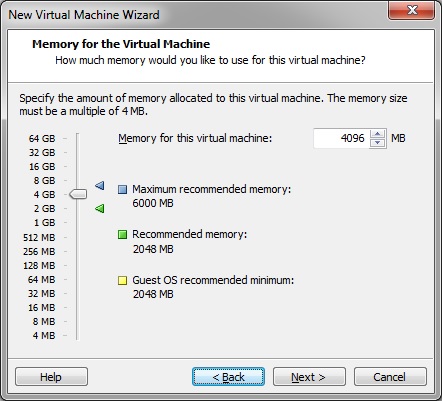
12) Select the amount of RAM, I am going to put 4 GBs here. The more RAM you have in the host computer, the more RAM you can put here.
13) For networking we will use bridged networking. This will allow our virtual box to get it’s own IP address. This is important if you are going to be hosting any services from the Mac Guest OS. You can also just leave this in NAT mode. However I like to have a little bit more control over my virtual hosts.

1
4) Just leave this as default. Click Next
15) Leave this as default. Click Next
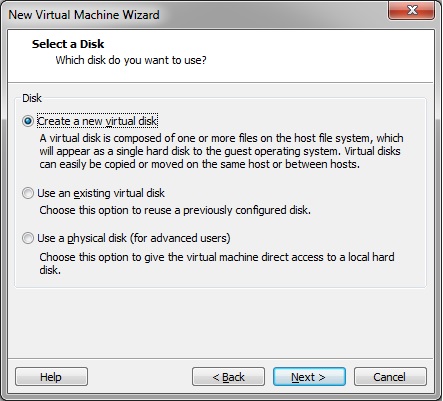
16) Select Create a new virtual disk. Click Next
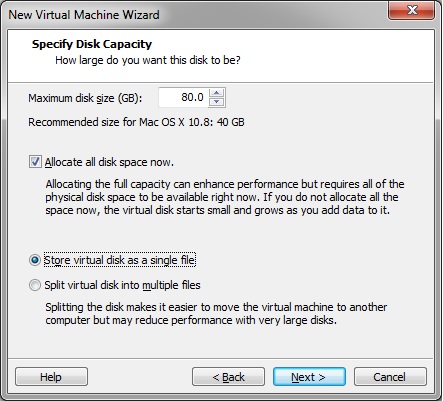
17) Create an 80GB Virtual Disk, Allocate all disk space now, and Store virtual disk in a single file. Click Next
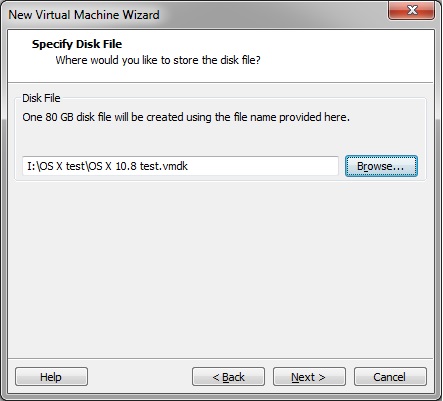
18) Verify the drive path, keep the default name, and click next
19) Verify All settings and click Finnish. You will not have to wait while the 80GB Hard drive file is created. This will take a while, so go get a cup of coffee.
20) That’s it. Now all you have to do, is insert your OS X Install Disk, and Power On Your Virtual Machine!
Configure you Virtual OS X 10.8 workstation as you would a normal Mac, then update to Mac OS X 10.9.
** I had to install OS X 10.8 then upgrade to Mavericks, as I did not have a 10.9 install disk.
There are still a few issues that I need to work out running OS X on VMWare. I have yet to install VMWare tools, so the screen resolution is limited to 1024/780, and I am not able to access my USB Web Cam (that did work natively under OS X).
As soon as I work these out I will be updating the article, as these are basic functionality before you can have a successful Virtual Machine (I think.)
Brent
UPDATE —
I was able to determine that I had not actually installed the VMWARE tools, which is what was preventing full screen from working. I found VMWARE tool for OS X 10.9 at this site. http://softwareupdate.vmware.com/cds/vmw-desktop/fusion/5.0.3/1040386/packages/com.vmware.fusion.tools.darwin.zip.tar
I now have mostly full screen (There are still 3 inch borders on either side of the screen, but better then before.. I will continue tweaking.
I am able to get my Logitech webcam to work in Facetime IF I unplug it and plug it back in once the guest OS is loaded. This of course is not optimal, as I webcam should be available all time time. I will keep experimenting.